I Feel The Need for Speed!

Speed skydivingIf skydiving is a strange game of reverse-dodgeball (throw yourself at the dirt ball and try to just miss), then speed skydiving is the upper end of the game. As the fastest sport on Earth, at no other time will the “ball” be coming at you that fast! For neither the faint of heart nor the inexperienced, it is a game of intense mental preparation, alertness and mind-over-body control that can test the mettle of a skydiver with thousands of jumps.

The goal of the speed skydiving event is to turn in the highest average vertical speed through a designated one-kilometer course from 8858 ft to 5557 ft (1000 m). The current world record for speed skydiving is 511 km/h (317.5 mph) That’s almost three times normal belly-fly speeds!

Prerequisites

While there are currently no formal requirements for speed skydiving, I would recommend the following: C license (minimum), 1000 jumps, thorough knowledge of how the gear works (and fails), the ability to hold heading in a head-down orientation, the ability to easily handle off-landings, and good reflexes.

Before You Start: Gear Check

Before you begin to train for speed skydiving, go through your gear with a fine-toothed comb with an eye to making it ultra-freefly friendly. Make no mistake, a premature opening can kill you at these speeds. And your gear has never been tested in this scenario. The manufacturers will tell you that you are going where angels fear to tread.

Velcro is an active enemy in this environment. Take a close look at your gear and ensure that maintenance is two or three steps above adequate. Closing loops should be tight. All tuck tabs and flaps should hold their intended position easily, with little to no tension. Riser covers in particular should be well-seated. Magnetic riser covers have been used, but they are not currently recommended. The pilot chute pud should be in good shape and rest comfortably close to the container.  Under no circumstances should you “bury” the pud inside the pocket. All retaining bands should be in good shape. Failing to use a leg strap retaining band may not cause a major issue, but it will hurt.

Don’t stop with the rig! Also have a close look at your helmet visor for general condition and security of the visor. If a visor comes off at 300 mph, it is a potentially sharp object about to travel the length of your body at high velocity. Afterwards, you get to experience skydiving blind, which is never recommended.

Also choose clothing that is tight and tough. Flapping clothing can and will tear in the force of a 300-mph relative wind.

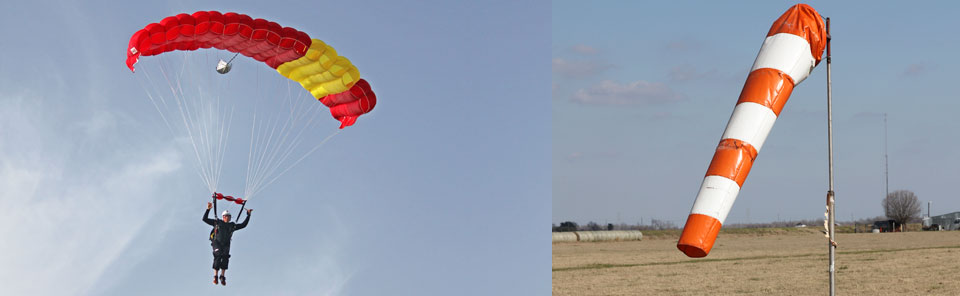
Audible altimeters (notice the plural) are mandatory. The rules require at least one for safety. The other is to give you key vertical location information like that start of the course, or (more importantly) the bottom of the course. I prefer to set mine just a bit above the bottom of the course and let reaction time handle the difference. I also intentionally set my altitudes 500 feet higher than normal.  You should also consider the higher wind noise in the helmet at these speeds, and get that helmet tight!

In order to prove the speed of your training and competition skydives, you have to be able to accurately measure your velocity. The current international standard requires the use of two L&B ProTracks attached in line with the laterals of your rig. Some competitors are using Lycra pockets sewn to the sidewalls of their main container. A single ProTrack (or similar device) mounted in/on the helmet is not as accurate.

When measuring your speed, there are two things you must keep in mind. First, this event is NOT based on PEAK speed. If your wrist-mounted altimeter says you did a max speed of 284 mph, you are probably running slow. The event is based on average speed in the course, as measured on two devices. Secondly, know that a difference in measurements between the two devices can have a HUGE impact on your actual score (see rules about Out-of-Bounds). You also have to make sure that your devices are set to measure properly. On L&B products (I am not sure about others), you should be set to read TAS (True Airspeed), rather than SAS (Skydiver Airspeed). The latter adjusts for pressure and is totally invalid for this event, but it is the far more common setting.

Airspace Concerns

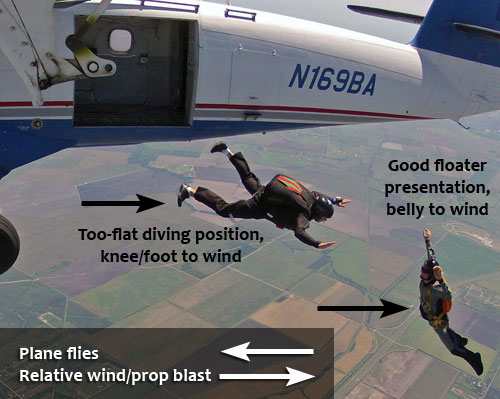
When you manifest for a load, consider what else is on board. Complicated airspace is a bad idea. The fact is that your mass plus your velocity on a speed skydive make you a true meat missile to other skydivers if you end up in their airspace. Don’t hesitate to scratch from the load if there are lots of different types of skydives going on! Complex jump runs make it very hard to have confidence that people will be where you expect them, and this is critical. At the speeds you want to attain, you can’t see and avoid other jumpers in time. You just have to plan to stay clear and stick to that plan.

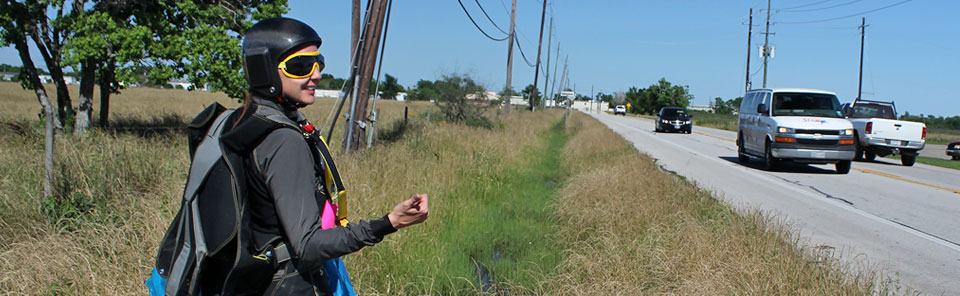
I prefer to be out first, and just a bit short. This means that I will sometimes land off the DZ. But that is better than risking a collision. Conventional practices for loading put fast fallers out later because of reduced drift, but a speed skydiver is going so fast that you can quickly pass other skydivers/groups vertically, then slide under them if you’re not falling straight down or during your deceleration flare. Seek advice from the local S&TA and load organizers, and coordinate every speed skydive with them.

Anatomy of a speed skydive

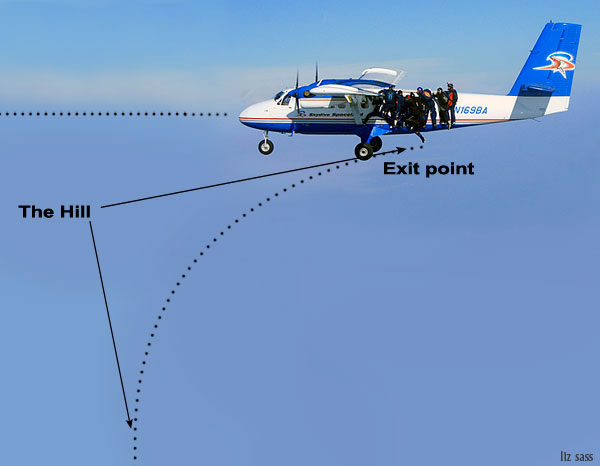
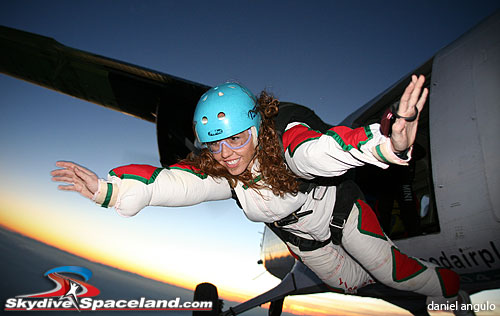
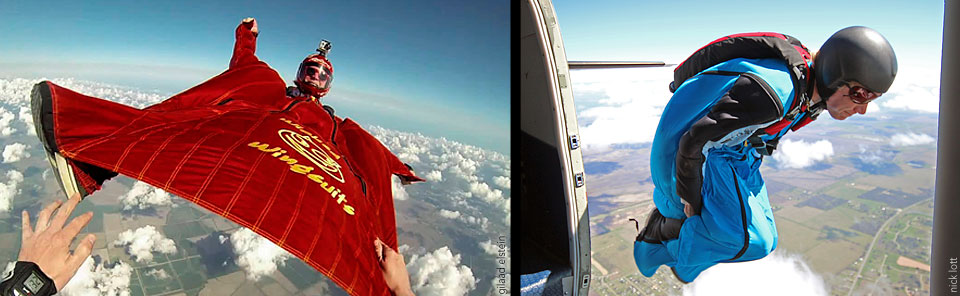
A normal speed run starts with a head-down exit at 13,000 feet (12,500ft is fine for practice); head-down is the fastest orientation possible. The key to a good run is acceleration, acceleration, acceleration.  And this is just the first section of the skydive! On exit, focus on building speed. Getting “off the hill” takes on new meaning, as “the hill” is going to get longer because maximum velocity is much higher than usual.

The key ingredient to the bulk of the skydive is to stay relaxed. Be Zen. If you are tense, you will feel oscillation develop like a student potato-chipping. As you tense up to control the oscillations, they will get worse. If you thought your AFF-I’s were insistent about relaxing, you ain’t seen nuthin’ yet. Think of this oscillation as potato-chipping in a vertical axis. Here is the catch: Your body has to stay relaxed, while your mind is at peak awareness. You have to learn how the air feels at these speeds. If you feel something out of the ordinary (like a main flap opening and slapping against the container) you have to react right now! As you learn how the air feels, you may react to nothing a time or three, but you will figure it out.

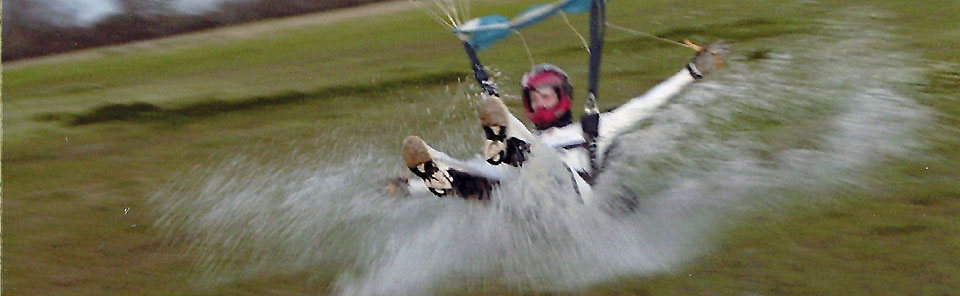
The other reason to stay sharp is that when you come to the bottom of the course, you have less than 10 seconds to slow down to less than 150 mph for deployment. From experience, I can tell you that you will feel each and every mile per hour you are over 135-140 as a slap in the crotch and the neck.  Opening at 160 mph is on my “do not do that again” list. While you are doing this, you will need to check your heading and set up for the end of the skydive to take you away from the line of flight.

At the bottom end, your focus goes from “go faster” to “slow the hell down!” First, check your heading and face across the line of flight. As you slow down, you won’t continue to fall straight down. You’ll take that high vertical speed you’ve generated and shift into a fast-fall track to begin bleeding off speed, and this will create very fast horizontal movement. Horizontal speed of 70-100 mph is not impossible after a fast speed run, and this can absolutely put you into other groups’ airspace if you move up or down jump run. I do not recommend immediately flattening to your belly and getting big as a winning strategy. From 250+ mph, that just hurts. Shoulder and finger dislocations are possible. Shift first to a fast-fall tracking position with your shoulders rolled back, then bring your head and shoulders up into a head-high tracking position. Then bring your arms and hands out slowly until you are falling slow enough to fully extend them. Then pour your entire being into maximum deceleration! If you don’t work hard enough at this, you may rest assured that the opening will provide you with instant feedback about your lack of technique. Once the main is open, take the time to actually inspect it, as openings at too-fast speeds can break your parachute.

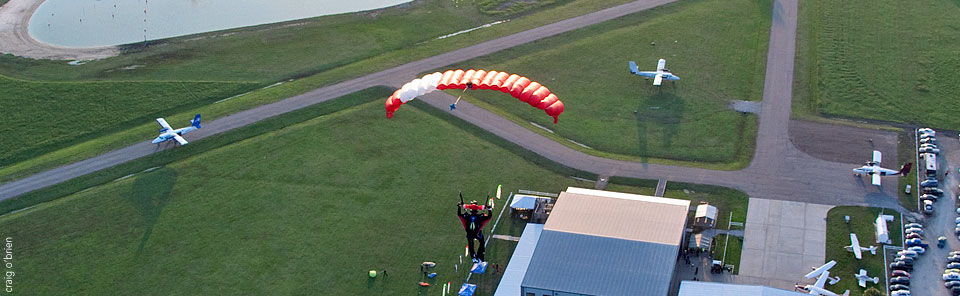
Now that you are under canopy, check your location over the ground. It is very possible that you are not in a normal opening location. Decide if you can make it back to the DZ quickly. But do NOT fly directly up the line of flight. EVER! If you exited first, you are possibly under the jump run. If you exited last, you almost guaranteed to be under the jump run. As you check airspace, LOOK UP!!! Having freefall jumpers come past you is most definitely in the category of “undesirable.”

Performance Logging

If you want to get better, you are going to have to log. Not the usual stuff, either. Get both ProTracks out and compare the data. Determine if you have gone “out of bounds” (see the rules). Take the time to think over your body position very carefully and in minute detail. Focus on eliminating anything that can cause excess aerodynamic drag. If you had oscillations, it is time for long talk with yourself. You will find yourself spending real time poring over your acceleration curve and trying to figure out how to improve it.

More Info

You can find other good information at www.speed-skydiving.com.

Have fun!

As you pour time, energy, and money into this, remember the idea is to have fun! The main competition in this event is actually with yourself–mastering your body and mind. Triumph will bring you in to the ranks of humans who have gone faster without a vehicle than most will ever go in a vehicle!

Skydiver Training Tip: Finding Your Match

When you get ready to skydive for the first time, you put the ultimate trust in your instructor. You trust that person to gear you up, give you the freefalling time of your life, and deliver you softly back to the real world on the ground. The relationship between first-time student and instructor is an intense one, albeit often short-lived for those who choose to make only one jump.

When you decide to skydive again and start training for your skydiving license, you again put your trust in an instructor to train you to save your life, but now without being next to you at all times. All of our Skydiver Training Program instructors are more than qualified to give you the knowledge you need to skydive safely; many have several thousand skydives and many years of practice skydiving and training students just like you.
With that said, however, not every instructor clicks perfectly with every student. Just like in any other kind of school, some instructors’ communication/training styles will suit some personalities better than others. The good news is that we have several instructors on staff here at Spaceland! So if you feel that your current instructor isn’t quite the perfect match for you, you can request a different instructor who may work better with your personality and needs. It’s very important to your skydiving education and your safety for you to be comfortable working with your instructor, and to be comfortable asking questions for clarification.
Some skydiving students enjoy working with different instructors who all have different perspectives, while others like to stick with the same instructor throughout the program. We will always work with you to provide an instructor who will best fit your training needs, because we want you to succeed in your skydiving goals just as much as you do!
We understand that it can be a little intimidating to ask for a change of instructor; feel free to reach out to our chief instructor in person at the drop zone, via email, or chat with our office staff in person or on the phone (903-364-5103). We will all be happy to help you find your perfect instructor match and watch you soar through the program!

Canopy Traffic: Find Your Place in the Sky

Traffic is a bad word, especially for those of us living in the Houston area! And while we think we can get away from it when we’re flying, the reality is that at any dropzone, and particularly at a busy one like Spaceland, the traffic can resemble downtown Houston rush at its worst. The difference is that if we don’t like what’s ahead of us, we can’t just stop and let things sort themselves out. Parachutes can’t stop until they land, so we skydivers have to manage our position in traffic from deployment through landing to avoid collisions.

When we’re driving down the highway in a pack of cars going 85 mph, we are very, very close to each other, but it works because we’re all going the same direction and at the same speed. Parachute traffic doesn’t have such rigid guidelines for paths and minimum/maximum speed; add the third dimension of altitude and it’s no wonder the canopy pattern can look like a total mess!

SUMMARY

Problems:

  • Closing Speeds
  • Converging Paths
  • Faster Canopies Behind
  • Slower Canopies in Front

Solutions:

  1. Take responsibility for getting in the best place in the pattern order on every skydive, and staying there.
  2. Maintain hyper-awareness of where everyone is under canopy throughout your descent.
  3. Put safe landings for you AND everyone else in the air at the very top of your priority list on every skydive.

There are two major reasons why cars and canopies collide: Closing speeds and converging paths. First let’s look at closing speeds: Just like on the highway, a Ferrari going 40 mph faster than everyone else has a higher risk of catastrophically running into slower vehicles; what would be a bump at similar speeds becomes a crash. With high closing speeds, there is very little time to react if the traffic in front of you doesn’t behave as expected. Flip that on its head and look at it from the other perspective; a slower car in front of a pack of speed demons can cause impressive chaos, especially if it behaves erratically.

This leads us to the next aspect of collisions: Converging paths. We don’t have problems on the road when everyone’s going the same way and staying in their lanes, even if some cars are going much faster. The problems occur when people going the same or different speeds turn towards each other, change lanes, or otherwise get in each other’s way. The problem can be significantly more complex with canopy traffic that can be going in any direction at any time (although hopefully we’re all on a similar page in the landing pattern under 1000 feet!). There is a lot more to watch in the sky than there is even on Houston’s highways, because other people could be coming from anywhere–even from below if you’re descending faster or turning.

The other aspect of converging paths is that essentially, we are all converging on every skydive. We’re spreading ourselves out as we leave the plane, but then flying back towards a landing area that’s nowhere near as big as our jump run.

With more and more canopies filling the skies above dropzones, we need to reduce our chances of canopy collisions by being aware of our ideal place in the canopy pattern and flying to maintain that place. For canopies approaching the same landing area, your place in the pattern is where the jumpers above/behind you are flying at the same speed or slower, and jumpers below you are flying at your speed or faster. Some might call it an “order of go,” and this reduces our chances of a closing speed issue. It’s a loose order given that we are not all aiming for the same pinpoint on the ground such that we are forced to take turns (we do have quite a few acres to land in!), but it is a good guideline to minimize converging canopy paths and closing speeds.

There can be a couple of challenges in getting to that place:

1) Exit order, which is selected to maximize horizontal separation between groups at pull time, may result in faster canopies being placed behind you. For example, freeflyers will exit behind belly flyers, and some of those freeflyers may have more highly loaded, faster wings than the belly flyers (and vice versa!). Also, Skydiver Training Program instructors/tandem videographers who often jump highly loaded canopies will be behind both of these groups.

2) Canopy flight choices are very individual; any one of us can go from being a slow right-lane flyer to a passing demon with a simple turn. We are all flying high-performance canopies that turn and dive easily; one of our instructor likes to say we are all driving Ferraris, but some are in second gear and some are in sixth gear!

As with any problem, there are multiple solutions. Every single skydiver (whether you’re on a fast or slow canopy) should use these strategies on EVERY skydive! If you’re wondering if this is about you… it is. 🙂

Solution 1: Take responsibility for getting in the best place in the pattern order on every skydive, and staying there.

That place will vary depending on what you’re doing and who’s getting out in front of and behind you, and what canopies they are flying. Your job is to get into the place in the order where faster canopies are below/in front of you, and slower ones are above/behind you.

  • Know the canopies that will be in the air around you. This is yet another reason to get to the loading area a good five minutes before your load! Remember that we pick our exit order to maximize horizontal separation between groups at deployment; once that order is set, ask about canopy sizes/wingloadings of the jumpers in the groups before and after you so you can plan the canopy part of your skydive as well as the freefall part. We spend more time under canopy than in freefall, but we tend to plan the canopy part of our jumps much less than the freefall part. For our safety, this needs to change.
    • Slower canopies or lighter wingloadings behind you aren’t likely to be big traffic problems, but a much faster canopy is likely to pass you at some point. If you have a pocket rocket behind you, find out what color it is so you can prepare to look for that canopy in the sky. If it’s near you, let it go by, flying predictably straight and possibly in some brakes to make the pass easier. Don’t forget that kicking your feet lets the other jumper know you see them, which is great to know when you’re passing or being passed! (Kick your legs once or twice while watching the traffic all around you–don’t fixate on the other jumper and forget about everyone else.) It’s better to get that pass out of the way up high than to dive and play so the pocket rocket is forced to pass you at a much lower altitude, leaving you less altitude to recover in the event of a collision. Remember that we are converging on a single property to land, so passing each other closer to the ground generally means all of the canopies from that load are also closer together laterally, with less margin for error.Spiraling and playing with your canopy inputs should be reserved for times when no other canopies are nearby.
    • Jumpers in front of you with slower canopies or lighter wingloadings may pose a traffic problem as well; find out what color their canopies are so you can be aware of those you will most likely pass. Talk to those jumpers and make sure you are both aware of your canopies and colors so you can get yourselves into the right place in the pattern relative to each other. Don’t just swoop past someone close by without warning; people do unpredictable things when they get scared.
  • Once you’re settled into the appropriate spot in the pattern, especially under 1000 feet, stay there! Don’t dive and play and crowd the person in front of you, or float in deep brakes so that you crowd the person behind. Don’t be that guy/girl. :p This requires you to follow the next solution as well.

Solution 2: Maintain hyper-awareness of where everyone is under canopy throughout your descent.

This can’t be over-emphasized! Keep checking the airspace around you every few seconds, because the traffic pattern will fluctuate with people’s wingloadings and canopy flight choices all the way to the ground. The last thing you want is to lose track of someone close to you! Also, we have blind spots behind and below us due to our rigs, so keep checking! As you approach the ground, don’t fixate on the ground or on traffic near you. Maintain awareness of both by using your peripheral vision and scanning fore, middle, and far ground ahead of you, and left and right of your line of flight. Big head movements aren’t necessarily required; but we want to avoid target and traffic fixation, and tunnel vision, to see any traffic problems developing while there’s still time and altitude to fix them.Remember, it takes two to collide but only one to avoid. Also, remember that once your feet touch down, it isn’t over! Look up and around for other traffic landing after you, and collapse your canopy quickly to keep it out of the way of others.

Solution 3: Put safe landings for you AND everyone else in the air at the very top of your priority list on every skydive.

Are you working on accuracy, but someone’s too close? Land somewhere else and work on accuracy on another jump. Or do a hop and pop to work on that with fewer or no other people in the air with you. Or perhaps you’re swooping, and traffic reduces the space you have to do the big turn where and when you want. Remember Rule #1, “Land safe, not close?” Everyone’s safety is more important than your swoop.

On multiple occasions, skydivers considered to be some of the top canopy pilots in the world have collided with others, sometimes with fatal results. No one is perfect all the time, and if we fly very close to others, our margin for error is very small. Let’s increase that margin by knowing when conditions are good for our landing goals and when to bail to plan B. (You do have one, right?!)

I’ve heard it said a few times that parachute landing is a team sport whether you train with your teammates or not. This is so true; we are all in this together, and we need to watch out for our teammates on every jump.

Blue skies and fly smart!

Skydiving? Take Your Phone!

These days, most of us are almost never without our mobile phones. Some even seem to have separation anxiety if they misplace their phones for even a few minutes! 🙂 This week’s tip is good news for the phone-bonded among us, because it’s a recommendation to take your phone with you whenever you skydive.

Why, you might ask? Do I really need to get that last selfie on the plane before exit? That’s just a bonus; the main goal is to give you a way to communicate with manifest if you happen to land off the drop zone. Whether it’s a long spot or a malfunction that led to you landing away from home, we want to know you’re OK! We also want to get an idea of where you are so we can send the cavalry to pick you up quickly. Chances are that we’ll have spotted you, but it is possible that we missed your off landing.

Also, if you do happen to turn an ankle and need help getting home, we definitely want to know that as soon as possible so we can come prepared to help you.

If you’re doing tracking, angle, or wingsuit dives, you know you can cover a lot of ground and out landings are more likely. Phones are required on every jumper for these jumps in particular (see our horizontal flight guidelines for more information).

Before jumping with your phone, please program the following numbers into it:

  1. Manifest: 903-364-5103
  2. Your jump’s organizer
  3. In case of emergency number (ICE)

If you land out and you’re fine, let manifest and your jump organizer know! If you land out and you have a mild injury such as a sprained ankle, let both of us know that too. Lastly, if you’re badly injured, call 911 first and then us.

And if you REALLY want us to pick you up quickly, find your location on your phone’s map application, screenshot that, and text it to your group’s organizer and manifest. 🙂

Keep that phone in a nice, secure zippered pocket (preferably an inside one) until after you land. Traffic management and canopy safety is our #1 priority until we land safely; save the selfies for pre-jump and/or post-landing “OMG, look where I landed!” times.

I know I sure wish I’d had my phone on some of my previous off landings, and the drop zone probably wished the same at the time!

Altitude Awareness: Do You Have It? 

Checking altitude during a skydiveWhat’s the first thing your skydiving instructor has you do after you leave the plane? Check your altitude. Before and after maneuvers, check your altitude. If you don’t have altitude awareness, PULL! Awareness of your altitude is of paramount importance to our survival in skydiving, and we all know it.

And yet we sometimes forget about altitude awareness as we progress as skydivers. We start working on more advanced skills and jumping with other people, and we take our survival skills for granted as we shift our focus to these new, fun things to do. Generally speaking, there aren’t a whole lot of different things that injure and kill skydivers–but loss of altitude awareness is a common factor in many incidents, both in freefall and under canopy.

Altitude awareness is something we must actively pursue throughout every skydive, or we can get surprised. Most of us develop an “internal clock” after doing a lot of jumps from the same altitude, so we have a pretty good idea of when it’s time to break off from the group and when to pull even without looking at an altimeter or hearing an audible altimeter beep. However, this is imprecise and absolutely not something we should rely on! Even if your internal clock for your usual kind of jumping were perfect, several things can make your internal clock wrong by a little or a lot:

  • Exiting from a lower or higher altitude than usual (i.e., hop and pops or lower-altitude helicopter jumps when you usually do full-altitude jumps)
  • Doing a faster-falling type of skydive than usual (for example, sit-flying when you usually belly-fly)
  • Planning to break off and/or pull higher than usual

Altitude Awareness Tools

Since relying on your internal clock can lead you astray, it’s important to develop good altitude awareness habits that will keep you aware on every skydive, no matter what you’re doing. First, let’s look at the altitude awareness tools we have at our disposal.

  • Visual altimeters
  • Audible altimeters
  • Internal clock
  • Your eyes

The first step in altitude awareness is to be aware if your altimeter is working properly. Check your visual altimeter before boarding to make sure it’s turned on (if electronic) and zeroed out, and look at it a few times on the way up to make sure it’s working properly (counting up at about the right rate). If you aren’t sure it’s correct, check it against other altimeters in the plane. If your altimeter readings differ significantly from others’, try to figure out why. Did the calibration knob (if there is one) get bumped? Or are the batteries dying, or is the unit malfunctioning? If you suspect your altimeter is misbehaving, it may be better to ride the plane down or pay extra attention to other methods of estimating your altitude.

Once you know your altimeter is working, it’s a good exercise to check it periodically on the ride up and glance out the window to see what the ground looks like from that altitude to train your eyes. This is also a good time to practice looking around the landscape and identifying where you are relative to the drop zone. Your eyes will generally not be as accurate as a working altimeter, but they can give you a general idea of altitude to compare against your altimeter readings and to back you up in case your altimeter fails. Also, this keeps you aware of your altitude in case of an aircraft problem–since your options and actions will vary with your altitude if a problem occurs.

Comparing eyes to altitude is a fun exercise to do on commercial airline flights as well, as long as you have an in-flight display available to give you accurate altitudes (pressurized cabins cause our altimeters to read incorrectly.

Once you’re on jump run, check your altitude again so you know how high you are exiting. This will also tell you if you are exiting at a different enough altitude from usual to know if your internal clock will be off.

After exiting, continue to check your altitude periodically throughout the skydive. Now is when a different kind of internal clock can help you out–the clock that counts how long it’s been since you’ve checked your altitude. Checking altitude every 10 seconds or so is a good target, and take extra opportunities to check your altitude when they arise. For example, if you’re in a formation waiting on someone to get there, and you’re not doing anything, check your altitude.

After break-off, check your altitude quickly as you wave off and pull; this will tell you if you’re pulling higher or lower than usual. If you’re much higher than planned when you start to pull, hold off until you’re close to the altitude the other jumpers expected you to pull when you planned the dive. This will keep you from opening high underneath or close to someone who’s aiming for the preplanned pull altitude. Plan the dive, dive the plan.

Knowing your pull altitude will also affect how you handle a malfunction. For example, if you are pulling slightly higher than planned, you have a few more seconds to deal with a malfunction. But if you’re lower for some reason, that tells you that you don’t have as much time as usual to sort out any mess over your head before your hard deck.

Once you’re under a good canopy, check your altitude so you know where you saddled out (useful if you have a late malfunction such as a brake line that doesn’t release). If you do have a malfunction and you decide to try to fix it, keep checking your altitude; many malfunctions can burn through altitude faster than you’d expect even if you are flying a lightly loaded parachute. Know your hard deck for a cutaway, and know when you’ve reached it.

As you fly your canopy to the landing area, continue to check your altimeter periodically (while maintaining traffic awareness) so you get to your holding area and fly the landing pattern as planned. Be ready to adjust your pattern if you end up higher or lower than intended at your pattern turn points, and work on developing your eye for altitude while in the pattern. This is especially important to track when you have recently changed canopies or are working on higher-speed landings.

Audible altimeters are fabulous for reminding us about important altitudes such as break-off, pull time, decision altitudes, and pattern altitudes (for some models). However, you can’t check them periodically to see how high you are. They are great back-up devices and should be used as such; don’t rely on them as your only altitude reference.

Altitude is an ever-shrinking commodity as we skydive, and it runs out at various speeds depending on what we’re doing in freefall and how we fly our canopies. Keep track of altitude using all the tools at your disposal until you’re on the ground, and you’ll go a long way towards staying out of the incident reports.

Skydive Spaceland Brings World-Class Skydiving with Texas Hospitality to Atlanta on May 1

Rosharon, Texas (March 31, 2015)–Building on the strong success of two world-class skydiving centers near Houston, Texas, and Miami, Florida, Skydive Spaceland will open a third skydiving center near Atlanta on May 1.

“This is such a beautiful farm property in the Appalachian foothills,” says owner Steve Boyd. “We’re super excited to bring our business here.”

Boyd first opened Skydive Spaceland just south of Houston, Texas, in February of 2000, and the third-generation family skydiving business quickly grew into Houston’s largest, most progressive skydiving center. Spaceland conducts more than 100,000 skydives per year and has hosted major skydiving competitions including the U.S. National Skydiving Championships, and several state, national, and world records for skydiving including a Guinness World Record for most tandem skydives done in a day have been set there. The brand expanded to Clewiston, Florida, near Miami in early 2013.

Located just 55 miles northwest of downtown Atlanta in Rockmart, the latest Skydive Spaceland location is a 60-acre skydiving center that’s currently undergoing a complete remodel in preparation for its grand opening. Brand-new classrooms, restrooms, office, and a newly carpeted parachute packing area will welcome guests in style.

Skydive Spaceland-Atlanta will fly the area’s largest skydiving aircraft, a Twin Otter capable of carrying 23 jumpers to 14,000 feet in just a few minutes. This allows up to 11 first-time skydivers to jump at the same time, unlike small skydiving centers where only a few people can jump together.

Skydive Spaceland-Atlanta will continue the Spaceland tradition of offering one of the world’s strongest and most efficient civilian skydiving training programs, using modern training aids and state-of-the-art equipment in a wide range of sizes to fit most any body type. Open every day but Christmas starting May 1, Spaceland-Atlanta will be able to help skydiving students attain their basic skydiving license in as little as a week. This popular training program draws skydiving students from around the country and the world, many of whom cannot complete skydiving training as efficiently or cost-effectively in their home countries.

To celebrate its grand opening, Spaceland-Atlanta is offering free skydives to licensed skydivers after 2pm on Thursday, April 30 (gear rental not included) and $15 skydives ($10 off the usual rate of $25) for its opening weekend May 1-3 (Friday-Sunday). Tandem skydives for first-time jumpers are currently being offered at a pre-opening special rate of $169, $50 off the regular retail rate, and these can be redeemed for six months from the date of purchase.

“I am super stoked to bring Spaceland’s professional, friendly way of doing things to Atlanta skydivers,” says operations manager Kevin Purdy, a longtime skydiver with 16,000 jumps and 24 years of experience as a skydiver and tandem/Skydiver Training Program instructor.

For more information and to sign up for Spaceland-Atlanta email updates, see http://atlanta.SkydiveSpaceland.com.

What’s Your Wind Limit?

Gusty winds are common at Spaceland and many other dropzones. As an experienced jumper, I have thought a lot about what my personal wind limit is–in other words, when I will sit down even though the dropzone is not on a wind hold. Recently, I made the decision not to jump after watching other fun jumpers and tandems land. Later in the day, the tandems went on a wind hold. I was surprised to see that many newer jumpers flying larger canopies with lighter wing loadings than I have continued to jump that morning and afternoon, even after the drop zone put the tandems on a hold.

Once you graduate from the Skydiver Training Program, you are responsible for determining your own wind limit. What is safe for someone with 100-200 jumps flying a canopy loaded around 1.0 is very different from what is safe for someone with thousands of jumps on a crossbraced canopy. To quote Brian Germain,” …until your skills and knowledge are ready to fly smaller, faster parachutes, you should stay out of the sky until the winds come down. I still haven’t been hurt by a jump I didn’t do.”

There are many questions you can ask yourself and ways to observe the conditions at the DZ that will help you make a safe, informed choice. I often ask myself the following:

  • Are people with more experience than me sitting it out? 
Particularly, are people with thousands of skydives standing down?
  • How are the landings of other people jumping canopies loaded similarly to yours?
  • Are they coming straight down or landing backwards?
  • Are their canopies “breathing” a lot or do you see their end cells folding under?
  • What is the spread between the peak gust and lowest reading on the wind-meter at manifest?
  • Is the wind sock standing straight up and then going limp, or whipping up and down?
  • What is the wind direction, and is it consistent or changing?
  • Are there obstacles near my target landing area that are likely to cause turbulence?

Just because you can jump, doesn’t mean you should. What is your personal wind limit? What do you consider when you decide whether or not it is safe for you to jump?

Factors You Should Consider

How your canopy’s groundspeed will affect your accuracy and landing

Consider the speed of the uppers and the speed of the winds on the ground. If you are on a lightly loaded canopy, you may not “penetrate” into the wind—this means that it may be harder for you to make it back to the drop zone. You will want to pay close attention to your heading on opening so you do not unintentionally fly your canopy downwind of your targeted landing area.

Strong winds also mean that you may have to “crab” the crosswind leg of your pattern, because you will experience a push away from your target while flying this leg of your pattern. You will also need to be ready to see some different sight pictures under canopy: your canopy may be pointing one direction and moving another. Then, on your final approach you may come straight down or go backwards. You will want to be able to plan your pattern in light of these conditions. You will want to avoid flying over any obstacles. If you are getting very little penetration into the wind, you will also want to make sure that you are flying your canopy in full flight—without any pressure on your toggles—until you begin your flare. Preserving as much forward speed as you can will improve your flare, and flying in full flight will reduce your vulnerability to turbulence.

Strong winds will also affect how you land your canopy. When you start your flare, you may start to go backwards. You will need to be prepared to deal with how this may change the speed and depth of your flare—you still need to flare after all—and be confident in your PLF.

As you land and begin to unload your canopy, you will need to be prepared to collapse your canopy quickly using your risers or a steering toggle. Otherwise, your canopy could continue to fly and drag you (and your beautiful rig) across the landing area. Many experienced jumpers have different tricks that help avoid them from getting dragged. Some examples are stepping on your d-bag or canopy and “running around your canopy”. Your mileage may vary, so be sure to develop a method that works well for you. If you make a mistake and your canopy drags you quickly and violently, you may need to disconnect your RSL and cut away your main.

Finally, in the event that you have a bad spot or experience a malfunction, how comfortable are you dealing with all of the above while landing off? You should always be sure to know the outs at the dropzone where you are jumping and consider your ability to land your canopy accurately and safely in an unfamiliar area.

The above are only some of the considerations and skills that go in to deciding if you can fly and land your canopy accurately and safely. Even if the winds are not gusty—just strong—you should be sure to consider whether or not you have the skills and confidence you need to land your canopy in those conditions.

To summarize, here are some questions you should ask yourself before jumping any day where the winds are strong.

  • Will I make it back if the spot is less than perfect?
  • Am I comfortable landing off the drop zone in less-than-ideal landing conditions where I may not be able to see a windsock?
  • How strong is my ability to fly a proper, accurate landing pattern? Am I likely to misjudge the conditions and land on an obstacle if I come straight down? Do I have the skills and awareness necessary to avoid obstacles?
  • Will I be able to pay attention to and account for canopy traffic while landing in strong winds?
  • Are the winds strong enough relative to my wing loading that I could land backwards and if so, do I really want to land backwards?
  • Can I collapse my canopy quickly and effectively or am I likely to get dragged by my canopy?

How turbulence will affect your ability to fly your canopy safely

Many of the factors discussed above are things you can learn to control with canopy coaching and the appropriate level of experience. You may feel that once you have 200 jumps and fly a canopy at a non-student wing loading, you can jump in any conditions you want. If you feel this way, you may either be overconfident or have forgotten the effect that turbulence has on your ability to fly and land safely.

Turbulence created in gusty conditions may cause your canopy to collapse or your end cells to fold under. Obviously, this will impact your ability to fly and flare your canopy. If the “spread” between the peak gust and lowest lull in the wind speed is high, many canopy pilots experience a bumpy ride. Typically, jumpers consider anything over about a 10 mile an hour difference between the average wind speed and the peak gust to be high enough to cause trouble. So, if the winds are 10 gusting to 21, many jumpers will choose to sit down because the air feels “dirty” or “bumpy”. If you watch the windsock and it whips up and down, it is a good indication that the conditions are gusty and bumpy. Often, the best way to determine if the conditions are bumpy on a particular day is to watch other jumpers land. If you are concerned, ask the jumpers who just landed what the conditions were like.

You may also have a bumpy ride if there is mechanical turbulence caused by obstacles near the landing area. As a student, you learned that mechanical turbulence exists directly above, upwind, and downwind of large obstacles. On the downwind side, turbulence may be encountered at a distance equal to at least ten times the height of the obstacle. If you catch mechanical turbulence that causes a rotor, your canopy may speed up and increase its angle of attack. You could experience a sudden drop or surge that makes it feel like your canopy has lost lift. If you experience turbulence close to the ground, you may “drop” out of the sky and you need to be ready to take whatever countermeasures are necessary (if you are at flare altitude, typically stabbing out a flare) to stay under your canopy and also be prepared to PLF.

At Spaceland for example, the hangar is a source of turbulence in the D license landing area when the winds are out of the north and the landing direction is toward the hangar. It’s really easy to catch turbulence off the building if the winds are strong and there is even a slight northern component to the wind—I have made this mistake, been deposited on my butt, and had trouble sitting for weeks. Not worth it!

Finally, gusty or inconsistent winds may also affect your accuracy because your penetration into the wind can change unpredictably throughout the course of your canopy flight. Remember not to fly over anything you do not want to land on and to err on the side of caution when evaluating where to land.

To summarize, here are some questions you should ask yourself before jumping any day where the winds are gusty or the conditions appear “bumpy” for other jumpers. For an excellent technical discussion of the different kinds of turbulence, take a look at this article from Performance Designs.

  • Does my canopy ride feel typically feel “bumpy” on windy or gusty days?
  • Are other jumpers with canopies loaded similarly to mine either sitting out or, if they are jumping, are their end cells rolling under?
  • What direction is the wind out of? Is it out of the North or another direction that is likely to create turbulence near my intended landing target?
  • Am I comfortable jumping in conditions where it may be more difficult to accurately predict where I will land?

Who sits down and who stands up

Watching other canopies land and asking jumpers about the conditions is one of the best ways to evaluate whether or not you feel safe jumping. Of course, you have to ask and observe the right people. Consider the following.

1. Experienced jumpers sit down because they know they can jump on a better day

Many experienced jumpers have jumped in not-so-pleasant conditions. As a result, many of them are totally over it and are much pickier about the conditions they choose to jump in. This usually because they have experienced turbulent conditions either felt unsafe or just determined that it is no fun to land in sketchy conditions. When long-time jumpers are sitting down, it is typically a good sign that the conditions are bad enough that they are not worth the risk of jumping.

2. Experienced jumpers might stand up because they are very experienced canopy pilots on high-performance wings

Some experienced jumpers, however, may choose to jump in a wide range of conditions because they feel it has very little effect on the canopy that they fly. For example, people with thousands of jumps jumping tiny cross-braced canopies are, speaking broadly, less vulnerable to turbulence. They are also very experienced canopy pilots. If you are a beginning or intermediate skydiver on a larger canopy, do not decide you should jump because these kinds of jumpers are still skydiving. If, however, even very experienced pilots are sitting out—take note! The conditions are very likely not the kind you want to be jumping in.

3. Experienced and inexperienced jumpers might stand up because they are very eager to jump on a particular day

Jumpers who are team training or at the drop zone for a record event might choose to jump in conditions that they would sit out if they were fun jumping. Someone who hasn’t jumped in a long time may also choose to jump in borderline conditions. And many inexperienced jumpers may choose to jump in sketchy conditions because they do not know any better or are still experiencing the initial rush of a new hobby. Jumpers of all levels of skill will experience peer pressure to jump when their friends make the decision to jump.

You can make positive safety decisions that will affect your friends. Often, if one jumper on a load decides they do not want to jump in certain conditions, other jumpers who are too afraid to speak up will join that jumper in sitting down. That decision may impact another group’s decisions about whether to jump or not. Choose to be a positive role model. Choose to be conservative. As many an experienced skydiver will tell you, it is best to be on the ground wishing you were in the sky than in the sky wishing you were on the ground.

By Meredith Regan
Reprinted with permission from FlyLikeaGirl.com

Splish-Splash: Landing in Wet Conditions

Ah spring… Green grass, warming temperatures, and RAIN! One of the most common questions we see in our social media news feeds this time of the year is, “How wet is the landing area?” If you have to ask, the answer is usually “underwater.” 😉

Since we’re not too interested in waiting days for perfectly dry ground to skydive, that means we have at least a fair chance of landing in a puddle from time to time. As you might have already discovered, it’s far from the end of the world! However, there are a few things that can help you land more safely and better manage your gear.

  1. Puddles are the last hazard to avoid. Water won’t hurt you unless it’s deep enough to drown in and you can’t swim. Plan your landing pattern to avoid obstacles and people first, puddles last.
  2. Don’t dodge puddles if you’re on final. Since no one WANTS to land in the water, it’s very tempting to turn a little left or right to avoid a puddle when you’re about to land. However, remember two things: One, low turns can hurt you a whole lot more than a little water! Two, other skydivers may be flying near you, and your turns may cause them to turn low to avoid you and thereby risk injury. Not cool!
  3. Water and mud are super slick–be ready to PLF! Whether you’re touching down in a puddle or slick mud (and you know how slick that gumbo mud can be here in south Texas!), chances are very good that you may slip and fall. As funny as it can be for the rest of us to watch others trying to stay on their feet in this scenario, it isn’t unusual for skydivers to sprain ankles trying to stay up. Just like if the ground were dry, always be prepared to PLF if your landing isn’t going as planned.
  4. Once you’re down, hop up quick to get the rig out of the water. If the container soaks in water for any length of time, it will have to be dried before it can be repacked, meaning you can’t jump it again for awhile. And if the reserve container gets soaked, there’s a reserve inspection and repack in your future and that rig is down for even longer. Thirdly, there is the risk that if the reserve container gets very wet, your automatic activation device (AAD, Cypres in our rigs) may have gotten wet enough that it will need maintenance as well–>more potential downtime.This is why sometimes when it is very wet, we’ll put rental gear on hold–more people will get to jump the gear if we wait till it’s a little drier than if all of our rigs end up in the loft waiting to dry and be repacked.
  5. Pick the canopy up out of the water quickly as well. If your canopy lands in standing water, pick it up as quickly as you can rather than waiting until after you’ve removed helmet/goggles, etc. The packers won’t pack a wet canopy, so if you want to jump that rig again soon, pick it up quick to minimize its soaking time! Make sure you have every bit of the gear off the ground before carrying it in, as always.
  6. If your jumpsuit or shoes get significantly muddy, you can hose them off out back by the observation deck or between the hangars.
  7. If your rig gets significantly muddy, it’s usually best to scrape off any clinging mud, then let the rig dry thoroughly before using a brush to knock the rest of it out of the fabric. If you brush it wet, you’re just cramming the dirt deeper into the fabric.
  8. Not sure if your rig needs any special care after a wet landing? Ask one of the packers or instructors for help if you’re not sure how to handle your wet gear.
  9. Bring dry shoes and socks to wear after jumping. Don’t waste your last pair of dry socks and shoes on another water landing, but it sure is nice to have dry feet for the evening and on the way home.

Follow these tips to land safely and manage your gear when jumping in the wet, and remember we have showers in the main restrooms and bunkhouse if your mud landing is truly epic. 🙂

Emergency Exit!

Current weather reports 1000 foot overcast skies… anyone for a hop & pop?

In all seriousness, how low are you prepared to get out of the airplane? Have you thought about what you would do in an emergency since you were a student?

A couple weeks ago I was flying, had just taken off from Spaceland in the SuperVan with a load of jumpers, and after waiting for a lull in the radio traffic I checked in with Houston Air Traffic Control:

Me: “Houston, Jump one foxtrot lima back with you passing through seventeen hundred for fourteen thousand.”
ATC: “Roger Jump one foxtrot lima, ident, and hold at or below two thousand five hundred for crossing traffic.”

Now being that the airplane wasn’t real full and that the SuperVan climbs so fast, my response to comply with the instruction was a pretty quick reduction in power and a push forward on the yoke to level off. The next thing I heard?

Silence.

Seriously, even through my noise canceling headset you could almost hear a pin drop from what I’ve come to expect as a noisy group of people chatting about anything and everything, and expressing their energy and excitement for the upcoming jump.

After about two minutes the traffic had passed and we resumed the climb, at which point a rather more subdued than normal tandem instructor asked me “Traffic?” and seemed rather relieved for me to nod yes, knowing it wasn’t a real emergency.

The point of this is that I’ve been thinking, “How many people consider what they will do in an emergency?”

What is your lowest exit altitude?

There is no one answer for this question as an experienced jumper. There are the numbers we teach in our STP program, but for jumpers who have different gear considerations, there may be different numbers. For example, a tandem instructor is supposed to ride the aircraft down at an altitude that an STP student and their instructors could exit safely on a reserve. An experienced jumper with a sub-100-square-foot crossbraced canopy is going to be making a different decision than a highly experienced CReW dawg.

What will you do with your helmet and or goggles?

Have you thought that you might have to leave gear in the aircraft? Could you safely do a hop and pop without goggles or a helmet on?

Is your gear ready to skydive?

Of course it is, because we jump at Spaceland and no one should be boarding the aircraft without gear that is tightened down and ready to jump.

Can you get your own seat belt off, and at what altitude should you remove it?

As a tandem instructor, mine stays on higher than the usual 1500 AGL. Speaking of seat belt, consider its location and how you’ve got it attached. Will it keep you restrained and prevent you from causing injury to others in the event of a forced landing? Ideally it should be around you (in an Otter/Skyvan with side benches) or connected to your harness as close to your center of mass as possible and have the shortest run to its floor or wall attachment point (straddle benches/floor seating).

Who makes the call to exit?

The pilot is of course the final authority over all aircraft-related things including if it’s safe or permissible to exit. That said, the pilot’s workload goes up exponentially in an emergency and disturbing him/her at this time might not be the best course of action. Instead, be as ready as possible to exit or be prepared for a forced landing. If the pilot wants jumpers to exit, he/she will inform them after taking care of the immediate emergency and its associated workload. Trust me, we’d rather land empty when things are going wrong, but we will consider whether it’s safer for the jumpers to stay or not.

Who should you listen to in the airplane?

Usually the pilot will communicate through one jumper, often the person sitting behind the co-pilot position. Ideally this should be an instructor or other highly experienced jumper who can remain calm and relay instructions clearly. Everyone else should keep quiet, listen, and obey without question. There’s plenty of time for discussion after everyone lands; now is not the time.

How will you exit?

Will you remember to not overload the rear of the airplane, and to keep the exit orderly? How much separation is needed if everyone is taking no more than a 5-second delay? I can’t think of very many situations where anything other than solo exits would be advisable for anyone other than students or tandems. Climbouts are going to increase the danger to everyone, so don’t do them. Freefall is not recommended, so exit separation can be kept to a minimum since freefall drift won’t be a factor. Keep in mind if the issue is the loss of an engine, the aircraft may very well be descending and the pilot may want the aircraft emptied as quickly as is safely possible.

Where will you land?

This is something locals should have a pretty good idea of; we spend so much time in the aircraft on the climb to altitude, and we should spend some of it looking outside for the options we have for off landings. Your pilots have. Your safest option may be an off landing even if you think you can just barely make it back to the DZ. If it is back at the drop zone, remember that the pilot may be trying to return there in an airplane that has no power to perform a go around and avoid you if you make the mistake of crossing the runway at a low altitude. Follow our runway crossing guidelines in all situations (do not fly over the runway under 1,000 feet if aircraft are using it or approaching).

I think the jumpers at Spaceland have a great chance of responding properly to a problem since we have some of the best training and resources in the sport, period. I also think we have some of the best aircraft in the industry and I trust every one of them; if I didn’t, I wouldn’t fly them or jump out of them. That said, if you haven’t thought of YOUR answer to the questions above, maybe you should take a few moments to do so.

I guarantee your pilots have…..

Keep Learning with Facebook!

As a current or former student in our Skydiver Training Program here at Spaceland, you have access to our skydiving students group on Facebook. This group is a ton of fun! You’ll find everything from freefall and canopy control questions to gear inquiries, discussions of who’s jumping on a particular day, Spaceland event announcements, and what crazy exit people want to try on their post-graduate dives.

We keep this group focused on safety/training and skydiving, so the signal to noise ratio is pretty good. Unlike many corners of social media, this group is a valuable use of your time for continuing education, support, and skydiving photos/videos.

Many of our highly experienced jumpers and instructors keep in touch with this group to offer advice and answer questions, so know the advice you get here will be of high quality and in line with your training. It’s a great digital bonfire for all jumpers, new and experienced! So grab a beer and let’s chat. 🙂 What questions do you have about skydiving safety and training?

www.facebook.com/groups/spacelandstudents/

Flying the Hill: Basics

Skydiving: The "Hill"
Skydiving: The “Hill”

You’ve probably heard skydivers talk about the “hill” and “flying the hill” when discussing exits from powered aircraft flying horizontally. If you’re unfamiliar with the term, let’s define it! The hill is that transition period between your leaving the aircraft and reaching terminal vertical velocity. When you exit, you are initially traveling horizontally just like the aircraft from which you exited. Gravity works quickly to accelerate you towards the planet, however, and your horizontal velocity quickly decelerates (due to wind resistance) to zero relative to the air mass through which you fall.

While you are on the hill (in that transitional state), there are two reasons why flying there is different from flying at terminal velocity. The first is that due to your initially horizontal movement, airflow over your body isn’t coming from below–it’s coming from the front of the aircraft, 90 degrees to the ground (we call this the relative wind and it comes from the direction the aircraft is moving towards). So if you’re thinking of freefall as something you only do relative to the ground or the horizon, your thinking is 90 degrees wrong as you leave the plane and funnels/unintentional flips often occur. Only when you reach terminal velocity are you correct. Think of freefall and flying as something you do relative to where the wind is coming from, and you’ll be right all the time. 🙂

The second reason why the hill is tough is that initially, you don’t have quite as much airflow over your body as you will at terminal velocity. The plane is usually going a little slower than belly-down freefall speeds (the differential is much bigger for freefly speeds). So any inputs you give (legs out, dipping a knee, etc.) won’t seem to do quite as much until you reach terminal velocity. You might hear skydivers say things like “the hill is mushy” when talking about how this feels.

Diving exit
This diver is doing a great job presenting his belly to the relative wind (coming from the front of the plane). Note that his right side is much higher than his left.

Learning to fly well on the hill is quite challenging for one simple reason: You get so little time to practice it! You only get about 10 seconds of hill time before you reach terminal velocity at standard belly speeds. So while you get little enough time to practice freefall as it is (maybe 60 seconds depending on your exit and deployment altitudes), only a small fraction of that already short time is spent on the hill. It’s a challenge within an already big challenge!

So let’s look at some hill flying concepts to get started on meeting that challenge! For this article, we’ll focus everything on belly-fly exits and assume we are exiting from a left-side door aircraft such as a Twin Otter or Caravan.

Presentation

Proper presentation of your body to the relative wind is key to the success of any exit, solo or linked. Good hill flying starts with good presentation; you want to be oriented to the relative wind (forward towards the nose of the plane) exactly the way you eventually want to be oriented to the ground. If you are doing a poised floater exit, for example, you’ll step off the plane with your head up to the sky, knees below, and belly forward towards the prop, perpendicular to the ground. If you change nothing about your body position, you’ll gradually transition to a stable belly-to-earth orientation with your head pointed the same direction the plane was traveling.

When a skydiver unintentionally flips, flops, and flails on exit, the reason is almost always poor presentation. Usually the problem is that the skydiver exits with a literal belly-to-earth orientation, but this means he/she is presenting his/her side or feet/knees to the relative wind coming from the prop. There’s a reason we don’t teach students to fly on their sides–it’s hard! It’s kind of like trying to balance a knife on a table by its blade instead of just laying it flat.

Divers and floaters
This shows examples of good floating presentation and less-than-perfect diver presentation. The floater has his belly squarely into the relative wind coming from the front of the plane. The diver is flat to the horizon, presenting his knees and feet to the relative wind. Flying in a stand out the door isn’t easy, especially if you’re not ready for it!

When floaters flail, the problem is usually that they did not get their left sides up and away from the plane quickly enough to present their bellies/chests to the relative wind, so they are essentially flying with their left sides into the wind. To help avoid this, turn your body to stand in the door with your left side slightly further from the plane than your right side; this will get some wind on your chest and belly. Consider standing just on your right foot and trailing your left foot away from the plane a little to get your hips even more squarely into the wind. Now you’re ready for success! On exit, step strongly away from the plane, leading with your left side and keeping your chest and belly into the wind.

When divers flail, usually they are diving out with a belly-to-earth mindset, which presents their right sides to the relative wind. To get your belly into the wind as a diver, you have to have the right side of your body higher than your left. That means launching off your left foot with your body twisted a little to raise your right hip and get wind on the front of your pelvis and belly, and raising your right shoulder/arm/elbow to get wind on the front of your chest.

When belly flying, put the front of your hips/pelvis into the relative wind wherever it may be (depending on the aircraft), and the rest of you will usually follow! Visualize this before your jump; this helps performance significantly.

It’s All Relative

Now that we know how to exit in a stable position from inside and outside the plane, let’s think about staying close to others on the hill. So we can, you know, turn points and stuff. 🙂 This is where things get familiar (yay!), because the physics of staying relative to other skydivers don’t change on the hill. The challenge of staying relative is slightly one of physics because of the lower airspeed we mentioned earlier, but it’s mostly one of perspective.

Flat diving exit
This diver is diving with her belly to the ground, not to the relative wind. The air is hitting her right side, making it very likely that she’ll barrel roll instead of flying smoothly down the hill. If her right side were much higher than her left, her belly would be into the wind.

Mostly, we just have to remember that while we are on the hill, we should throw the horizon and ground out the window, because they are fixed references in a changing world. Don’t try to keep up with the changes by counting seconds out the door, especially since early floaters/divers will have different times out the door. Instead, look at where you are relative to where you want to go and put your mind into hyperdrive.

Lock onto your target like a fighter pilot and see what needs to happen. See that the distance may be increasing between you and your target in terms of altitude, or lateral distance, and catch that before those inches or feet of separation become tens of yards or hundreds of feet. See that you are just a little low or high relative to your target, and fix the levels before you have to perform hero moves to get there. It’s very common for new skydivers to just lock down a body position out the door and try to survive the exit so they can make it to freefall, but the hill is a fun, fluid place to fly because it’s even more of a challenge than terminal velocity.

Caveat: Never, in any skydive, lock onto a target so hard that you forget what else is around, because lack of awareness of others around you can lead to other problems. Lock on in the sense that that’s where you’re going and you’re tuned in to what you need to do to get there, but always, ALWAYS maintain situational awareness.

A great friend and teammate of mine loves a quote that’s really appropriate here: “You can only make a hero play when you’re out of position.” The key to flying relative to others on the hill is to see quickly when your position is worsening and fix it before it takes a hero to get back. Awareness guides skill, and both come with experience.

Competition Perspective

When doing 10-way speed years ago, then as now it’s all about the exit and hill flying. The best teams are building 10-ways from a no-show (all-divers) exit in 10 seconds or less, and on the best jumps in 8 seconds or less. Our team captain (Roger Nelson, founder of Skydive Chicago and a super awesome 10-way competitor) would tell us that if you look at your target (assuming that your target is stable!) and see backpacks, you’re a diver. If you see bellies, you’re a floater.

This gives you an idea of the body positions you need to get into to reach your target. See your target, see what you have to do relative to the target, feel the wind on your body, and use it to fly where you want to go. It sounds simple, but we all know it isn’t! 😉 Start with good presentation that puts you on the same plane as your target, follow that with awareness of what needs to be done, and close the gap with the techniques you’ve already learned to get closer to your target.

You might have noticed that we have spent no time on actual skills of body flight, such as legs out to go forward, sideslide technique, etc. Why? Well, those skills are all the same on the hill as they are at terminal; the physics don’t change. What changes on the hill is just your perspective relative to the horizon; it’s all a head game. As a licensed jumper, you have already demonstrated that you know what it takes to go forward, back, up, and down relative to a target. So take that knowledge and apply good presentation and quick-thinking awareness to it, and you’re a hill-flying rockstar. 🙂

Skydiving Currency: Use it or Lose It! 

Ah, wintertime. We’re lucky enough here at Spaceland-Houston to have jumpable temperatures year-round, but cooler days and holidays often result in many of us taking a bit of a break from jumping this time of year. This break can result in a lack of currency, which is an additional risk factor for injury in skydiving. No one wants that!

If you are a licensed jumper, but you haven’t jumped in however many days your license level requires for currency, you will have to complete ground training and/or a recurrency jump with a coach or instructor to demonstrate survival skills before you can skydive here unsupervised. If you’re not yet licensed, you’ll need to jump every 30 days to avoid a recurrency jump.

As you already know, skydiving is a very technical sport. Taking a lot of time away from it means our brains aren’t thinking about jumping as much, and our bodies aren’t going through the motions. Our ability to recall the details of how to skydive safely decreases over time, as does our knowledge of anything else! And then there is the additional risk with very long layoffs that equipment or safe skydiving procedures may have evolved during our absence from the sport, and thus recurrency training will be critical to safety.

Sometimes people feel recurrency jumps are money grabs (and they aren’t shy about telling us!), but this has nothing to do with money and everything to do with safety. Uncurrent skydivers are at higher risk of injuring themselves and those around them, and no drop zone wants that additional risk in their skies. Our currency requirements are those recommended by the United States Parachute Association, with additional requirements for C/D license holders after years of layoff time.

Currency requirements vary by your license level, with higher license levels requiring less frequent recurrency training than lower levels. We all learned about currency requirements as students, but it’s easy to forget them. So here they are from our policies and the United States Parachute Association Skydiver’s Information Manual (as of January 2015):

License Held Time since last jump Must do
Student (none) 30 days STP-15 or last passing dive flow
A license 60 days Coach jump
A license 90 days STP-15
B license 90 days Coach jump
B license 180 days STP-15
C license 180 days Coach jump
C license 2 years STP-15
D license 180 days Coach jump
D license 3 years STP-15

Please note: If your last jump wasn’t done here at Spaceland, we will need to see your logbook to verify the date and place of your last jump, and the signature of the experienced jumper who witnessed your jump. Don’t leave home without it!

Rigs vs. Doors

Recently, one of our licensed jumpers took it upon himself to remind us all about keeping our rigs away from the edges of the aircraft door when rotating out to a floater exit. It’s a great reminder for all of us, because it’s far too easy to get too comfortable and complacent about safety aspects such as this when we’re focusing on a crazy new exit or type of skydive. The trick is to never be complacent!

Why is it important to keep your rig off the door? There are a couple of big reasons, and they are both major safety concerns.

  1. Contacting the door with your rig on climbout can knock your flaps open and even your pins loose, potentially resulting in a horseshoe malfunction or immediate premature deployment of your main or reserve. This has implications for your safety as well as that of the jumpers in your group, any jumpers still in the aircraft, the aircraft itself, and the pilot. A prematurely deploying canopy can rip you off the aircraft and knock your buddies off the plane as well. Entanglements and injuries are possible. Not only that, but a parachute deploying off the aircraft door could also go over the tail, causing damage to the tail and potentially crashing it. This is more of a risk in the Caravan than with the Otter, but neither is immune (and other aircraft with low tails are also at higher risk).
  2. Contacting the door with your rig can damage your rig, especially if there are any sharp sheet metal edges or hinges. Damage could range from a cosmetic scuff on the material to a cut that needs rigger repair to return it to airworthy status. Your rig is a lifesaving device; treat it as such and protect it at all times!

So back to floater exit technique: The wrong way to turn out for a floater exit is whatever way risks scraping your rig on the edge of the door; the right way is to keep your rig towards the center of the door as you rotate out to a floater position. For example, if you’re floating near the front of the door on a left-door aircraft, pivot clockwise as you climb out to float to keep your rig away from the front edge of the door. If you’re rear floating, pivot counter-clockwise to keep your rig off the rear edge of the door.

If you’re in the center of front and rear floaters, it doesn’t matter which way you turn but your front floater will be experiencing more prop blast, so he/she might appreciate it if you rotate your rig toward the rear so you don’t knock them off the plane. 🙂

Keep an eye out on jumpers practicing exits in the mockups; chances are good that you’ll see someone turning the wrong way on climbout before too long. Help them out by reminding them to keep rigs to the center of the door; the life you save could be your own!

Think about protecting your rig on every exit; not just floater exits. See #7 in this article on hop-and-pop safety for more thoughts on keeping your rig clear of the door for other types of exits. And always, always do a thorough gear check before gearing up and before exiting.

Blue skies and fly safe!

Skydiver Training Tip: What If You Have to Repeat a Dive?

weather

Let’s face it: Skydiving isn’t easy, especially when you’re just starting the sport. You may be a natural at freefall, but struggle with canopy patterns or landing, or vice versa. Or you may be nervous enough to have trouble getting out of the plane at all.

The important thing to remember here is that many highly skilled skydivers had trouble with at least one aspect of skydiving when they were learning to fly. (My issue was landing patterns; what’s yours?) Hey, if every bit of skydiving was easy to pick up right away, we’d all get bored and do something else! I’ve known quite a few world-class skydivers who initially couldn’t force themselves to exit at all, or who battled bad landings, or who had trouble staying stable. They were able to get through it and excel, and so will you!

Also, remember that a dive that has to be repeated isn’t a waste; it still counts towards your total number of jumps needed for your license.

“With the right attitude, you probably learned more from a jump that did not go as planned than you would have if it had gone perfectly,” adds instructor Hank Prewitt. “You will have plenty of jumps that do not go as planned (during and after training), but as long as everybody is safe and you learn something, it is a good job.”

When your instructor utters those words you were hoping not to hear: “Let’s try that dive flow again,” don’t despair. Instead, run down this list of tips and make sure you’re fully prepared, physically and mentally, to repeat that level and knock it out of the park.

  1. Make sure you are physically ready for this jump. Learning to skydive isn’t easy even if you’re in top shape, so trying to fly when you’re not in top shape is a detriment you don’t need right now. Consider that if you’re feeling sick or exhausted (or both), you won’t perform at your best, and is skydiving really something you want to take on in a compromised state? If you’re overly tired from an all-nighter at work or play, or if you’ve got a cold or worse, consider taking a break for a couple of hours or waiting for another day when you’re healthy. If you’re hungry or dehydrated, take care of those physical needs before you get ready to fly again. Make sure your body’s taken care of so your mind won’t be distracted by physical needs or problems.
  2. Study the dive flow again as often as you need to memorize it. If you can’t remember what to do when, you definitely won’t be thinking of how to do it with proper technique.
  3. Take some quiet time to relax and visualize the skydive. Visualize the good parts of your previous dives, and fill in anything that needs improvement with visualization of proper technique. Don’t replay mistakes in your head, or you’re more likely to make them again.
  4. Practice, practice, practice. Walk through the freefall and canopy flows as realistically as possible, and ask your instructor to help make sure you’re doing it right. Definitely practice even if you’ll be leaving for the day and doing the jump later; this way you’ll have the right information and visuals in your head to consider in the day(s) between then and your actual jump. If you’re battling with a particular freefall skill, your instructor may even suggest that you practice that skill in a wind tunnel for a few minutes before your next jump.
  5. Put yourself in the right frame of mind to succeed. If you’re nervous and fidgety, find someplace quiet to sit for a few minutes, breathe, relax, and focus on good visuals of good performance. You got this. 🙂 If you’ve had trouble with forgetting things, study until you’re fully prepared. If you’re angry about repeating the dive or about something that happened outside of skydiving, take a few minutes to sit someplace quiet and put that out of your mind so you can focus on the jump. Listen to the tips your instructors give you on mentally preparing to skydive, because getting in the right frame of mind to fly well is just as important as a good gear check.

With all that preparation under your belt, you’ll be ready to rock that next training jump!

Skydiver Training Tip: Cheat Sheet!

Are you one of those people who knocks standardized tests out of the park without half trying, or do you tend to need some quality study time to ace them? Regardless of your test performance proclivities, keep one thing in mind regarding your skydiving training tests: These are definitely tests you don’t want to fail, because this knowledge could literally save your life!

Your Skydive Spaceland Skydiver Training Program (STP) manual will tell you everything you need to know to pass the quizzes you need to complete before each STP dive flow. But sometimes you might want a different study perspective, and the USPA Skydiver’s Information Manual (SIM) can help!

The manual includes everything the United States Parachute Association requires and recommends for skydivers doing various activities, from basic training to wingsuiting and high-performance canopy flight. As a skydiving student, you’ll want to focus on sections 2 (basic safety requirements, or BSRs) and 4 (Integrated Student Program).

Section 4, in particular, has quizzes for each category of training dive along with the answers, which will give you a very good idea of what we’ll ask you to know before each training dive at Spaceland. It’s a bit like a cheat sheet, but we’ll call it a study guide. 🙂 Review the applicable categories before you arrive at Spaceland for your training, and you’ll be extra prepared for success! The SIM is also available for mobile devices, so check it out in your mobile device’s store if you want to review it on the go.

And if you really want to be the star student, ask your instructor (or another instructor if your previous instructor is busy) to review your next dive flow with you at Spaceland before you leave for the day. Ask for physical practice on the creeper board and/or malfunction junction so you have a clear idea of what’s expected of you for that next jump. That way, you can spend some of the time between that practice and your next jump reviewing a clear, accurate visualization of your dive flow objectives and be ready to knock it way out of the park on your next jump day.

As always, if you have any questions about what you read in the SIM or what you practiced earlier, just ask one of our highly capable STP instructors!

Skydive Spaceland Owner Gives Back to our Military By Flying Wounded Veterans

Do you ever wonder what our pretty King Air with the in-flight door is up to? Spaceland’s owner Steve Boyd, Sr., has teamed with the Veterans Airlift Command (VAC) to provide free transportation in his King Air to our wounded veterans. So far, he has completed four missions including trips to North Carolina, Florida, and two to Colorado.

The Colorado missions were extra special to Boyd, as he and co-captain Rabbitt Staib were included in the closing ceremonies of the Chris Kyle “Seal on the Mountain” Memorial Hunt.

“We were privileged to transport Jeff Kyle and SSG Bruce Heckendorn back to Texas,” said Boyd. (Heckendorn had an IED blast under his vehicle blow out his knees, rip his Achilles tendon, and cause mild traumatic brain injury.) “Also going on were the Warrior Games in Colorado Springs, from which we transported SSG Brian Boone and his family back to San Antonio.”

Want to help our veterans too?

Steve is looking for any corporate sponsors who are interested in contributing, tax-free, to help us fly more missions for our wounded veterans. Please email him at steve@skydivespaceland.com if you’d like to learn more and get involved!

Boyd also transported Army SGT Cory Muzzy and his wife on a VAC mission. Muzzy lost both legs and is now legally blind from a training accident at Fort Bragg on February 21, 2014, in which an explosion killed one service member and wounded seven others. Muzzy has endured many surgeries and continues to recover and remain positive, and he has big plans for his future. He and his wife went home to San Antonio for the first time since the accident courtesy of Boyd and the Veterans Airlift Command.

Finally, Boyd flew 7th Special Forces Group SFC Mario Pinilla from San Antonio back home to Tampa after Pinilla had maintenance done on four different orthopedic devices. Pinilla was injured on three separate occasions during his deployments to Afghanistan. On August 20, 2008, he was shot in the left hip and the bullet exited through his lower back. He was put in a medically induced coma and had a two-liter blood transfusion. He was eventually sent to the James A. Haley VA Hospital in Tampa, Fla., where he spent three months in a wheelchair and had to learn how to walk again. Pinilla was awarded the Silver Star for his actions during that mission.

“Being able to give back to these heroes who have given so much is truly an amazing experience,” says Boyd, who continues to fly VAC missions (two more are scheduled for November so far).
[flagallery gid=36]

Right-Now Rigging 

Oh no! You want to jump this weekend, but your reserve is out of date! Can this tragedy be averted so you can get some quality sky time? The answer is: Maybe!

Our full-time rigging loft may very well be able to accommodate your right-now repack request, depending on their current workload. If you need your repack completed in less than a week, please give our riggers a call at 903-364-5103 to see if your rig can fit in their schedule. And next time, you might want to check our online repack calculator to plan further ahead. 😉

Our rush and rig storage fees have recently changed, so make sure to check out our current rigging work order form online for the latest rates. Also, it’s a great idea to print this form ahead of time, fill it out, and drop it off with your rig to save time at Spaceland. If you need to find this form in the future, just see the “experienced” link on our website (which describes all Spaceland policies for experienced jumpers) and scroll to the Rigging section.

Did you know that our loft is full-service? We can handle routine assemblies, repacks of square/round reserves in sport and bailout rigs, many customizations/upgrades, and nearly any repair your gear or jumpsuit may require from harness repair and canopy patches to jumpsuit knee/butt pads. If you want it, there’s a good chance we can do it! Check with our riggers on-site or call them at 903-364-5103 to discuss the work you need done.

Keep your riggers happy! Remember: No shoes in the loft!

Special Dives: Low/High Pulls, Toy Dives, Pond Swooping

Low/High Pulls

  • High openings and low passes must take into account the number of airplanes flying, other skydiving activities, and canopy descent rate. We cannot always accommodate low passes or high openings.
  • We cannot guarantee that low-pass jumpers will land alone unless only one plane is flying.
  • Ensure that the aircraft is configured for your exit regardless of your exit altitude.
  • Licensed jumpers wishing to open above 5,500 feet (such as CRW or canopy flight courses) must discuss their flight plans with the drop zone manager beforehand. High-opening canopies will be assigned an airspace box where they must stay until 1,500 feet.
  • Jumpers wishing to open at full altitude must exit last. No exceptions.
  • Jumpers straying outside their airspace box will not be allowed further high openings.
  • High pullers must declare their intended pull altitude to the pilot and the entire load.

Pond Swooping

  • You must sign our pond waiver in manifest before swooping the pond.
  • Your approach and turn for your pond swoop should not encroach on aircraft operations on the runway.

Toy Dives

  • Toy dives are jumps on which you bring an unnecessary toy or piece of equipment (anything from a Barbie doll to a tube or inflatable raft) that can become separated from you.
  • No weighted spaceballs. No exceptions. The risk to people and property on the ground is too great.
  • Before taking your toy for a skydive, you must brief the pilot of the plane you’ll be jumping on what you are doing. If the aircraft is hot-turning and you can’t reach the pilot, speak with the drop zone manager or manifest, who can then communicate with the pilot.
  • If you have a heavy item, your jump run/freefall area must be over an open field in case you drop the toy (the pilot will help).
  • Have a plan for deploying your parachute safely while keeping control of the toy.
  • Take toys on skydives at your own risk.

Landing/Canopy Safety

Canopy Safety

  • Wind indicators: Landing direction arrow, flags, wind sock. The landing direction arrow is an air-traffic control device that sets the landing direction on the north side of the runway.
  • Know the landing direction before takeoff, and check the landing direction indicator (LDI) north of the runway after you open and check canopy in case winds have changed.
  • Follow the landing direction indicator when landing north of the runway. No exceptions even if the wind is light/variable and not in perfect agreement with the LDI at that moment. If you would prefer a different direction, land south of the runway. This keeps all skydivers moving in the same direction, which is better for seeing and avoiding other traffic than mixed landing directions. Think of landing here as landing on a runway at a controlled airport rather than landing in an open field.
  • Pattern altitude begins at 1,000 feet.
  • Fly left-hand patterns north of the runway unless safety requires otherwise.
  • Below pattern altitude, do not fly over primary landing areas (i.e., 1 or 2) where you don’t plan to land. Think of these areas as vertical columns for different jumpers up to 1,000 feet, not just lines on the ground. The point is to keep higher-performance traffic in area 1 completely and safely separated from slower canopies in area 2, so keep your pattern over the area where you intend to land without overlapping other areas.
  • No S turns, spiraling, or sashaying to lose altitude in the pattern (below 1,000 feet).
  • Tandem instructors always have right of way.
  • After landing, remain vigilant for other canopies you may need to dodge by turning around and looking up line of flight and all around until all other canopies have landed.
  • Do not kite your canopy while others are landing nearby.
  • Please see this map of each drop zone’s landing areas and read their policies.

Runway(s)

  • Under canopy, do not fly over the runway or its approaches below 1,000 feet when aircraft are approaching/taking off/taxiing.
  • When under canopy, avoid holding off the ends of the runway where aircraft take off and approach.
  • When crossing the runway on foot, stop and look both ways first. If an aircraft is on landing approach or taxiing, stop well back from the runway and take a knee or squat down to show the pilot you see him/her. NEVER cross in front of an aircraft on the runway.
  • The pavement is not the only runway; we also land on the grass runway next to it. Stay well back from the runway when landing or waiting for an aircraft to pass.

Aircraft/Loading Area Safety and Policies

Winds Aloft

This information is posted daily on the board near the aircraft mockups. Also check out our weather page…

Loading Area

  • We use loading area 1 (north of the hangar) on cold starts/after fueling, and loading area 2 (northwest corner of hangar) on hot turns.
  • Please be in the loading area on the 5-minute call.
  • You must be fully geared up, ready to jump, before entering the loading area. No loose leg straps or gearing up in the loading area.
  • No smoking in the loading area.
  • When the airplane pulls up, be lined up ready to board. Don’t make the aircraft wait for you.
  • Please observe our planned boarding/exit order

Runway(s)

  • Under canopy, do not fly over the runway or its approaches below 1,000 feet when aircraft are approaching/taking off/taxiing.
  • When under canopy, avoid holding off the ends of the runway where aircraft take off and approach.
  • When crossing the runway on foot, stop and look both ways first. If an aircraft is on landing approach or taxiing, stop well back from the runway and take a knee or squat down to show the pilot you see him/her. NEVER cross in front of an aircraft on the runway.
  • The pavement is not the only runway; we also land on the grass runway next to it. Stay well back from the runway when landing or waiting for an aircraft to pass.

Aircraft Safety

  • Please avoid all aircraft operations areas except when boarding the aircraft.
  • NO GUM on the airplanes!
  • 4 on the floor MAX in the Caravan! No more than 4 jumpers aft of the benches during boarding, taxi, takeoff, or landing.
  • Avoid all propellers, moving or otherwise, at all times.
  • The person sitting behind the copilot seat must be prepared and willing to relay commands from the pilot to jumpers in an emergency situation.
  • Helmets must be buckled on heads for takeoff and landing (until 1,500 feet). Large video helmets can be buckled to seat belts.
  • Seatbelts on until at least 1,500 feet. Open door at 1,500 feet in hot weather after checking your handles and verifying seat belts are off jumpers near the door first. Also check for a thumbs up from any instructors near the pilot. DO NOT slam the door open or closed! (More info/video on operating an Otter/Caravan door…)
  • The Skyvan door must be operated by two people.
  • Close door around 7,000 feet in hot weather (or lower if it’s too cold) to allow students to easily talk with instructors.
  • Get a gear check before exit!

Check 3s before exit:

  • 3 rings
  • 3 buckles
  • 3 handles
  • 3 accessories (helmet, goggles, altimeter)

Exit Procedures

  • First ensure the door and exit lights are dark before jump run (have not been left on from the previous flight).
  • Red light turns on: Open door and check for other aircraft traffic/spot. Request course corrections using left/right toggle switches at your own risk. DO NOT exit on the red light! If you exit before the green light, you may be grounded.
    Green light turns on: Exit.
  • If you are in the Caravan, ensure the green light is on AND aircraft is not climbing before exit (to avoid striking the tail).
  • Before observing other jumpers exit on low passes, full-altitude jumpers should remove their seat belts, check their handles, and prepare for exit in case of emergency.

Wingsuit Dive Policies

Wingsuit jumps carry many of the same risks as tracking/angle flying because of the horizontal movement component. They can also pose a risk to later-dropping aircraft because of the extremely slow fall rate. They can pose challenges when dealing with malfunctions as well, because of the limited mobility many suits allow the jumper before wings are released.

  • These dives have a higher chance of landing off the DZ. Also, since you’ll open away from the usual jump run, we may not see you if you land out or have a malfunction. Don’t expect a ride if you land out; we’ll do our best to get you if we see you, but assume you’re on your own. If you have a cutaway, note where you opened so we can help you find your main. Identify an appropriate alternate landing area right after opening and fly conservatively to it, then make the phone calls described below.
  • Each jumper should carry a mobile phone in a secure pocket, and program the following three numbers into it: Manifest (903-364-5103), ICE or In Case of Emergency number (family/responsible person for us to contact in case you are hurt), and the jump organizer. Call 911 first if you land out and are badly hurt, and call us second. Call us also if you land out but are unhurt to let us know you are OK and if you need a ride. Also call your jump’s organizer with the same information.
  • We highly recommend AADs for all skydives.

Experience Suggested Requirements

  • 200 jumps within the last year, or 500+ jumps total. If you are not an experienced wingsuit flyer, your first 10 wingsuit jumps here should be under the supervision of a wingsuit instructor.

Wingsuit Dive Policies

  • Get a briefing from a staff wingsuiter before making a wingsuit jump here. You will then receive a tag for your rig; otherwise, the loader will not allow you to board with a wingsuit.
  • Always tell manifest if you are making a wingsuit jump so we can notify the loader and pilot. If you don’t declare your intentions with manifest, the increased last-minute load organizing may result in you missing the load.
  • It is your responsibility to determine if the rest of the load is compatible with your jump. If there are already multiple horizontal skydiving groups planned, you may be assigned to a different load.
  • Know where wingsuiters are assigned to fly each day you jump a wingsuit and stay in that area to avoid traffic with aircraft and other groups.
  • It is your responsibility to plan each jump in a way that will keep you away from others and let you land on the drop zone. Check this board and/or weather websites for current wind conditions and use this information to plan where you must open to land on the drop zone, then make a flight plan that will take you to this opening area without crossing the normal jump run or approaching any other high canopies, trackers, etc. Consider that 180° second passes may occur and keep your flight plan clear of this as well.
  • Do not ask the pilot for a variation from the normal jump run. If you would like a different jump run, ask the drop zone manager and if the new jump run is approved, he’ll communicate with the pilot. You should verify that the pilot is briefed when boarding.
  • Before exiting, ensure the plane’s wings, nose, and tail are level and the green light is on. Do not exit linked with another jumper.
  • On exiting the aircraft, keep all wings collapsed for at least three (3) seconds to avoid striking the tail of the aircraft.
  • DO NOT attempt to chase or fly in formation with the descending aircraft.
  • Flying past or opening close to tandems or other groups, or crossing back and forth over jump run, will result in immediate and prolonged grounding.

New on New

weather

Are you a new skydiver with a shiny new A license? Or maybe you’re a skydiving student already thinking about the fun things you’ll do after you graduate? Congratulations on becoming a part of the global skydiving community! We’re glad you’re here. 🙂 Now let’s talk a little about the skydives you’ll do once you graduate. There are so many choices!

One thing we see frequently, perhaps because we are a big dropzone with a lot of students graduating all the time, is new skydivers jumping together. There’s absolutely nothing wrong with that! You are cleared to self-supervise your own skydives because you’ve proven that you have the necessary skills to save your own life after throwing yourself out of a perfectly good airplane. However, one skill you may have not yet developed is the ability to assess the inherent risks of different types of skydiving than the small, one-on-one belly jumps you have done until now.

Back to all the choices… there are bigger belly-fly jumps, sit-fly, head-down, hoop dives, raft jumps, tracking dives, angle flying, canopy flocking, canopy relative work, high pulls… it’s a smorgasbord of fun! But all of these dives carry more or different risks than the individual risks you learned about in the Skydiver Training Program. When you do bigger belly jumps, you need more awareness of where everyone is in the sky to stay safe. For sit-fly or head-down, you would need all the control you learned in the program on your belly, but enough skill to exercise that control at freefall speeds almost half again as fast as what you’re used to. For tracking/angle dives, you need all that awareness and skill along with awareness of where your group will travel across the sky and whether it will interfere with other groups on the load.

And no matter what kind of flying you’re doing, you will no longer have an instructor with you whose sole focus is to stay with you and keep you safe. Chances are quite good that you’ll start learning just how good your instructors are when you jump with others… 😉 And when everyone on your group is relatively inexperienced, chances are good that none of you have the experience and awareness to do a lot of the new activities safely and effectively.

None of this is intended to scare you or create reservations about jumping outside of the program. Far from it! Rather, we’d like you to consider that since the freefall world is now open to your interpretation, that you use that freedom wisely and safely. If you’re doing something on your skydive that you didn’t learn in the program (this will be many things), take a few minutes to ask one of our instructors or organizers for tips on doing that activity safely. If they say you need XYZ skills before trying what you want to do, trust that they are not trying to stifle your fun, but that they want to keep you and other skydivers safe. We’ve seen a lot of people make mistakes simply by not knowing what they don’t know, and the good thing about Spaceland is that there are so many people here that I guarantee somebody knows more about what you want to try than you do. Find these people, pick their brains, and keep learning! Keep an open mind and you’ll keep learning as fast as if not faster than you did in the student program.

Another aspect to learning quickly is to take advantage of jumping with people with more experience than you whenever you can. At Spaceland, we have the mentor program whereby jumpers under 100 jumps from any dropzone can get free coaching from a USPA-rated coach or instructor every weekend day in a 3- to 4-way format. Every month, we have a larger event on the first weekend of the month focused on a particular topic, be it dive and dock, turning pieces, accuracy, etc. Keep jumping with people who have lots of experience whenever you can, and get all the tips they can offer. Don’t feel that you should stick to skydives with your fellow graduates to avoid ruining someone’s jump who’s more experienced, because we all grew up in the sport with people taking time to help us out. We’re giving back what was given to us, and we know you may not be perfect. We aren’t either! We just want to skydive, improve, and have fun, knowing that whatever we give you will be paid back when you’re ready to do so.

Blue Skies!

Skydive Spaceland Camera Policy

Camera Safety

Forrest Gump might have said that skydiving and cameras go together like peas and carrots. It’s an awesome thing to capture what’s arguably the world’s most fun aerial activity with a nice tiny, high-quality camera such as a GoPro. It won’t get in the way, right? You won’t even know it’s there!

To go back to our peas-and-carrots analogy, it doesn’t quite fit the skydiving scene in the sense that the peas don’t hurt or kill the carrots. But cameras add risk to nearly any activity, even if it’s just a spectator on the ground with a camera. Why? One, cameras apparently have a unique ability to disable basic brain function in humans. Haven’t you noticed how smart humans can become complete idiots when cameras are rolling? It might be a “Hey y’all, watch this!” showoff, being so focused on getting the shot that the camera jumper forgets to deploy his/her parachute on time, or a spectator walking into a dangerous landing or aircraft operations area because they are too busy watching what’s in the viewfinder or on screen to realize they are walking into a trap. All kidding aside, the distraction problem cameras pose is very real.

Two, cameras on skydivers can snag parachute lines and thereby cause or complicate parachute malfunctions.

Jumping with any type of camera, including small-format cameras such as GoPros and Contours, adds significant risk to any skydive. These risks may include the following and other risks:

  • Cameras falling off of jumpers, creating hazards for people and property on the ground.
  • Pilot chute bridles, lines, and/or parachutes entangling with the camera.
  • Distraction from critical safety issues such as proper gear routing, exit lights, and freefall and canopy traffic.

The United States Parachute Association recommends that jumpers have at least 200 jumps and a C license, and instruction in camera flying before using a camera on any skydive. Skydive Spaceland believes in and follows this recommendation. If you are interested in jumping a camera here, get your 200 jumps, familiarize yourself with USPA’s Skydiver Information Manual Section 6-8, and seek advice from one of our many experienced camera flyers.

Further Reading

Avoiding Turbulence

It is bumpy up there!

Turbulence is the Rodney Dangerfield of skydiving…. It doesn’t get respect. Turbulence is a challenge for jumpers for at least two reasons: It is invisible and unpredictable.

Because turbulence is invisible, we must actively anticipate where it may be. Most new jumpers (and a lot of more experienced ones) vastly underestimate the danger zone for mechanical turbulence around obstacles. We can expect turbulence in front of, over, beside, and 10-20 times the height of the obstacle downwind. At Spaceland, turbulence in the primary landing areas most often occurs south of the berm and hangar in a north wind and east/southeast of the hangar in a west wind.

Because turbulence is unpredictable, it is easy to be lulled into an unwarranted sense of safety. If ten jumpers on one load fly through the same cube of potentially turbulent air in a 90-second period, four may experience nothing at all, five may get “bumped around”, and one may have a partial canopy collapse. It is therefore critical that we be wary of areas where turbulence is likely even if turbulence has not yet caused trouble there today.

Many jumpers have experienced turbulence only as “bumpiness” under canopy. That is certainly the most common manifestation of turbulence. However, bumpiness is not the only consequence of flying through turbulence. Turbulence can create unstable landing conditions. These unstable conditions can result in the canopy moving suddenly in unexpected ways or even collapsing very close to the ground. This has injured or killed jumpers. Canopies are fabric wings that are vulnerable to collapse. When turbulence collapses a canopy it typically does so suddenly and close to the ground. Fortunately, most collapses are only partial, and re-inflate promptly. Occasionally, a canopy will not recover in time for a safe landing.

Varying appreciation of the risk of turbulence plays a part in the varying wind speed limits among jumpers. Often because the new jumper has not seen or experienced the dangerous consequences of turbulence, he or she discounts it as just “bumpiness” and not a reason to stay on the ground. This was certainly true for me as a new jumper. I traveled to a temporary drop zone set up for spring break. The appeal of this DZ was the promise of beach landings. Unfortunately, after arrival, we discovered that the DZO had not done the FAA paperwork right, and beach jumps were not allowed. The alternate DZ was near the beach, but it was surrounded by turbulence-generating buildings on three sides. I made three jumps there in turbulence before I decided to come home. A few days later a jumper with more than 10,000 jumps died at that DZ due to a canopy collapse (The fire department recovered his body from the attic of the condo that he landed on). That incident forever changed my personal appreciation of the risks that turbulence poses.

The smartest way to deal with turbulence is to avoid it. Learn to predict turbulence, watch other canopies for evidence of turbulence, and be willing to stay on the ground when conditions are risky for turbulence.

Scroll down for maps of turbulence risk areas at Skydive Spaceland based on different wind directions–but keep in mind that turbulence can also occur in other areas for reasons you might not expect (such as the wake turbulence from a jumper who landed shortly before you).

The linked article is EXCELLENT. I highly encourage all jumpers to read it (or read it AGAIN): http://www.performancedesigns.com/docs/Turbulence-Hazard.pdf

Reprinted with permission from Jim McGraw

Skydive Spaceland-Houston Turbulence Risk Areas

Turbulence risk areas: Winds out of the north
Winds out of the north (click to expand)
Turbulence Risk Areas: Winds out of the south
Winds out of the south (click to expand)
Turbulence Risk Areas: Winds out of the east
Winds out of the east (click to expand)
Turbulence Risk Areas: Winds out of the west
Winds out of the west (click to expand)

Hop and Pop Skydiving Smarts

Skydiving hop n popIf you’re a people watcher, observing skydivers preparing for hop and pop skydives (low-altitude exits) is a lot of fun. You see everything from cool-cat, ho-hum, highly experienced swoopers practicing their craft to jumpy first-timers doing their first exits below full altitude, hoping with all their hearts to be stable enough to deploy within the 5 seconds required to graduate from student status. 
With all that observation, you tend to notice a lot of people doing things right as well as some things that are frequently missed or done incorrectly. So here are eight tips on doing a safer hop and pop:
  1. Plan your exit order with any other hop and poppers before you board the plane. The person with the highest wing loading should exit first, since they will be descending more quickly. Knowing this before boarding lets you load the plane efficiently in the correct order so you don’t end up climbing over or around each other before exit, reducing the chance that you’ll snag pins, flaps, and handles in the plane (bad juju!).
  2. Know what to do at and with the door. It’s hot outside these days, so we’re opening the door at about 1,500 feet so we don’t all get heatstroke. But you shouldn’t just open the door at 1500 feet without doing a couple of things first:
    1. Remove your seat belt and ensure those jumpers near the door have their seat belts off as well. If there is an aircraft emergency and the pilot tells us to bail, we all want those jumpers to be able to exit as quickly as possible!
    2. Check the jumpers up closer to the pilot to make sure their belts are off too. Usually there will be an instructor or experienced jumper on board who will give you a thumbs up when all is clear.
    3. Check your handles and buckles, get a pin check, and secure any loose accessories (gloves, helmets, etc.) before opening the door.If you’re unfamiliar with operating the door of a Twin Otter or Caravan, please check out this video!
  3. Sit safely. Usually as a hop and popper, you’re sitting on the floor near the door and you may be tempted to lean on the wall, bulkhead, or the end of a bench. As with any ride to altitude, you should make sure you are not moving around a lot and especially not scrunching the back of your rig on things as this can pull or bend your pins (neither of which is good!). In particular, some aircraft have rails on the bulkheads that are at a perfect height to mess with your reserve pins if you are not careful, and the ends of Otter benches are a pretty good height for that too. Very experienced jumpers have pushed out their reserve pins on the ends of benches! You can safely lean straight back on things IF you are gentle and don’t move around a lot, but it’s even better to avoid that.
  4. Check the spot AND check for traffic. When the door (red) light goes on, do any of the above checks remaining and open the door if it isn’t already open, check the spot (can you find and make it back to the DZ from here?), and check for traffic. The last item is one that we often see neglected, but it’s a really important one. Usually the pilot will know about any other aircraft in our airspace and will not turn on the red light if another aircraft is in a hazardous spot. However, other pilots don’t always use their radios when they should and/or don’t always have perfectly working radios. So there is always a chance that another aircraft could be trailing your jump plane where you could hit it if you jumped (resulting in a really bad day for everyone). It’s critical to look for such traffic and ask for a go-around if necessary in order to jump into clear airspace. Look down, all around, and especially aft for other traffic flying in the same direction as you before jumping.

    Also check for other canopies on days when we’re flying multiple planes; you don’t want to jump right on top of anyone! Our aircraft operations should prevent this, BUT stuff happens–premature deployments, accidental handle grabs on group jumps, etc., that could result in a canopy being open in our airspace higher than planned. If canopies are in the landing pattern, they’re low enough that you’re good, but if you see they’re too high or you’re not sure, ask for a go-around or for an instructor to take a look for you.

  5. Don’t go until the pilot turns on the green light. There’s usually a good reason why the light isn’t on, and often it has to do with traffic. Likewise, if people are exiting (at any altitude) and the green light is turned off, later groups/jumpers should not exit. There’s a good chance that the spot has gotten poor or a traffic issue has just been identified, and this is the pilot’s way of telling you not to exit.
  6. Ensure an appropriate delay when multiple people are doing hop and pops. Just like at full altitude, you need enough separation between jumpers that each one gets to open in his/her own vertical column of air. Leave at least 4 seconds between jumpers if the airspeed is high, and leave more time with lower airspeeds. Learn more about optimal exit separation…
  7. Don’t scrape your rig on the door! Far too often, we see hop and poppers do creative exits out of the plane that put them at high risk of raking their rigs on the edges of the door, and this is dangerous for a variety of reasons. (To be fair, the problem is definitely not confined to hop and poppers!) Opening flaps and pulling pins on the door puts you at risk of deploying pilot chutes and/or canopies over the tail of the aircraft, which puts the jumper, the plane, and everyone in it at risk. It also puts the jumper at high risk for having a horseshoe malfunction, which is no fun at all. Be aware of how far off your back your rig is, and don’t exit in such as fashion that you put your rig close to the edges of the door as you move through it.Common exits to handle with care: 
    1. Swinging out from the bar into a back flip: This can scrape off pins on the bottom edge of the door and puts the back of your head at risk of slamming the floor. Safe as long as your rig and head are well clear of the bottom of the door when you pass through it.
    2. Hopping out head-down, with your head toward the prop: Safe as long as your rig is well clear of the bottom of the door when you pass through it.
    3. Hopping out in an aft-facing sit: Safe as long as your rig is well clear of the front of the door when you pass through it. This is more of a challenge when exiting with another person with grips between you; both of you need to be aware of the door edges and not put your rigs close to them.
    4. Diving exit: Safe as long as you don’t scrape your rig along the floater bar/top edge of the door.
    5. Floater exit: Safe as long as you keep your rig well clear of the sides of the door when rotating from inside the plane outward to a floating position. If you’re jumping with another person and you’re nearer the front or rear of the door, make sure your rig rotates through the center of the door so it’s as far from the door edges as possible.
  8. Don’t hit the tail! This is tough to do in our Super Otter, but much easier to do in a Super Caravan or any other low-tail aircraft. Before exiting, make sure that the plane is configured for your exit (slowed down and not climbing, or not climbing as steeply in the Otter). The pilot will usually slow down and level off dramatically so it is clear that it’s jump run time. Once it’s time to exit, don’t do a big jump upward off the door and if you’re jumping a wingsuit, keep all wings closed for at least three seconds after exit.
Blue skies and safe hops!

Skydive Spaceland Hosts First Transitions 3-Way Speed Star Competition

https://dallas.skydivespaceland.com/wp-content/uploads/2014/08/104.jpgOn August 3, 2014, Skydive Spaceland added friendly competition to its Transitions program for recent graduates of any skydiving program. Skydivers with A licenses up to around 100 jumps enjoy free coaching from two available USPA Coaches/experienced jumpers every weekend. Also, during the first weekend of every month there is an event with additional mentors focused on a particular skill such as dive and dock, turns, and linked exits.

August’s Transitions event was a 3-round, 3-way Speed Star event in which each mentor formed a team with two jumpers who each had under 100 jumps. The event followed a modified version of classic 10-way rules, with all jumpers leaving from behind the so-called “suicide line” from the leading edge of the Otter door to the opposite bulkhead corner. Each mentor provided point-of-view video for judging purposes, which allowed the event to run at no additional cost to the competitors.

Despite significant weather challenges on both weekend days that pushed the Saturday event to Sunday afternoon, five teams persevered and completed all three rounds in short order once jumping recommenced. It was the first skydiving competition for many of the mentors as well as the mentees.

“I learned more in these 3 jumps than in the last 20,” said Cale Curry of third-place team 101 JumpStreet.

First place went to Double Ds, with recent graduates Dave Baxter and Doug Brooks jumping with mentor Steve Thompson. Dave and Doug received first prizes of 20% off a Sun Path Javelin harness and container system from the Skydive Spaceland Pro Shop.

Double Ds scored a fast 14.64-second round 3 to get out of a near-tie with Bald Beaver Lovers; only 0.35 seconds separated the two teams after round 2. Double Ds scored 60.8 seconds across the three rounds, averaging 20.27 seconds per round. Bald Beaver Lovers scored a total of 76.4 seconds, and 101 JumpStreet came out of a tie for last after round 2 to leapfrog into third with round 3, scoring a total of 110.42 seconds.

“I am a much better and safer skydiver today than I could have ever expected to be at this point without this [Transitions] program,” said Dave Baxter of Double Ds. “This program is the reason why I am still skydiving.”

See all team and jump photos

Future 2014 event focuses include:

Does Your Canopy Turn When You Land?

Does your canopy turn when you land?

Does your canopy turn when you land? The most common cause of this is when the pilot looks to one side instead of straight ahead, creating a chain effect. We tend to go where we look. As you enter your flare, if you look down and in either direction, your body will want to go that direction. Try standing in front of a mirror and hold your hands at chest level a few inches in front of your body, then look down at your right foot. Look back in the mirror; you will more than likely notice that your right hand is slightly lower than your left hand.

When you do this under canopy, this starts a slight turn to the right. At the same time, you will tend to reach towards the ground with your right leg, unevenly loading the harness and thereby adding to the turn. As the turn progresses, your instinct to reach out to break your fall starts to overpower your training to fly and of course, the further you reach the more aggressive the turn becomes.

How can you fix this? Simply by looking ahead where you want to go. On final, you should be looking ahead of you with your focal center point approximately 45 degrees below the horizon. Once you have entered the flare and begun to swing forward towards the leading edge of your canopy, you should shift your focus directly ahead, a couple hundred feet in front of you. You should be aware of what’s in front of you. This will also help you keep your flare even as you finish. It may help you to lean forward over your hands after you have reached chest level. This will make finishing your flare evenly easier and help keep your focus ahead of you. Remember to look where you want to go.

As always, if you have any questions about canopy flight, ask one of our instructors!

Long Hair? Avoid This Skydiving Malfunction

Containing long hair for skydiving

Ah, the feel of freefall on your face, your hair whipping in the wind… wait a minute! If you have long hair (past your shoulders), hair whipping around in freefall is actually a bad thing.

Aside from the Gordian knot that often results from 120mph of wind whipping your hair around, hair that is very long can actually cause a malfunction when you deploy your parachute. This is highly unusual but it has happened, and to very experienced skydivers; here’s one jumper’s story of a hair-main entanglement that turned into a hair-main-reserve entanglement. Luckily, the jumper was eventually able to clear the mess and land her reserve safely with only some scalp soreness, but it’s an experience no one would want for sure.

There are a couple of ways to capture your tresses safely and comfortably for skydiving. Trust me… tucking a long braid down the back of your jumpsuit is not comfortable under a rig, nor does it always stay in place. And a braid whipping around in freefall can be a significant distraction from that important stuff like checking altitude, deploying, etc. Here are some options; comment if you have any additional ones! 

  1. Braid it and pull the braid up straight up over your head under your helmet (you are wearing one, right?). If you have been jumping with your hair out of your helmet and switch to pulling your braid in, you might find that you need a size larger helmet to fit everything securely.
  2. If your hair is super long, you might need to wind the braid(s) around the crown of your head to contain it all.
  3. With short or long braids, consider using a stretchy skullcap (ideal) or bandanna to keep everything neatly contained and your hair out of your eyes. These are also really useful at the wind tunnel, and you can get them at most any sportswear store for $15 or less. There is also the currently popular Buff-style head/neckwear, which you can usually get for free or very little as a branded promotional item from a skydiving gear manufacturer, drop zone, or tunnel.
  4. Another option is to wrap your hair into a bun, tie that with an elastic, and tuck the whole thing under your helmet liner.

With your hair taken care of, you can focus on rocking out your skydive instead. 🙂 Blue skies!

Skydiver Training Tip: Practice Before You Leave

Practicing a skydive

When I was still in school, I was a serious last-minute crammer before tests. Study ahead of time? Not my strong suit. So there I would be at 1 a.m. before a big exam, studying my tail off. 5 minutes before the test, still reviewing. At least I studied, right?!

When you are learning to skydive, studying has a huge payoff as well, whether you’re reviewing things at the last minute or (preferably) with more time to truly learn the new skill. When you’re learning something completely new like skydiving, practicing what you can beforehand and visualizing proper performance are key to helping you get it right the first time (or at least with a minimum of effort!). But now we reach the sticky point: What do you study?

Here’s where you can be proactive about your education: Ask your instructor to talk you you about what your next dive flow will include, and how to practice it effectively at home. Keep in mind that if you stop jumping in the middle of a busy day and your instructor starts to jump with someone else, that person will take priority on the instructor’s time. However, if your instructor has even a few minutes to help you out, he/she will be glad to help you prepare for your next dive so you can practice correctly at home. Practicing correctly is essential; the last thing you want to do is drill something incorrect into your head and take that into the sky.

Make sure you have your instructor’s input before practicing at all, and once you know what to do, think about it, practice, and visualize so you rock out your next jump!

Movement Dive Policies

Horizontal movement jumps are fun… free flowing… and inherently potentially much riskier than jumps that fall straight down. Any jump in which jumpers plan horizontal movement other than tracking for separation after breakoff requires good planning and execution to minimize the additional risks to everyone on the load.

Above photo by Daniel Angulo

That responsibility is 100% the job of the organizer(s) doing movement jumps, and it should not be taken lightly.

Only Spaceland-approved movement leaders may lead movement jumps of any size at Spaceland.

Spaceland has developed several policies for tracking/angle jumps with the blessings of our staff and experienced tracking organizers. Please read all of and follow these guidelines to help keep us all safe.

Movement Jump Safety Basic Guidelines
  • Design your jumps and select your group with safety in mind. Consider jumper experience, flight path, group size, and winds to develop a plan that will minimize any chances of compromising other groups’ airspace. Then discuss the plan with the rest of your load, adjusting as needed to maximize safety. If you need help, ask a more experienced movement leader and/or consider getting coaching before leading these jumps.
  • Use the dry erase board in the loading area to draw your flight path for the jump, and make sure all other movement groups on the load do as well, so you can visualize the plans and adjust as needed to divide the airspace safely. Jump run  is marked with a black magnetic arrow.

    Horizontal dive planning board (Spaceland Houston)
    Movement jump planning board (Spaceland Houston) – Click to expand… Can you spot the problem with this flight path? If not, please don’t lead any movement jumps until you can.


  • DO NOT break off towards the line of flight.
  • No more than 2 movement groups of each discipline per load without expressed approval from an S&TA or movement evaluator.
  • Always have a straight-down jump as a backup plan in case conditions such as clouds, changed jump run direction, modified exit altitude, etc., will make your primary plan unsafe.
  • New to these jumps? Jump with an experienced organizer/coach until you fully understand the risks and have sufficient technique and awareness to not increase these risks.
  • Each jumper should carry a mobile phone in a secure pocket, and program the following three numbers into it: Manifest (903-364-5103), ICE or In Case of Emergency number (family/responsible person for us to contact in case you are hurt), and the jump organizer. Call 911 first if you land out and are badly hurt, and call us second. Call us also if you land out but are unhurt to let us know you are OK and if you need a ride. Also call your jump’s organizer with the same information.
  • These jumps have a higher chance of landing off the DZ. Also, since you’ll open away from the usual jump run, we may not see you if you land out or have a malfunction. Don’t expect a ride if you land out; we’ll do our best to get you if we see you, but assume you’re on your own. If you have a cutaway, note where you opened so we can help you find your main. Identify an appropriate alternate landing area right after opening and fly conservatively to it, then make the phone calls described below.
  • Equipment Recommendations: We HIGHLY recommend AADs and audible altimeters for all skydivers (we can’t encourage this enough!). Many organizers will not include jumpers without AADs and audibles in their group, with very good reason!
  • Make sure to manifest your group as a movement jump.  If you don’t declare your intentions with manifest, the increased last-minute load organizing may result in you missing the load.
Suggested Minimum Experience for Movement Jumps
Jump type/role Minimum experience Notes
Movement jump with coach 100 jumps Must jump with an experienced movement coach/organizer.
Solo movement jump 200 jumps Must be an approved movement leader.
Small group follower (3 jumpers max) At least 100 jumps We recommend that your first 10 movement jumps be with an experienced organizer/coach. After at least 100 of these small group jumps, you may be ready for larger groups.
Group movement jumps (4+ people) At least 200 jumps We recommend that your first 100 movement jumps be small groups with an experienced organizer/coach before flying with groups of 4 or more jumpers.
Lead movement jumps At least 750 jumps Leaders must be approved by Spaceland before leading anything. We recommend that leaders have at least 200 tracking jumps as a follower and take a leading course or attend a leading briefing.

* Individual experience and skill vary widely. You may be more or less skilled at a certain jump number than others, so please consult with our safety officers/instructors/more experienced organizers before trying new types of jumps or if you have any questions at all.

Approved Leader Requirements
  • You MUST be a Spaceland-approved leader to lead any movement jumps! See above minimums table. Consult a movement evaluator, S&TA, or the drop zone manager for more information on becoming an approved leader.
  • Leaders must be effective communicators who work well with others. Cooperating with other groups/leaders is a crucial component of creating a safe movement jump culture.
  • Make a flight plan that ensures you won’t fly into others’ airspace and lets your group land on the DZ. If your jumper(s) land off due to poor planning, you may be barred from organizing these jumps until the problem has been solved.
  • Screen all jumpers for skill/experience needed for the type/size of the dive. We suggest that you do not allow open participation without regard for each jumper’s skill and experience (no zoo dives).
  • You are responsible for the safety of yourself, your group, and its plan. Select your skydivers and your plan carefully.
  • Leading on your back is NOT recommended.
  • Design your skydive to maximize the safety of all groups on the load.
  • Design your skydive around the least experienced flyer.

Ensure that everyone on the jump knows:

  • These jumps have an increased risk of forceful freefall collisions due to combined horizontal/vertical movement, and many people can be in your blind spot. Reduce risks by keeping groups small, especially with less experienced jumpers, and thoroughly briefing good technique and awareness.
  • Getting clear of the normal jump run is essential.
  • These jumps require a safety-focused plan. Know your jump’s plan and DO NOT deviate from it unless danger requires it.
  • Determine where other jumpers/groups are before flying back towards jump run and the landing area under canopy.
  • Know what to do if a jumper is left behind in freefall.

Exit Order

  • Leaders should be able to identify a wide variety of exit order considerations including scenarios for large groups, multiple moving groups, high winds, variable jump runs, wind shears, etc.
  • Leaders should value horizontal separation over vertical separation when considering exit order.


How do I get approved to lead movement jumps?
  • See minimum requirements above
  • Talk to the DZ Manager
  • Complete a written questionnaire
  • Attend a course or briefing about leading movement jumps
  • Conduct a supervised skydive with a Movement Jump Evaluator

As with other type of skydives, flyers involved in incidents caused by unsafe planning/execution may be prohibited from jumping until they obtain further training/guidance from organizers/safety officers.