What’s most important, an on-heading opening or a fully open canopy?
(Video follows article)
Many manufacturing industries educate their employees about hand safety, especially when they have to work around heavy machinery. We don’t tend to talk about hand safety too much in skydiving, other than to recommend not wearing rings that can get hooked on things and to wear gloves when it’s really cold. Our focus on injury prevention usually focuses more on landings!
That said, there is a type of hand injury that can happen very quickly in skydiving, with very little in the way of safe options to resolve the situation.
First, how many of us put our hands on our risers while our main canopies are opening? Probably most of us, so check this out… if you have a violent line twist into your risers, and your hands are on those risers, it is possible for the twist to trap your finger(s). There is a LOT of tension on your risers in this scenario, and you will not be able to get your finger out… just ask Camilo.
Camilo deployed at around 4000 feet after an uneventful movement jump only to have a ghost-pepper-spicy deployment with an unstowed right toggle on his Comp Velo 90, loaded at 1.9:1. As the canopy started to inflate, his hands were gripped on the risers, ready to use them if/as needed to manage the opening.
Click to expand photo
As parachutes often do, his canopy did the unexpected, initially turning right as it was still inflating (in the direction of the unstowed brake). As the turn continued, Camilo pulled his left rear riser to counter the turn. Note his left middle finger is through the excess brake line of the stowed brake… we’ll come back to that.
Click to expand photo
On full inflation, the canopy finally did as it was being told; the combination of the unstowed right brake and left rear riser input whipped it sharply back to the left to create the line and riser twist, trapping Camilo’s left middle finger in the twist.
Click to expand photo
As the canopy added a few more twists and started to dive, he reached higher into the risers with his right hand, resulting in a very brief but undoubtedly terrifying moment where his right hand was trapped as well (this is the stuff of TRUE skydiving nightmares!). But Camilo yanked his right hand free and kept his wits; he knew this canopy was definitely not landable, so he had to cut away even though he worried the finger trap would keep the main attached to him. With his finger still trapped, about 10 seconds after the twist started, he did about the only thing he could do… he pulled the cutaway handle.
Click to expand photo
The main released cleanly and the reserve deployed immediately into line twists 2.0, which he was able to kick out of after several seconds of working that problem. Only then did he take a look at his left hand to realize the brake line looped around his finger, and/or the edge of the departing main riser, had sliced off part of his finger!
Click to expand photo
Despite the pain from his injury, Camilo was able to fly his Optimum to a comfortable stand-up landing on the DZ. Unfortunately, the doctors were not able to save his fingertip.
Good news: After a little time off to heal, he went right back to jumping, starting with fun jumps and video jumps, and now tandems again.
Props to Camilo for breaking off and deploying at a smart altitude of 4000 feet, leaving himself time and altitude to deal with a terrible issue while still having time and altitude to land safely!
Can this happen to you?
Obviously the tension on risers and lines will be higher with a highly loaded, high-performance canopy, but all of our risers and lines are pretty heavily loaded with our body weight under them. Any canopy turns (intentional or otherwise), common with line twists, only increase the load and potential for injury if your fingers are trapped in them.
Keep in mind that if you have downsized and/or changed to a higher-performance wing, problems on opening such as line twists will generally develop much more quickly and become much more violent than on your larger student/early canopies. Habits such as grabbing the risers to manage the opening can have far different results than they used to!
“People need to understand what damage parachute lines (and risers) are capable of when they’re loaded up,” commented Stephen Rosier, the DZ manager. “Also keep this in mind when you consider CReW and close canopy flocking, especially with high-performance canopies.”
Prioritize keeping your body aligned under the canopy, even if it’s turning.
How do you avoid this scenario?
The best way to avoid this is to keep your hands completely away from your risers until the canopy is open.
If you do put your hands on your risers, wrapping your fingers around them may not be the best plan in case of a line twist down into your risers like this. Also, it’s probably a better idea to keep your hands lower on the risers/closer to their anchor points on your shoulders where they are less likely to get caught up in a twist, moving them up only when you know they won’t get trapped.
Consider your priorities during the deployment sequence. What’s most important, an on-heading opening or a fully open canopy? (Ideally both, of course, but if you have to pick I’d sure go with the open canopy.) Prioritize keeping your body aligned under the canopy if possible, even if it’s turning. As soon as it is open and flying, it will be a simple, non-dramatic task to put it back on your initial deployment heading with a rear riser.
Why? A parachute can’t fly normally when it’s not fully open. Your normal toggle and riser inputs may have very abnormal results, in other words. This case is a great example: The canopy initially turned the opposite way of both toggle and riser inputs while it was still inflating. Once the canopy inflated enough to load up all the lines, the left rear riser input plus the unstowed right toggle created the snap turn back to the left and the line/riser twist.
If you do feel the need to add control inputs to “manage” the opening, you’ll likely get more out of harness input than risers, and bonus: You won’t risk getting your hands caught in a twist.
Keep your lines in good shape to reduce all sorts of canopy spiciness on opening, including line twists.
We’re all adults here, and we all know that showing up late for a date can make you miss out on… well, whatever you had planned! 😳 Your date with the airplane for a skydive is no different, and few of us ever miss that!
However, there are a LOT of skydivers who can be really, really bad about being late to our date with the loading area on the 5-minute call before that airplane pulls up. There are a lot of potential reasons why, one of which is better than others. About the only really good reason to miss that mark is if you’re doing back-to-back jumps with a training team or student and you literally aren’t even on the ground yet; in this case, the rest of the load will know who’s missing and what they’re doing so they can be included in the loading order in absentia. If you’re doing a back-to-back, you probably already know you need to run and get to the loading area just as soon as you can for all the reasons to follow…
For the rest of us, there is no good reason to miss that 5-minute call and a whole lot of reasons why you shouldn’t. Here are 11 reasons why you SHOULD be in the loading area, fully geared up and ready to get on an airplane, on the 5-minute call.
The entire load is present to help decide the exit order before the plane shows up and you can’t hear each other talk. Discussion may be required, especially if movement groups are present and have differences of opinion! (Nah, that’ll never happen… 😉 )
You’ll be ready if the plane shows up early–sometimes it really does happen, I’ve seen it! Rushing to the airplane when you’re late is a really great way to have a really bad skydive…
The loader can see who’s on the load and have time to sort it out if anyone is missing/overmanifested without slowing down aircraft operations (more jumps in a day for you)!
Instead of hunting for late jumpers, loaders/ground crew can spend more time on the essential task of watching canopies and landings in case they need to respond to cutaways, off landings, and/or injuries. (How terrible would you feel if ground crew didn’t see someone hurt themselves on landing and respond immediately because they were hunting for you while you were being lazy to the loading area?)
You’ll have a few relaxed minutes to review your jump and get in that last dirt dive/mockup (hint: MORE SUCCESSFUL JUMPS when you are more mentally prepared!).
Movement groups will have time to review the dropzone aerial with all movement groups on the load to make sure flight plans don’t endanger anyone (much more easily done without airplane noise and boarding urgency!). Let the straight-down groups know where movement groups plan to open.
You’ll have time to flirt with meet the new guys/girls on the load.
You can ensure your whole group is there and ready to go on time.
You’ll have time to make friends with the loader/ground crew (they’ll be the ones finding your gear if you chop!).
You’ll get to weigh in on where the party will be later!
A few lucky dropzones, such as Spaceland Houston, Dallas, and Florida, have air-conditioned packing/hangout areas that often tempt us to linger inside where it’s cooler on hot days, rather than heading to the outdoor loading area. I think one would be hard pressed to find a jumper at such a dropzone who hasn’t done it–we are ALL guilty! That said, we all should recognize the many reasons why being in the loading area by the 5-minute call truly improves safety, and strive to be a better example of safety. The life you save may be mine–or your own!
Summary
The bottom line is, rushing or being late is the first in a series of events that can cause a poor skydive, misunderstanding or serious incident. Being on time or even early is an important part of preparing for a great skydive, and positive safety culture for the whole dropzone.
Want a few free skydives? Tell your friends to come skydive with us! Every single new tandem skydiver you send our way gets YOU $30 on your jump account! That’s a free skydive if you’re licensed, or $30 towards your next skydive if not!
Ask our office for a bunch of Skydive Spaceland referral business cards and hand them out to prospective new jumpers at work, at social outings, or distribute them at local businesses. For every new tandem skydiver that brings us one of those cards with your name on it, you’ll get $30 on your account. No bag limit!
You can also send us an email to get an online link just for you that you can share on social media. Skydives booked through that link will give you that $30 credit!
Don’t forget to follow us on social media for the latest news and sales!
A Tandem skydive adventure allows you to experience the thrill of a lifetime!
Jump out of a perfectly good airplane from 14,000 feet!
Freefall at 120 mph!
Jump harnessed to an experienced instructor after a brief class
Pull your own ripcord for a peaceful, 5-minute parachute flight and a soft, on-target landing
Get a professionally edited tandem skydive video package to prove you did it and relive your experience of a lifetime!
Note: You must be at least 18 years of age, bring a valid photo ID, and weigh less than 265 pounds to tandem skydive. For more information about who can skydive, what to wear, and more, please see our Frequently Asked Questions page.
Video/Photo Options
Don’t forget to capture your tandem skydiving adventure forever with our professionally edited high-resolution (1080p) video of your jump set to your choice of music style! Let us document your skydive so you can relive your experience of a lifetime with friends and family (and prove that you actually did it)!
No matter which package you choose, your video/photos will be delivered to you before you leave the drop zone on a Spaceland Flash/USB drive–this makes sharing your video and photos with your friends and family via Instagram, email, Facebook, Youtube, etc., as easy as stepping out of a plane. 🙂
Selfie Video
$129 + tax
If you just need proof, this is it! Video of your jump, parachute flight, and landing filmed by your instructor.
PRO Video+Photos
$179 + tax
Professional videographer flies with you to film your experience from gear-up to landing! Includes video and photos.
ULTIMATE Video+Photos
$229 + tax
Everything in the Selfie and Pro packages COMBINED! You get all the best angles and have the most fun!
Hey, new skydiver! Do you feel confused when picking your gear up off the field? Do you constantly hear “YOU’RE DRAGGING!” being shouted from across the landing area? Do you want to look more like a PRO on your way in?!
There’s a whole lot of information thrown at you as a new skydiver, and some of the finer details can slip through the cracks. Hopefully you get a laugh or two while learning a thing or two in this great video.
Following these tips after every jump will help reduce wear on the gear and also make you a lot more popular with the packers and riggers! (These are two groups of people you really want on your side!)
Have you ever struggled to understand what a parachute landing pattern is and how to modify it for different wind conditions? Check out this video! (Another fantastic edit by Nick Lott!)
When we were kids, pretty much everyone who took care of us taught us to look both ways before crossing any street. Right? This was probably one of the rare pieces of advice most of us didn’t challenge too much, because no one wants to get hit by a car!
Why, then, do we not apply the same logic to crossing the runway at an active airport, especially one as busy as a dropzone? At drop zones where jumpers must cross the runway on foot to get back to the staging area after landing, jumpers crossing the runway in front of operating aircraft (or almost doing so) is inexplicably common. This is called a runway incursion, which is defined as “any occurrence at an aerodrome involving the incorrect presence of an aircraft, vehicle or person on the protected area of a surface designated for the landing and take off of aircraft.”
Heath Richardson, chief pilot for Skydive Spaceland Dallas, comments, “Runway incursions have directly caused many major aircraft accidents worldwide, resulting in significant loss of life. It’s not just the individual jumper and a single pilot, but up to two dozen (or more) souls aboard each jump plane that are potentially endangered.”
Skydiver/runway incursions are likely a simple result of jumpers being jazzed up on adrenaline after a skydive and being distracted by discussing the awesome jump with your friends, but regardless of why they happen, there are both obvious and less obvious reasons why this is a really bad idea.
Reason 1: It’s Really Bad for Everyone’s Health (obvious)
Those spinny things on the fronts of most commonly used skydiving aircraft will do even more damage to you than a car! In the contest between you and a spinning prop, you’ll both lose. You’ll be severely injured at best, and the prop strike will require an engine teardown before returning to service–also at best. At worst, you’re dead, the pilot and passengers are injured or worse, and the airplane sustains further damage to its hull, wings, and/or landing gear in addition to the prop and engine damage. #dontbethatguyorgirl
Reason 2: Airplanes Aren’t Cars (kind of obvious)
“This baby handles like it’s on rails!”
“This thing stops on a dime!”
Said no one about an aircraft while taxiing, taking off, or landing, EVER.
Airplanes are designed to fly, with ground driving (taxiing) performance as a distantly secondary priority. Taxiing is what you have to do with an airplane to get it to and from the runway for its real job of flying. An airplane on the ground, whether it’s taxiing slowly or going faster for takeoff or after landing, is not a nimble and responsive machine like a car. If it’s taxiing slowly, it can at least stop quickly, but if you cross the runway in front of an airplane that’s rolling at speed for takeoff or just after landing, it simply can’t stop very fast and it can’t even turn off the runway to avoid you without risking major damage. We all know how poorly it can go when a car runs off the road…
Because airplanes aren’t nimble on the ground, pilots don’t like to cut it close with people crossing in front of them. They have to take evasive action long before an unaware jumper may even be aware there is a problem. Help a pilot out… NEVER cross the runway without looking both ways to see if an airplane is pointed at you. If it is, don’t cross. Simple as that.
Awareness = Prevention
Runway/airplane awareness tends to be lower for jumpers who mostly jump at dropzones where they never or rarely have to walk across the runway, such as Skydive Arizona. Conversely, jumpers who call Skydive Perris or Skydive Spaceland Dallas home are pretty accustomed to crossing the runway routinely, so they will often be more aware of proper runway crossing procedures. Visitors to such drop zones, or regulars who land out on the other side of any active runway, should do the following:
If there is a designated runway crossing point, only cross there. Yes, it may be a longer walk. Land closer to the crossing point next time.
Spaceland Dallas landing areas and runway crossings
Once you reach the crossing point, look both ways for airplanes pointed at you (if you haven’t already done so while you were walking up). Don’t just look on the ground, also look up off the ends of the runway in case an airplane is approaching to land. Don’t count on hearing the airplane, especially if you still have your helmet on and/or are wearing earplugs or earbuds playing music. Also note that aircraft may be coming from either direction at any time, especially on a light/variable wind day; don’t assume you know the aircrafts’ traffic patterns as patterns may change with the winds throughout the day just like canopy landing patterns/directions. One more thing: Even if your dropzone only operates one aircraft, other aircraft may use the runway especially if it’s a municipal airport. Don’t just check the dropzone aircraft off and stop looking for aircraft; keep your head on a swivel for ANY operating aircraft until you’re back in the staging area.
If an airplane is pointed at you, DO NOT CROSS. Stop double the airplane’s wingspan away from the runway (often there will be cones or other markers you should stay behind) and take a knee (kneel) to show the pilot you see them and will not cross in front of them. Look nearby for other jumpers from the load who may be approaching to cross and make sure they stop and take a knee as well.
If no airplane is pointed at you, cross but don’t be slow about it. The runway is LAVA!!!! Don’t stop, hang out there, and chat with your friends! (Seems silly to say, but we’ve seen it happen more than once!)
“It seems that the mindset is often one of: ‘There are occasionally airplanes where I skydive,’ ” says Richardson. “The opposite is true and should be remembered at all times while on any airfield: ‘I am on an active airport, where I am a guest as a skydiver.’ ”
Fenced RV storage just west of the peas. Stephen Rosier says if you see this view, you may have already made a mistake or two…
UPDATE (10/10/22): We now have a secure gate on our side to access this area (in the southwest corner, the one closest to the hangar).
It’s still not ideal to land here for sure, but we should be able to get you out without too much trouble. We would still recommend avoiding this area when possible.
Please be advised that one of the fields just west of our D and previously B-C license/tandem landing areas is now an RV storage facility. This former farm field is adjacent to the DZ property and there are two issues with this area:
It will ultimately be filled with RVs, so it won’t be a very open landing area anyway.
The property is fenced with chain link and barbed wire on top.
What does this mean to you? One of our outs to the west, most often used when winds are strong out of the east, is no longer a good option for the reasons mentioned. If you do happen to land here, walk to the southeast corner (the one closest to the hangar) and wait for us to unlock the gate to get you out. Don’t damage your gear or the fence by climbing it.
If you are a B-licensed jumper: This changes one more thing for you (sorry). With the addition of a large hazard adjacent to what used to be the B-C license landing area north of the D/tandem area, this area is now limited to C/D licenses only. You will need to land in the general landing area to the east of the runway unless safety dictates otherwise, until you earn that C license. Please see our updated briefing document to visualize the landing areas.
TL:DR: It is not a good idea to land here.
No one likes landing off the drop zone, but if you skydive eventually it will happen! Landing off should never be cause for panic or poor decisions, because we literally train for this from our first solo jump onward. We know how to handle it.
If the decisions you made up higher have boxed you into landing here, don’t panic! Make the best of a bad situation by landing SAFELY. No matter where you land, getting hurt makes things worse. Stay calm and follow the landing priorities you already know, and you’ll be sharing the story about getting out of “jail” over sunset beers at the DZ rather than from a hospital bed.
LANDING PRIORITIES
Land with your wing level and flying straight
Land in the middle of a large, open, clear area
Flare (at least half way)
Prepare for a PLF
Once you have landed safely, be patient; it may take us a little time to get the gate unlocked to get you out. If you have a phone on you, establish communication with manifest: 903-364-5103. (Save this number to your phone!)
Airplanes are a lot like people–individual (sometimes ridiculously so) in their needs and tolerances. For example, you can safely get away with sitting far back in the cabin of the Super Otter, but not so much in the Super Caravan. This is the reason for a recent policy change in how we load the Super Caravan here at Spaceland (seating arrangement).
Compared to the Otter, it’s much easier to overload the tail of the Caravan when boarding because the airplane is already more tail-heavy even when empty. As a result, putting too much weight in the tail, or even the right amount of weight too far back in the cabin, can actually tip the airplane backward, crashing the tail to the ground and taking the airplane out of service until the tail is repaired. Ain’t nobody got time fo’ dat! We want to fly the plane and you want to jump it!
In our Super Caravans, everyone should sit facing aft when boarding, whether you’re on a bench, in the copilot seat turned to face aft, or on the floor. This puts the heaviest part of your body (torso and rig) further forward, which is a better balance for the weight. No more than three people may sit on the floor for taxi, takeoff, and landing. No one may sit on the cargo shelf aft of the door at this time).
Above 1500 feet, no more than four people may sit on the floor and one person, maximum, may move to the cargo shelf.
Please see the seating diagrams below for a visual of how the aircraft should be loaded:
Seating configuration with the copilot seat facing aft (one jumper in this seat), 18 jumpers max. 7 per bench (green).Seating configuration with the copilot seat facing forward (no jumper in this seat), 17 jumpers max. Caravan graphic by East West Aircraft Sales.
Also, when loading, don’t crowd into the area aft of the benches while one or two jumpers make their way up to the pilot. Balance is just as important as total weight, so let several people get seated on the forward benches before piling into the back. This will also help reduce the risk of tipping the plane.
So to recap:
18 jumpers max, 17 if the copilot seat is facing forward.
All jumpers face aft for taxi, takeoff, and landing.
Up to 7 jumpers per bench, 3 jumpers max on the floor for taxi, takeoff, and landing. 4 jumpers max on the floor above 1500 feet.
No sitting on the cargo shelf until above 1500 feet, then ONE jumper may sit here
Please help us spread the word! If you see people sitting in the wrong place in the Caravan, help educate them about this policy.
Side note: You will notice there are no longer seat belts on the cargo shelf. It’s a good rule of thumb when getting into any jump plane to note that if there’s not a belt there, you’re probably not supposed to sit there.
If you have any questions, please ask one of our pilots, instructors, or managers at the DZ. See you soon!
Welcome! We look forward to making ALL the jumps with you, ALL YEAR LONG!!! Here are a few tips about Skydive Spaceland Dallas that you might find useful if you are moving here from afar.
ATM located a gas station/convenience store about 5 miles/5min from the DZ
Most major banks have branches in Sherman.
Lodging
RVs/Hookups
RV hookups are available on a first-come, first-served basis. Rate: $500/month for full hookups, electricity included. Call manifest at 903-364-5103 to inquire about availability and reservations.
RVs may be available for rent, again on a first-come, first-served basis. Call manifest at 903-364-5103 to inquire about availability and reservations.
Bunkhouse
To reserve a room in the on-site bunkhouse, please contact Manifest at 903-364-5103. $15/night for a shared room, $30/night for a VIP room with a full and single bunk bed. Learn more
Many local skydivers will also rent rooms or houses. Check out the Dallas Flyers Club group on Facebook to inquire about that. There are also apartments available in nearby towns; Sherman and Whitewright are good options.
For more information on our landing areas, safety policies, packers, locker rental, pet policy, full-service pro shop, full-service rigging loft, and much more, please visit the experienced jumper information page on our website.
Showers/Bathrooms/Laundry
Bathrooms are open 24/7 on-site next to the hangar/pro shop, and showers/bathrooms/laundry are available 24/7 in the bunkhouse.
Local Stores/Cafe
There is a Dollar General store about 10 miles from the DZ (2303 Pettit Pkwy, Whitewright, TX 75491)
There is a good “pizza joint” in Whitewright called The Loft that also serves adult beverages (107 West Grande Ave Box 549, Whitewright, TX 75491)
There is a good Mexican food restaurant in Whitewright (Tejas Mexican Grill) that is BYOB
Lots of places to eat are in McKinney, about a 30-minute drive from the DZ
Cafe On Site
There is an on-site cafe that is open for breakfast and lunch.
Get the Most Out of Your Unlimited Package!
Jumpers who maximize their jumps on the package usually come here with skydiving goals in mind and a path mapped out to achieve them, such as becoming accomplished wingsuiters, freeflyers, or even instructors.
Every Spaceland has tools to help you grow and succeed in skydiving! We have mentor programs with free coaching for skydivers with 100 jumps or less, then we have organizers. We have highly skilled coaches who will be happy to focus on you and keep your learning curve steep. And we regularly hold coach and instructor rating courses by The Ratings Center to help you achieve goals of working with students.
We also are proud to have a highly skilled community of active jumpers here on any given day, and we are located conveniently to a 14-ft iFly wind tunnel in North Dallas (Frisco).
Let’s see what you can do with YOUR unlimited jump year!
Remember the Smokey the Bear public information campaign with the slogan, “Only YOU can prevent forest fires?” The idea was to remind us that we all bear personal responsibility for avoiding this dangerous situation. (See what I did there? 🙂 )
Flying parachutes puts us in a similar situation that requires each of us to take personal responsibility for safety–for ourselves, other jumpers on the load, people on the ground, and for this article’s focus–aircraft.
Worldwide, we have seen several jumpers strike aircraft on the ground over the years, with two notable incidents just this year at other U.S. skydiving centers. Landing on or striking an aircraft can have major medical and financial consequences to you, the pilot, and the airplane, especially if the props are turning. This is a situation no one wants!
Look Out for the Spinny Things
Why do we have to avoid aircraft, you might ask? They have engines, they can fly around us! True, as long as they are in flight. However, they are not at all nimble on the ground, so they have a much harder time avoiding skydivers when they are taxiing on the ground, landing, and taking off. Also, the pilot can’t see what’s descending at him/her through a solid cockpit ceiling. It’s much easier for a skydiver flying a parachute to avoid an aircraft on the ground than vice versa.
The good news is that aircraft are generally quite predictable, much more so than many skydivers! 🙂 We know where aircraft will be (taxiways, runways, and the airspace above the ends of runways) and where they are going. That makes it much easier to avoid them if we just consider a few bits of knowledge about aircraft operations.
Aircraft only operate in very specific areas on airport grounds, including runways, taxiways, and parking pads/fueling areas. These are a very small percentage of the land on an airport, so we should be able to stay away from them without too much trouble.
At some Spaceland dropzones and likely many others, the paved runway may not be the only runway. At Houston and Dallas, our aircraft will often land on the grass runway that’s right next to the paved one since it reduces wear on the tires compared to landing on pavement. Consider the runway area to avoid as the paved runway and at least its width to either side. (That way you don’t even have to remember which side it’s on!)
It’s more challenging, but no less important, to avoid flying over the runway below 1000 feet when the runway is in use or about to be in use. If you’re not sure, always assume the runway is in use! In addition to normal take-offs and landings, aircraft sometimes have to perform a “go around,” resulting in the aircraft potentially NOT being low to the ground/near the runway surface as it travels across the runway area. Also, our beloved Texas humidity (which isn’t specific to just Texas, of course!) can lead to the windshield fogging over just prior to landing. In this scenario, with the pilot losing forward visibility, he/she would then transition to flying “on instruments.” In this scenario, the pilot has no way of seeing and avoiding a skydiver that may have errantly flown into airspace designated for the aircraft.
After opening, do not loiter near the ends of the runway, as aircraft will be using that airspace for departures and approaches.
When crossing the runway on foot, be sure to check both directions, looking all the way to the end of the property and then upwards, checking for aircraft on final approach. Never cross the runway in front of an aircraft; you can cross behind it (assuming another airplane isn’t behind it also, as can happen when we run multiple aircraft), but never cross in front. A good guideline to follow is to STOP, LOOK, and LISTEN for aircraft before crossing the runway.
Avoidance Skills
By far the best way to avoid conflicts with aircraft is to be aware of where they will go by using the above information. It’s even a good idea, once you have deployed your parachute, cleared your airspace, and done your control check, to take a quick look down at the airport to see if any other aircraft are loading jumpers or taxiing around. You’ll also want to check the arrow for the landing direction and wind sock to tell you what winds are doing, since winds can change after you take off. This will help you verify or adjust your landing pattern plan, and predict where the aircraft will go so you can go somewhere else. As Mr. Miyagi said (more or less), “The best defense is no be there.”
The earlier you see an impending aircraft conflict, the less you have to do to avoid it because you have so much more time and altitude to work with. A small turn up high will change your pattern and landing location much more than waiting until you’re down to a few hundred feet off the ground on final.
However, newer jumpers in particular have so much going on mentally as they learn this new sport that awareness is in shorter supply than with more experienced skydivers. If you do not become aware of a potential aircraft conflict early enough to avoid it easily, you may have to take evasive maneuvers lower to the ground.
The good news is that as far back as Dive Flow 2 in the Skydiver Training Program, you started learning how to perform braked turns in order to change your heading/landing location with minimal loss of altitude. In Dive Flow 16, you learned about using front risers to steepen your glide when you need to land shorter (best done up high to allow the canopy to recover speed for the landing flare). You have all the skills you need; you just need the judgment to know when to apply them.
There’s one other item to consider when landing your parachute on an airport, and that’s the turbulence behind any aircraft that is running. Whether stopped, taxiing, taking off, or landing, an aircraft with a running engine creates turbulence in a widening cone shape behind it. You know this from the prop blast you feel while boarding the aircraft. Logically, then, landing a parachute behind or even almost behind a running aircraft is a pretty bad idea because turbulence can radically affect your parachute’s flight or collapse it. Don’t go there.
Target Fixation is Your Enemy
Sometimes, we get so fixated on an obstacle that we end up flying right at it (target fixation). This isn’t unique to skydiving; it happens with tasks such as driving as well. We tend to go where we look, and this is precisely how jumpers sometimes end up striking the lone windsock in an otherwise clear 130-acre field, for example; they’re so nervous about hitting it that they can’t take their eyes off of it!
If you are concerned about an obstacle, whether it is an aircraft, wind sock, or whatever, check its position and then focus on a reasonable area where you would rather land. Feel free to glance back at the obstacle from time to time to see if you need to adjust your flight further, but don’t stare at it. Keep checking your airspace for other jumpers and focus instead on where you want to go.
Pilots will always do their absolute best to avoid conflicts with jumpers, but jumpers can help pilots out a lot by doing their part. If you have any questions about how you can work better with pilots to increase safety, feel free to ask them! They are always happy to talk about safety when they are on a break from flying, preferably with a beer in hand after the last load. 🙂
If you’re reading this, chances are you tried to buy something here and received this error message: “The provided address does not match the billing address for the cardholder.”
Please do not continue to submit the transaction without fixing the error!
This message is telling you that either the numeric part of the street address you submitted at checkout (such as the 123 of “123 My Street”) or your zip code did not match the address information on file with your credit card issuing bank. All declined transactions tie up funds on your card as “pending charges” for a few business days, so you already have the charge amount tied up as a pending charge. If you continue to resubmit the transaction with incorrect information, it will keep declining due to address mismatch and each attempt will result in a new pending charge. For example, if your $200 order is declined five times, you’ll have $1000 in pending charges on your card. No bueno!
Wait, what? Wasn’t the charge declined? How am I still being charged?
When you make a purchase online, your credit card is not actually charged at that moment. The card processor first checks with your bank or credit card issuer to make sure you have enough available credit to complete the purchase. If so, your bank or credit card issuer places a hold, or pending charge, on the amount of the intended purchase against your card. The card processor then makes sure the other information you entered (for instance, your address) is correct, and if all is well the transaction is processed. If not, such as if you enter an incorrect address, then the transaction is declined and the pending charge will disappear from your account within a few days.
Not all online merchants require that the billing address submitted with a transaction match the one on file with the bank. We have chosen to do so to reduce fraudulent charges, protecting our customers and our business. The down side is when customers make a mistake in the billing address they submit and accidentally tie up funds on their cards as pending charges due to the mistake.
Quite often, we find people experiencing address mismatch declines have simply forgotten to change their billing address with their bank after a move. On rare occasion, the address on file with the bank has an error in it. Regardless of the reason for the mismatch, your purchase will not go through with the information you’ve provided. Please verify your address information is correct and try again online if you prefer, or you can simply show up during our normal business hours with a card or cash to pay on site.
You’re thinking about trying skydiving. Or maybe a friend/family member is. Or maybe you just need a few minutes’ break from work or your amazingly awful blind date, and this article sounded like the perfect activity to kill time while you’re hiding out in the bathroom. Let’s have some fun with this! These are the top questions we get asked all the time about skydiving, so we figure you have some of the same ones.
I’m afraid of heights… I probably shouldn’t jump, right?
Not true! Many licensed and professional skydivers are or were afraid of heights. They say heights and altitude feel different, and that at higher altitude (like in freefall), their fear of heights isn’t triggered at all because the ground is literally miles away. They may feel a little nervous when approaching the ground to land, but that is only one small part of the skydive and that’s much easier to overcome for a great experience.
Scared of heights? You might still love skydiving!
How fast do you fall?
About 120 mph! Ever drive that fast? (Yeah, me either 😉 )
Guru Khalsa shows us how to go really fast. 🙂
How safe is skydiving?
Nothing is 100% safe, not even eating popcorn on your couch (what if you choke?!). But skydiving is as safe as we can make it, especially tandem skydiving for first-timers. At Skydive Spaceland we use top of the line gear, experienced and well-trained instructors and pilots, proven safety procedures, and well-maintained aircraft to keep risks as low as possible. Nobody has a death wish; we want to skydive a LOT!
The United States Parachute Association reports that you are statistically much more likely to be killed by lightning, a bee sting, a dog bite, or legal execution (yikes!).
What does skydiving feel like? Does your stomach drop like on a roller coaster? Is it physically hard to do?
It’s a little like riding a T. rex carrying bazookas through a rainbow with a lot of wind in your face! OK, just kidding… kinda. Seriously though, physically it’s crazy windy with a spectacular view and you won’t notice much else in freefall. You don’t feel your stomach drop like on a roller coaster, because that feeling comes from the floor dropping out from under you and you feeling unsupported. When you jump out of an airplane, you’re jumping into about 100 mph of wind and while you *know* you’re falling, your body doesn’t feel unsupported like it does on a roller coaster.
People sometimes say it’s hard to breathe in freefall because the air is going by so fast, but we just say to scream–you’ll catch that breath on the flip side, guaranteed. 🙂
The harness may feel tight, but you know if you’re jumping out of an airplane you really don’t want it to be loose! Just wear comfortable, relatively form fitting clothes that won’t bunch up under the harness.
As for whether tandem skydiving is physically hard, it’s about as easy as falling out of an airplane… 🙂
Is it like the wind tunnel? I did that already.
Yes and not even close! The feel of the wind on your body is very similar. However, nothing beats the craziness and camaraderie of actually training for a skydive, getting in the plane, and stepping out that open door 2.5 miles up in the sky with your new lifesaving best friend, all the way out of your comfort zone. Plus the view is way better in the sky than the walls of a tunnel!
How often do people throw up?
Honestly, it’s pretty rare. It can be kind of spectacular, though, especially if you got video. Don’t worry, we’ll do our best to edit that out of your video!
Jump altitude–does it really make a difference how high you jump out of the plane?
No, and yes. The basic act of skydiving–jumping out of a perfectly good airplane, freefalling, and deploying/flying the parachute–won’t change much whether you jump from 8,000 or 18,000 feet. However, most first-timers are so sensory-overloaded that freefall goes by SOOOO fast (around 120 mph to be precise), and they just wish it would have lasted longer!
In the U.S., we can jump from up to 15,000 feet MSL (above sea level) without prebreathing supplemental oxygen. How high you jump on a given skydive can vary based on how powerful the airplane is, how high the airport is where you’re jumping (Mile-High City, anyone?), whether air traffic control in your area limits your altitude, and weather. Also, some skydiving centers sell a less expensive, lower-altitude skydive (such as 10,000 feet) to get you in the door and then upsell you on a higher altitude. Some offer a super-high skydive from 18,000 feet or more, but you have to prebreathe oxygen on the way up and these jumps are significantly more expensive. If you’re shopping skydiving centers, make sure you’re comparing apples to apples, not mountains to molehills.
Nicole Black gets ready to exit the Super Caravan.
At Skydive Spaceland, everyone jumps from around 14,000 feet so you get the highest skydive possible without the added hassle and expense of prebreathing oxygen. This gives you about 8,000 feet of freefall, which is just about one minute of possibly the most intense fun you’ve ever experienced! If you were do to a skydive from 10,000 feet, you’d get only about 27 seconds.
How old do you have to be to skydive?
In most places, at least 18 years old. Bring your ID. If you’re not 18 yet, wouldn’t skydiving be a great 18th birthday gift?
Sorry, kid… you have to be 18 to skydive at most drop zones in the U.S.
Is there a weight limit?
Yes, and that is driven by the total weight the equipment is rated to handle. Different skydiving systems have different limits. At Skydive Spaceland, we use top of the line Sigma tandem systems and we can take tandem skydivers up to 265 pounds. Many skydiving centers charge a small additional fee if the skydiver is over a certain weight but below their max, and this goes to the instructor for the additional physical work they encounter with a heavier student.
How can I find the best price for a skydive?
Do you really want to seek out the lowest bidder for jumping out of an airplane? You get what you pay for.
“What if I fall?”
“Oh but my darling, what if you fly?”
― Erin Hanson
If you want a true adventure-of-a-lifetime skydiving experience with a well-trained instructor, top of the line aircraft and gear, and an amazing insight into the culture of the sky, check out the skydiving center’s reviews. Pay special attention to reviewers who have jumped at other centers and feel this one is the best! Great skydiving centers stand out with lots of amazing reviews and crazy loyal customers.
Some people want to jump at a place with a great view, such as at the beach. This is a nice bonus, but you will often pay a premium for locations like this. That’s up to you, of course! The experience of skydiving will be amazing and over the top regardless of what you look at on the way down.
Keep in mind that no matter what you go, skydiving isn’t cheap because airplanes aren’t cheap. Saving $20 off a $200+ skydive isn’t worth having a worse experience. That said, there are ways to shave a little off the price at most skydiving centers. Paying in full ahead of time often saves you some money ($20 for us). Jumping on weekdays is often cheaper, and group discounts are often available.
Should I eat first? And maybe have a beer or something to chill out my nerves?
Yes and no, in that order. Eat normally/lightly because you’re more likely to get sick from nerves if your stomach is empty. Nay to the beer until you’re ready to celebrate after your jump! Alcohol/drugs and aviation (including skydiving) never mix well.
Who do you jump with? Are they certified?
Tandem instructors at United States Parachute Association (USPA) member drop zones must have at least 500 skydives and 3 years in the sport before they can even take the certification course. Most instructors accumulate many more jumps quickly, and at Skydive Spaceland we have many instructors with thousands of skydives. Some have more than 20,000 skydives apiece! They’ve seen it all, and they’re still in love with taking people like you on their first journey into the sky without a vehicle.
Here are a few of your potential jump instructors.
How long does it take to skydive?
The minimum time it requires to tandem skydive is probably close to 1.5 hours. This covers the time required to check in, read and sign waivers, pick video/photo options, attend a brief training class, and gear up, fly, and debrief with your instructor. We always do our best to get everyone skydiving as quickly as possible, but news flash–aviation is unpredictable! Delays are often caused by weather, but sometimes other scheduling issues pop up such as that group of 20 people that showed up right before you instead of 2 hours before like they were supposed to. Or the President makes a last-minute visit (no, we cannot fly you close for a potshot even if we wanted to!).
Don’t schedule anything important for right after your jump; we ask that people allow at least 4 hours just in case of delays, and so you don’t feel rushed. (Bonus if you get done early! Maybe jump again!) Enjoy watching experienced skydivers jump, land, pack parachutes, and razz each other about their jumps if you have some downtime. Play cornhole, grab a snack in the deli, or whatever works for you. We’re fun people; we want to welcome you to our playground and skyfamily!
Are there any reasons why I shouldn’t jump?
Other than those voices in your head telling you it’s crazy? 🙂 Just kidding. There are just a few reasons why jumping may be a bad idea on a given day. One is if you have done scuba diving in the last 24 hours; flying up to altitude increases your risk of decompression sickness.
An obvious one is if you have any medical problems that may interfere with your jump, such as an inability to fly, easily dislocating shoulders, or an inability to hold your legs up for landing (more on that in a moment). If you’re concerned about a medical issue being OK for skydiving, ask your doctor.
If you have a head cold/flu/etc., reschedule your jump for after you get well. Flying is not fun when your head is stopped up and you can’t clear your ears with the pressure changes!
Bad weather can keep you from jumping for sure, and it’s hard to know when the weather will ground us. The forecast is not always accurate, for sure! (Wish I could be wrong that often and still get paid!) Feel free to call your skydiving center on the day of your jump to check the weather. Expect that in addition to a weather report, you will also be told that you can’t skydive if you don’t show up…
Do I really need video/photos of my jump?
Don’t you want to see your first freefall face? It’s usually AMAZING! Plus how else will you prove you didn’t chicken out?
Skydiving centers offer video/photos shot by a hand-mounted camera on the instructor, from a separate videographer flying with you in freefall, or both. Prices are usually lowest for the hand-cameras and highest for combined packages. One thing most people really enjoy about a separate videographer is having someone fly right in front of you in freefall, maybe even giving a high five and doing a couple of tricks in front of you.
Your videographer will fly right in front of you, and might even show off a little.
How do you land safely?
Close your eyes and pray. Just kidding! You’ll help your instructor slow the parachute’s descent (flare) with control lines attached to the parachute, while holding your legs straight out in front of you so the instructor touches down first. This way, you won’t have the awkward epic tumble of trying to run off a landing while harnessed to someone who’s behind you! If the winds are light and you’re moving fast, your instructor will likely slide on his rear. If winds are a little stronger, your instructor may tell you to stand up your landing.
Can I pull the cord?
Yes! We WANT you to be an active student of skydiving. But if you don’t, we definitely will!
Can I jump with my friends?
Depending on how many friends are jumping in your group and how big an airplane we are flying, absolutely! Some centers operate smaller planes that only fit 4 people, but we fly turbine aircraft that hold up to 18 or 23 people per flight. If you have a large group, definitely go with a place that has larger aircraft.
Want to jump with your friends? Bring them all! And we’ll get started on your skydiving license so you can do this!
I want to jump with you! But I’m not in Dallas. 🙁
Never fear, we have Skydive Spacelands near Houston, Atlanta, and Miami as well!
Get ready for a whole lot of awesome skydiving July 6-8, 2018! Whether you’re a first-time jumper or you have thousands of jumps under your belt, you’ll have a blast at the annual American Revolution Boogie! We have extra aircraft (and we’re working on more), tons of organizers, a kick-butt fireworks show, and even trapeze artists!
First-Time Skydivers
This is an epic event, the biggest skydiver bash in Texas! (And that’s saying something!) There’s no better time to book your first jump and see what this whole skydiving thing is all about! You’ll see more awesomeness on these three days (July 6-8) than you can imagine!
Check out how much fun we had last year! Licensed jumpers–more info below!
Licensed Skydivers
You have never had this much fun! We have EIGHT organizers ready to keep you flying your butt off and doing things more epic than you ever dreamed! Register RIGHT NOW for $35. The first 100 registrants get a coupon for 10% off a RigSleeve!
If you find yourself at the dropzone, you will most likely be spending some time in the manifest office. With the rapid rate of growth that Skydive Spaceland has been experiencing, we want to spread the word on some general reminders and guides for manifesting and sharing the space of the office.
Manifest Basics
What to start with:
Number of slots you need
The minimum call time you can make
If we are running more than one plane available for fun jumpers, you can give a plane preference
For example, “Do you have 3 slots, more than 15 min? I’d prefer the Otter if it’s available.”
Before you give us the name(s) of who to manifest, we need to know if you are:
Wingsuiting
Renting Gear (per Jump or Daily rate)
Hop n Popping
Mentoring
Organizing
Tracking/angle, XRW, CRW, or high pulls: These dives fall under our “horizontal movement” guidelines.
Tell manifest that you are doing those types of jumps
Fill out the horizontal movement paperwork
Be in the loading area on the 5 minute call with the paperwork in hand
Have fun!
Renting Gear?
If you are renting gear (Daily or Per Jump), it is important to remind your (all that apply):
Manifestor
Mentor
Organizer
Coach
DJ
friend manifesting you
Rental Types
Daily
This means that you have ordered at least 3 pieces of a rig through our Pro Shop. This could be a container, main, reserve, and/or AAD. If you are on the daily rate, you get charged an initial fee of $37.36 and then $8.00 for every jump after for pack jobs. This means every load you get on, we have to add your gear rental and we need your help remembering!
If the gear you ordered comes in, be sure to let us know!
Per Jump
This means that you haven’t ordered gear yet and you pay $32.03 per jump that you use one of our rigs (this includes pack jobs). This also means every load you get on, we have to add your gear rental and we need your help remembering!
Manifest Etiquette
Respect the line
While we appreciate the kind thought of bringing fresh air into the office.. on busy days, drop your gear off before stopping by the office.
WE KNOW YOU’RE EXCITED TO GET ON A LOAD.. but please don’t yell from the door, confirm your load and call.
Communication! Talk to the people you are manifesting to make sure they are going with you and not manifested for another load they can’t make.
Some things we need before you can jump…
Money on your account
If you don’t keep up with how much money is on your account, we will call you over the speaker to refill it. If you don’t want to wait in line to refill it, you can fund your account online! Keep in mind it takes time to process online payments, so it would be best done the day before.
Your USPA Membership
If your USPA membership has expired, we need you to update it with us by bringing us your email confirmation or new card.
Your in-date reserve card
If your reserve packing date in our system is out of date, we’ll need to see your card to update it.
Know Your Load (Which Plane and Load Number)!
Busy Day = 3 planes = 65 slots = 65 names on one rotation of loads…
and that’s if you’re just looking at the current calls. We manifest up to four or five loads out per plane!
That means when you don’t your load number, we look through up to 12 loads with on average 20 names each.. That’s 240 names to find yours!
Load times change, load numbers don’t!
Always know your load number.
Know your load for changes too
When you are
adding friends
pulling off
putting yourself on with others
you need to know what plane and load number you are looking for.
20 minute call
Our calls are done based off of
Average plane time up and down
The altitudes we hear from the pilot on the radio
The calls can vary based on
Weight of the plane (jumpers, plane, gas)
Number of passes (hop n pop, team, STP) and any go-arounds
Air traffic control
Weather
Based on what the pilot tells us on the radio, we adjust calls accordingly.
5 min call
When you hear the 5 min call, you should be making your way to the loading area!
It’s important to set up your loading order before the plane gets there
The pilot looks to see if people are out there to know if he is turning if we forget to tell him
The loader has to check to make sure his load sheet matches the people before you get on the airplane.
Downtime
We love working in the office and because operations can’t pause, we spend a lot of time behind the counter! You are welcome to spend some time in the AC office, however if you don’t need anything, please hang out at the tables and not leaning on or around the counter so people who need us can get to us. Also, given how much traffic we have though the office, we appreciate our quiet downtime. If you are having a conversation with someone who doesn’t work in the office that doesn’t relate to office things, we invite you to take that chat to another part of our large, lovely, climate-controlled hangar.
Thank you Spacelanders!
We love our jumpers and we thank you for your patience on busy days! We love our jobs and seeing everyone progress in a safe and positive environment makes us proud to be part of such an awesome place!
Skydive Spaceland is thrilled to announce the full-time addition of longtime competitive skydiver Scott Latinis to the Skydive Spaceland team as Organizing and Events Director.
“My parents will be so thrilled that I got a real job,” Latinis jokes. “But seriously, it’s a really great thing to be able to work in and give back to the sport we all love so much.”
Latinis brings decades of high-level competitive formation skydiving experience, three world records, nine USPA National Skydiving Championships, and his trademark energy to this new position, which serves all four Spaceland drop zones.
“Scott is an extraordinary competitor, coach, and organizer, and he’s exactly what we need to continue growing the Spaceland family of drop zones,” said Spaceland’s owner Steve Boyd. “We’re all in this business because we love skydiving passionately, and Scott is going to help us share that love with our customers by blowing their minds with more and bigger events in all disciplines, for all of our locations.”
Boyd opened the first Skydive Spaceland just south of Houston, Texas, in February of 2000, followed by expansion to Clewiston, Florida, near Miami in early 2013; to Rockmart, Georgia, near Atlanta in May 2015; and to Whitewright, Texas, near Dallas in April 2016. Spaceland Houston conducts more than 100,000 skydives per year and has hosted major skydiving competitions including the U.S. National Skydiving Championships. It is also the busiest civilian skydiving school in the country.
Building on Spaceland’s successful Skydiver Training Program and Transitions programs that support new skydivers, Latinis plans to grow Spaceland’s organizing program to fully support licensed jumpers of all experience levels and all disciplines.
“No matter what your skill level is, we’ll have something fun for you to do at Spaceland,” said Latinis.
Latinis is already working on some innovative events, including FlySight-aided tracking competitions at Houston and Dallas in 2016 and the Pre-Nationals Meet in 2017 for competitors to pre-test themselves against peers before the National Skydiving Championships.
“We have a ton of great ideas, and I’m excited to be a part of this team as we take all of the Spacelands to the next level,” Latinis added.
Water fascinates us. How else do you explain the price premium on beachfront, lakefront, and riverfront properties? As skydivers, water should fascinate us for another, very important reason–it moves and responds to physics much like air, only we can actually see and thereby learn from it. As such, water has a whole lot to teach us about airflow and, more importantly, turbulence.
Air turbulence is something most of us understand conceptually, but not so much in practice. Why? We can’t see it. And if we’re on the ground, it usually doesn’t even affect us that much unless winds are extreme, so we don’t think about it that much. But when you’re flying a parachute, turbulence can radically affect your parachute’s flight and change your life very quickly. A little turbulence might feel like driving over a bumpy road, but severe turbulence can partially or completely collapse your canopy. Canopy collapses can cause radical, diving turns and even put you back in freefall at an altitude where you absolutely never want to be in freefall!
The good news is that turbulent airflow does follow the laws of physics, just like a river flowing around rocks. (Watch that closely next time you get a chance.) Thus, we usually have a pretty good idea of where it will appear when winds pick up. Turbulent airflow exists downwind of obstacles, extending to 10-20 TIMES the height of the obstacle horizontally! It also exists behind moving objects, and very much so behind airplanes with props turning, even if they are parked. Winds can also affect the location of turbulence generated by aircraft.
If you went through our Skydiver Training Program, you might remember learning this with the following graphic:
Let’s put this into practice. For example, with our 34-foot-tall hangar at Skydive Spaceland Houston in a north wind, turbulence could be expected at distances of up to 340-680 feet to the south. Measuring directly south of the middle of the hangar’s edge, the runway is about 450 feet away. Thus, the entire area between the hangar and the runway would be considered a hazardous landing zone in a north wind. This is why you generally see even highly experienced jumpers landing east of the hangar in north winds; it’s just safer.
Take another look at the turbulence graphic above with the airplane. Notice the turbulence behind the airplane? This is essentially the same situation we have at Spaceland Houston if an aircraft is turning hot and loading at loading area 2 just west of the hangar, facing north. Turbulence from this aircraft, especially but not only with a west wind, will affect the west-most edge of the staff/D-license landing area, making it a very good place to avoid no matter how many jumps you have or what kind of canopy you’re flying. The laws of physics do not bend for skydivers, no matter how many jumps they have!
A good rule of thumb is to never land anywhere behind a running airplane or close to and facing an obstacle.
A good rule of thumb is to never land anywhere behind a running airplane or close to and facing an obstacle. Just downwind of an obstacle, any significant wind will create turbulence right where you can least afford to deal with it–close to the ground where you have very little time and altitude to recover from a canopy collapse. Besides, if you overshoot while facing said obstacle, you might end up pulling a Wile E. Coyote faceplant on the obstacle, risking injury, embarrassment, and lots of beer owed.
Turbulence is a potential factor on any skydive whether you’re landing on or off the DZ. Before you make a skydive, consider the likely areas of turbulence in today’s conditions and plan to avoid those areas. If you need a little help, take a look at the aerial cheat sheets we’ve put together to help you sort it out.
Now to the really cool stuff: Here’s a video to help you visualize air turbulence using smoke, put together by our awesome staff members Ken Stone, Rosy Booker, Ben Nelson, and Nick Lott. As you watch this video, note the extreme change in both direction and speed of the wind when the smoke canister is placed downwind of obstacles. Now imagine what your canopy will do when flying through the same highly variable wind conditions.
Do you really want to fly there? I absolutely don’t!
Now here’s a video of what can happen to a canopy that does run afoul of turbulence. It’s a tandem, so it’s a lighter-loaded and lower-performance wing than what many skydivers fly. This result is quite ugly, and it could have been even more violent with a higher-performance wing.
For more information and several first-hand stories about skydivers battling dust devils (which in a sense are just visible turbulence), see this article from Skydive Mag. Note that one of the big differences between a “dust devil” and “turbulence” is that you can see a dust devil coming as it has picked up dust. In grassy areas, turbulence is invisible unless it picks up something you can see being flung around. This is why an understanding of where turbulence develops, and avoidance of those areas, is your best defense.
“Airmanship is the consistent use of good judgment and well-developed skills to accomplish flight objectives. This consistency is founded on a cornerstone of uncompromising flight discipline and is developed through systematic skill acquisition and proficiency. A high state of situational awareness completes the airmanship picture and is obtained through knowledge of one’s self, aircraft, environment, team and risk.” ‑‑http://www.skybrary.aero/index.php/Airmanship
Airmanship is a trait that we as skydivers should aspire to master, particularly with relation to our canopy flight. As with a pilot being aware of a powered aircraft’s abilities, the environment in which it operates, and of his/her own capabilities, we also must possess the same type of awareness and discipline when flying our canopies in order to fly safely. An aircraft pilot has many tools to help fly safely, including (sometimes) a co-pilot, radio/air traffic control, radar, and the ability to power down and up and go around to avoid airspace conflicts. We as canopy pilots do not have these luxuries. Takeoffs are optional, but landings are mandatory and imminent. We need to rely on our own skill and the awareness and skill of others to avoid airspace conflict.
We need to rely on our own skill and the awareness and skill of others to avoid airspace conflict.
So how can we be better canopy pilots (airmen/women) and safer airspace users? By developing an intimate understanding of our environment and striving to obtain a professional mastery of our knowledge, actions, and learning. Improving airmanship takes effort! Make the effort to improve and learn on every jump.
Knowledge
We need to fully understand parachutes and parachuting to be safe, effective canopy pilots. Do you completely understand your parachute systems, emergency procedures, canopy flight characteristics, and operating limitations? Do you know how meteorological conditions affect your parachute? (such as wind strength, turbulence, updraft/downdraft, and convection, just to name a few) How do they affect your flight and that of fellow jumpers? Do you understand, or are you aware of, your dropzone environment, our freedoms and limitations (regulatory restrictions, local rules, exit order, landing areas, hazards, etc.) and the challenges they pose to our airmanship? Most rules are not there to limit us, but to ensure we all have a safe environment to work and play in.
Knowledge of Risk
Having sound airmanship helps mitigate risk and sets the conditions for a safe airspace in which we can enjoy canopy flight. Identify the risks to define your limits (note: they may not be the same as other people’s limits) and thereby increase your personal safety. What are the risks on this skydive, you may think to yourself? The risks may include but are not limited to:
Identify the risks to define your limits (note: they may not be the same as other people’s limits) and thereby increase your personal safety.
Suboptimal weather conditions,
Your or others’ lack of self-discipline (not flying in a safe manner and rapid downsizing being prime examples),
Limited skill and proficiency as a jumper (risk would be being un-current or under-skilled for the jump at hand),
Limited knowledge (risk would be not knowing what you must know to do this jump safely), and
Poor situational awareness, or SA (which can be compromised by clouds, tinted eyewear, and/or lack of attention to our immediate environment).
All of these risks can result in injury or worse due to unsafe actions by ourselves or others.
Once we identify risks for a jump, we can create contingency plans to mitigate them (just like your emergency procedures). A simple way to think of this is prior to takeoff, ask who is doing what on the jump and look at the size container they have or better yet, ask what they’re flying to get a rough idea of what to expect under canopy. While under canopy, constantly scan all around you and identify all the other canopies in the sky with you by color, size, speed, and position relative to you (high, low, left, right). You will know some by sight, while others you will just be able to observe in flight. You are now actively and continuously assessing your airspace (smart!).
Scenario: You are flying a cross-braced 90sq ft canopy. You have opened safely, stowed your slider, moved to the holding area, and are now at 1200 ft, looking to enter the pattern. You spot a canopy below you.
Now think to yourself the following questions:
Who is that? (do you know them, or do you recognize the canopy?)
That’s Bill, a known culprit for poor landing patterns by spiraling down past other canopies, then floating in brakes to land at his intended point.
What is he flying?
Sabre 190 (or look at size, speed, color, if you do not recognize it).
What is his most dangerous course of action/path of flight?
Continuing his usual erratic flight through the pattern, cutting me off.
Once you answer these simple questions, you have recognized the threats and begun to prepare contingency plans. Likely, you will fly to stay far from Bill, allowing you to avoid the threat, fly a safe pattern, and land in a place of your choosing. You are using good airmanship to combat poor airmanship.
Scenario 2: You are flying a lightly loaded 190 sq ft canopy. You have opened safely, stowed your slider, moved to the holding area, and are now at 1200 ft, looking to enter the pattern. You spot a small cross-braced canopy nearby and above you.
Now think to yourself the following questions:
Use good airmanship to combat poor airmanship.
Who is that? (do you know them, or do you recognize the canopy?)
That’s John, known to spiral down past other canopies at any altitude to swoop at all costs.
What is he flying?
Velocity 90 (or look at size, speed, color, if you do not recognize it).
What is his most dangerous course of action/path of flight?
Spiraling in the pattern, possibly overtaking and colliding with me from behind and above.
With your answers, you have recognized the threats and begun to prepare contingency plans. Stay far from John by allowing him to pass you up high (much safer than down low where everyone is closer together and has less altitude to deal with problems). You might fly wide and even apply some brakes and kick your feet to communicate that you are letting him by. Again, you are using good airmanship to combat poor airmanship.
We all know a Bill and a John, who fly like they are the only ones in the sky. They are often unaware of their surroundings during flight and often after touchdown (i.e., not checking back up the line of flight for other canopies after landing). They are dangerous to all of us. Don’t be that guy!
Be vigilant.
Fly a predictable pattern.
Give way to other canopies as required.
Avoid target fixation when landing.
Avoid S turns in the landing pattern, as they are dangerous and unpredictable to following canopies. If you miss your landing point, there is always next time!
So you are ready to get that shiny new wing, or sell your current canopy. Well caveat emptor[1], good readers. Are you making good decisions about this purchase, or the sale of your “old” wing? We are seeing a disturbing, fatal trend among skydivers worldwide as newer, faster wings come onto the market and older wings become perceived as less high-performance. To help combat this, we all need to examine our mindsets when it comes to buying and selling canopies.
Canopy changes affect other skydivers as well as ourselves; we must do our due diligence on preparing that person to fly that wing safely, whether it’s ourselves or the people buying our old wings.
Canopy changes affect other skydivers as well as ourselves; we must do our due diligence on preparing that person to fly that wing safely, whether it’s ourselves or the people buying our old wings. We may not be in a position to train a buyer to fly the wing safely, but we absolutely are in a position to assess that person’s skill and determine whether he or she is a good fit for that wing or if it will be a loaded gun in untrained hands.
This article is not designed as a guide for canopy progression (which should be done with the help of a suitably qualified canopy coach, instructor, or subject matter expert), but rather to get you to think about the evolution of wings and how we can all continue to push the limits of our sport without needlessly increasing our risk. You don’t have to be an expert canopy pilot or a sponsored athlete to enjoy flying a high-performance wing, as today’s wings offer many advantages over their ancestors in performance, design, and construction. And this, sports fans, is the very heart of the problem.
What’s Trending?
People always want more. Release a new sports car, digital altimeter, or mobile phone and pretty soon a lot of people want it. Parachutes are no different; every time a new canopy design is released, a glut of “last-generation” high-performance canopies hits the market as people buy up the new canopies and sell off their old wings.
This has happened with every new advancement in the canopy market, whether it was the release of the Performance Designs (PD) Stiletto in 1992 or the recent release by NZ Aerosports (NZ Aero) of the Leia. Once the new canopy arrives, the sales begin as skydivers sell the old to purchase the new, or purchase the latest and greatest to keep up. A quick search of Dropzone.com today found about 220 used Crossfire, Katana, Stiletto, Velocity, JFX, and JVX canopies for sale (2/10/16); all of these could be considered “previous generation” high-performance wings.
Every time a new canopy design is released, a glut of “last-generation” high-performance canopies hits the market as people buy up the new canopies and sell off their old wings.
There is nothing wrong with wishing to upgrade your wing or sell the old. This is the evolution of our sport, but the key to buying or selling a canopy is to keep that skydiver on the new wing—yourself as the buyer, or your buyer if you’re selling—within their capabilities. Putting a skydiver under a higher-performance wing without the pre-requisite experience to fly it safely is creating a whole new type of problem. This problem is being observed at dropzones around the world, and is well summarized by comments from Bryan Burke of Skydive Arizona, who is one of the world’s foremost experts on skydiving safety.
“I’m very concerned that a lot of people will be buying used canopies as the more ‘expert’ jumpers sell off their Velocities, Xaos’, and JVXs to get Leias and Valkryies,” says Burke. “The latest fatalities [at Skydive Arizona, early 2016] were visitors from out of state, uncurrent, and especially in the latter case, not trained. One individual had downsized to the Velo from a Spectre 120! I never would have let him jump it if I had known. Now it seems like we might need to start screening visitors for appropriate choice of main and adequate training and supervision.”
Skydivers don’t want dropzones to screen their canopy choices, and trust me, drop zones don’t want the hassle of doing it either! But some drop zones may choose to screen canopy choices if it seems that this will help protect their customers and their business. The way to avoid external regulation like this is always with education and self-regulation, so let’s work on that.
Perception vs. Reality
Some seem to think that certain high-performance canopies have lost performance or become more forgiving just because newer technology is available. Not so! Not a single thing changes about a wing when another wing comes out; what changes is our perception.
Perception: As the newest wings such as the NZ Aerosports Leia and PD Valkyrie are beginning to circulate more, the number of used canopies for sale such as the JVX, Xaos, and Velocity is increasing. This has led to a perception that canopies such as the Katana, Crossfire 2, or Stiletto are now mid-range or newbie canopies. Some seem to think that these canopies have lost performance or become more forgiving just because newer technology is available. Not so! Not a single thing changes about a wing when another wing comes out; what changes is our perception.
Think of it like a car. The 2006 Ferrari Katana is not any less capable because the 2015 Ferrari Valkyrie has been released. The 2015 model will have a new shape and upgrades that make it more desirable; however, they are both high-performance machines capable of getting you into trouble more quickly than your 2000 Dodge Navigator (which don’t forget is also a more than capable canopy. What has actually happened is that the older canopy is now perceived to be slower relative to the new design. This creates a perception that it has magically transformed into a lesser or more mid-range canopy.
Reality: The reality is that all ram-air parachutes are high-performance. They are highly maneuverable whether you’re flying a 365-sq-ft tandem or a 67-sq-ft Petra. Make the wrong decision when flying any canopy, and the consequences may be dire. The reality is that most people downsize too rapidly without spending enough time on their first wings to develop the survival skills they’ll need to safely handle a canopy with increased performance.
Managing the Risk
How do we mitigate this new perception vs. reality risk? As buyers, we must select a canopy that is appropriate for our currency, skill level, and experience, and by being brutally honest with ourselves about our level of proficiency. This may mean we have to swallow some bitter pills from more experienced jumpers and canopy coaches, but this is how we’ll learn what we need to work on before we progress to higher-performance wings. As sellers, we must be selective when we sell a canopy to another jumper.
When buying and selling canopies, we have a responsibility to each other to make sure the right canopy is finding the right user. Random canopy sales/purchases without due diligence are careless and are not in the best interests of our skydiving family.
Selling and Buying
You have a responsibility to people with lesser knowledge and experience.
Sellers
If you are a seller, maybe the guy with low jump numbers is not the person to whom you should be offloading that Katana 107. You have a responsibility to people with lesser knowledge and experience. Maybe it is someone on your DZ, or maybe it’s a faceless someone replying to your advertisement. Either way, it doesn’t take long to ask a few questions to confirm their level of expertise with regards to their ability to safely fly your canopy. If you don’t know this person, you may not want to take their word for it, so ask for their home drop zone and contact management and/or instructors there about this person’s abilities. Taking this time to find out might save a life, prevent an injury, and/or stop your DZ making the news in the wrong light, which hurts everyone in the sport. Don’t be an accessory to injury–or worse!
Buyers
If you are a buyer, be honest with yourself as to your level of skill and knowledge. Are you really ready for that canopy, or are you just trying to look good? Have you fully exploited the capabilities of your current canopy? Have you discussed your intended canopy purchase with experienced canopy pilots, and completed suitable canopy training that sets you up for success? Can you safely land your current canopy in any given weather or situation? If the answer to any of these questions is no, you are not ready for a higher-performance wing. Spend more jumps on your current wing and consider canopy coaching to turn any “no” answers into “yes” ones.
Be proficient before transitioning, so you don’t become just another injury or fatality statistic. Approximately 30% or greater of all of our fatalities are due to bad landings under perfectly good wings.
Take the time and seek help to identify a canopy that is suitable for your skills before you start looking to buy. This will help you make good choices, grow your skills, and enjoy your new canopy rather than risking injury or grounding by safety staff.
Conclusion
We all want to progress in our canopy flight, whether it be for competition, licenses, or just plain old fun. And I’m pretty sure we can all agree that no one wants to be hurt or killed doing it. So when you are looking at selling or buying a new canopy, just ask yourself a simple question:
Sellers: Are they ready for this canopy?
Buyers: Am I ready for this canopy?
If the answer is no from either party (or even “I’m not sure”), seek advice from an expert as this strongly suggests that you require another canopy that better meets your requirements. There are many excellent canopies for all levels of experience on the market, both new and used. Take the time and seek help to identify a canopy that is suitable for your skills before you start looking to buy. This will help you make good choices, grow your skills, and enjoy your new canopy rather than risking injury or grounding by safety staff.
You will always have enough knowledge and experience to get into trouble. The question is, do you have enough to get out?
[Latin, Let the buyer beware.] A warning that notifies a buyer that the goods he or she is buying are “as is,” or subject to all defects. When a sale is subject to this warning, the purchaser assumes the risk that the product might be either defective or unsuitable to his or her needs.
At Skydive Spaceland, we love our active and retired military service men and women! We greatly appreciate your service to our country, and we’d like to welcome you to our training program to transition military-trained skydivers to the civilian skydiving world. This program is now available at all Skydive Spaceland locations—Houston, Texas; Atlanta, Ga.; Dallas/Fort Worth, Texas; San Marcos, Texas; and Clewiston, Fla.
The Skydive Spaceland Military Transition program builds on the skydiving training received in the military and qualifies jumpers for their United States Parachute Association A (basic) license in as little as three jumps (if HALO training has been completed with a ram-air parachute). This license will let you skydive anywhere in the country after completing our transition program, which is based on the very successful Skydiver Training Program used at all Spaceland drop zones. Skydive Spaceland is the busiest civilian skydiving school in the country.
Transitioning skydivers will learn about:
Civilian skydiving gear
Emergency procedures in case of malfunctions
Advanced canopy handling techniques
Spotting the aircraft
Stable freefall body position and maneuvers
Group freefall skills
The transitional training will be tailored to each individual’s needs, as military jumpers will have a wide range of skydives and experience. Transition skydives are $185 each and include everything needed for the jump–ground training, skydive, gear rental, and instructor–with no hidden fees.
Spaceland’s student/transition rigs are state-of-the-art systems including modern ram-air parachutes (Performance Designs Sabre2/Navigator mains and Performance Designs reserves), Sun Path Javelin harness/container systems, and Cypres automatic activation devices. Gear is available for rental after the transition training is completed, and we have a full-service gear store run from our Houston location to sell all civilian skydiving gear a skydiver needs.
All of the Spaceland drop zones have well-maintained grounds; properly maintained, upgraded turbine aircraft; state-of-the-art, high-capacity facilities; and professional instructors with experience transitioning military jumpers to the civilian skydiving environment. All locations also offer our free Transitions program on weekends, in which jumpers with less than 100 skydives can get free small-group coaching from USPA-rated coaches regardless of where they graduated.
To begin the Skydive Spaceland Military Skydiver Transition Program, please contact your preferred location for scheduling. Make sure to bring your skydiving logbook and certificate of HALO completion if you have one. We look forward to flying with you!
Skydive Spaceland Houston: 281-369-3337, open 7 days a week just south of Houston on our 130-acre private airpark. Camping is free and there is a bunkhouse available. Learn more…
Skydive Spaceland Atlanta (Rockmart): 770-748-2200, flying Thursday-Monday and by appointment Tuesday/Wednesday. We are located northwest of Atlanta in Rockmart on our 60-acre private airpark. Camping is free.
Skydive Spaceland Florida (Clewiston): 800-533-6151, open Thursday-Monday just outside of Clewiston (near Miami and Fort Lauderdale) on the Airglades Airport. Camping is available during special events only.
Skydive Spaceland Dallas (Whitewright): 903-364-5103, open 7 days a week just outside of Whitewright. Camping is free and there is a bunkhouse available for $15/night. Private bunk rooms are also available. Learn more…
Weekends are definitely the most popular days for our Skydiver Training Program–of course, because that’s when most people are off work! However, as you might know we are open 7 days a week. If you have any availability to jump on weekdays, you might enjoy weekday skydiving training even more! Why?
Overall slower pace of business gives you plenty of time to prep each dive thoroughly, with extra time if you need it.
More instructor availability than weekends, during which increased business may delay the time you get to start jumping until after earlier arrivals are done jumping.
More rig availability (usually) compared to weekends when more people are jumping.
Generally, we shut down earlier on weekdays, leaving plenty of time to hang out and get to know the staff and weekday fun jumpers after jumping.
Plenty of time to learn about other things between loads or during weather holds, such as packing, gear purchasing, and rigging.
Come on out and fly with us during the week, and let us know when you’re coming by contacting your instructor or calling manifest at 903-364-5103. We want to make sure we have enough instructors for everyone, so let us know if we need to call in instructors who might be taking the day off. (Hint: They are more than happy to have the extra work!)
It’s a super cool shot to get when you’re flying outside video above a skydiving formation–that shot when the outside camera flyer (who is filming the jump without being a part of the formation) drops into the center as the formation breaks away, probably turning in place to watch everyone track far and fast before deploying.
It’s a great shot, that is, as long as everyone is really tracking far and fast. On many occasions, outside camera flyers have had near misses with the people they were filming on deployment. Most of these near misses occur when the camera flyer doesn’t deploy at breakoff altitude, but instead sucks it down to the group’s pull altitude for whatever reason (there isn’t a really good one), and one or more of the formation flyers short tracks and has a 180-degree turn on opening. Or perhaps the group breaks off low, the videographer pulls low because the group broke low, everyone short tracks because they’re low, and now we’re perfectly set up for collisions on opening.
It’s easy to blame the formation flyers in this scenario–hey, remember the videographer takes the center? But the videographer bears responsibility here as well, because all he or she has to do to (usually) avoid this traffic is to pull at the planned breakoff altitude. The formation flyers should have planned at least 1500 feet of altitude or around 9 seconds (when belly flying) to track away from the center, so by the time they deploy they should be around 1500 feet below and several hundred feet away laterally from the camera flyer.
With this scenario, the only way the camera flyer should have any traffic issues with their group on deployment is if:
The videographer has a canopy malfunction/slow opening, and
Someone short tracks or tracks poorly, and
The short tracker has a turn on opening that puts them flying back to the center.
It would be a rare skydive for all three of these things to occur together.
For the formation flyers (belly or freefly)–always be aware that your outside camera flyer (or anyone else) could have a malfunction or off-heading opening on every jump. Break off on time on every jump, know where you are over the ground while you’re tracking, and after deploying, continue to fly your breakoff radial away from your group’s center until you’ve accounted for all of the canopies in your group and determined that no traffic problems exist.
Lastly, if your breakoff radial out of your skydive has put you tracking up or down line of flight, veer away from that direct line a bit if it is safe (i.e., not putting you too close to someone in your group), or consider shortening your track a bit to avoid running under or over groups ahead of or behind you. After opening, fly off the line of flight and account for the canopies of the group before or after you, whichever is closest, before flying up or down line of flight.
For the videographers–Know the group’s breakoff plan and pull on time, in the center, at the planned breakoff altitude, every time. If the formation flyers break off late, don’t let them suck you into their problems. Don’t feel bad about pulling on time even if they’re still turning points, because there is no good reason to get down in the mix with the formation flyers. Some of these situations have occurred because the videographer was concerned about opening high and landing off due to bad spots and/or being off the wind line, but keep this in mind: Your risks of injury or worse from canopy collisions are far higher than those of landing off. You know how to land a parachute safely and you learned about landing off in the first-jump course, but no amount of skill will save you from injury due to collision. Use your skills (and your brain) to AVOID the collisions. Don’t let concerns about landing make your breakoff and deployment more dangerous; minimize each risk in order.
Be safe out there!
PS: We recommend that all skydivers wear audible altimeters–videographers included.
Video
Please see this video showing one example out of many skydives that led to the writing of this article.
Have you had a close call with (or as) an outside videographer? What did you learn from it?
Tracking away from other skydivers well is one of the most vital survival skills a skydiver can have. No matter what kind of freefall skydive you do, unless it’s a Mr. Bill or a solo, you will be tracking to achieve horizontal separation from the other people you are skydiving with before deploying your parachute. Failure to track well and straight can result in collisions with other skydivers as you deploy, with potentially fatal consequences.
For these reasons, tracking well and straight is also an absolute requirement to do larger-way skydives. Big-way organizers will cut you from the jump if you can’t track, and sometimes you’ll get invited just because you can.
Tracking is a skill we may think we have when we graduate from the Skydiver Training Program, because we had to do it properly to pass the upper levels, right? However, just like most other skills you learned as a student, the track you learned in the program is only a starting point. As you jump more and more, you should continue to work on tracking better (flatter and farther) on every jump. Let’s talk about what that means.
What’s a Flat Track?
Compared to the delta track you learned as a student, a flat track is one where you fall slower and move forward more rapidly (a flatter glide slope). In the same amount of altitude (i.e., from breakoff to deployment altitudes), a skydiver tracking flat will gain more horizontal separation from the center of the formation than someone in a steeper delta dive.
Delta track vs. flat track
Why Flat Track?
Simply because it will save your life. The goal of breakoff and tracking is to get as far as possible away from those mofos you’ve been flying with so you can all deploy your parachutes in clean air. It has often been said that you have no friends below breakoff, and this is very true! If you’re close to others horizontally, if the low jumper pulls (or if the high jumper cuts away), the high jumper who’s still in freefall can fall through the low jumper’s canopy as they decelerate. Or an off-heading opening between jumpers who are near each other horizontally can result in a canopy collision/wrap. None of these scenarios carry high expectations of survival. Particularly with highly loaded canopies, you might be surprised at how much ground they can cover just after opening, even with the brakes stowed.
Not one of us is immune to a collision based on experience or time in the sport; only through good breakoff plans, constant awareness of others around us, and good tracking technique can we reduce our risks of collisions during breakoff and deployment.
Flat Tracking Technique
You may ask, “If flat tracking is so awesome, why didn’t I learn it as a student?” Excellent question! Most students are not taught a super flat track because it is a less stable body position with a higher center of gravity, and thus harder to master. As a student, if you are able to break off, track straight, and pull on time, you will pass the tracking requirements.
The student delta track maintains a good arch, legs straight with feet slightly apart, and arms swept back in a triangle shape with your body. When you transition into this body position, you may feel that you’re covering a lot of ground because you can feel and hear the increased wind noise. However, a significant part of this acceleration is downward, which doesn’t help out your horizontal separation goals at all.
Delta track
In comparison, a flat track body position has the legs tight together and straight (with toes pointed), front of the body completely straight to very slightly de-arched, and arms tight to your sides. You are turning your body into a single efficient wing with more lift, and as such it should have smooth, straight lines. In this body position, you will fall slower than your normal neutral belly position and achieve significant forward movement.
Flat track
It takes time and practice to master this position and be able to maneuver this position as needed. Because it is less stable, a minor issue like a dropped shoulder can cause a barrel roll right at the time it’s most inconvenient. As you work your way into this position, do it gradually over many jumps to maintain safety. Don’t punch into a new body position all at once at breakoff! Start with the track you know, and then work on making it ever more effective as you are able by:
Gradually straightening your legs further, locking your knees, and bringing your legs together.
Bringing your arms back tight against your sides, palms down.
Thinking of de-arching slightly (which will probably just put you in a flat body position, which is great). Think of pushing your straight legs down, parallel to the ground, and hanging your upper body just below them. It should feel like an ab crunch, and if you did it for an entire full-altitude skydive you’d probably be sore in the morning.
If you need to adjust your heading in this body position (say, to avoid someone tracking too close to you when you have space on the other side), you can do so by ever-so-slightly banking a shoulder in the direction you want to turn.
Remember your priorities at breakoff: Check altitude, pick a good heading, extend legs, then sweep your arms back.
Once you achieve this effective tracking body position, use it and refine it on every skydive. If you think your flat track is good enough… it probably isn’t! Never stop working on your track, because it certainly can’t hurt and it WILL save your life.
Anyone Can Flat Track
We sometimes see heavier jumpers tracking lazily because they think they can’t track well with their body type. We also sometimes see lighter jumpers track lazily because they figure their long limbs and light weight mean they are guaranteed to track well. Neither is true! Regardless of your body type, you can probably track a lot flatter than you think by using these techniques. I’ve seen many a lightweight jumper get passed up by heavier jumpers who tracked with better technique.
Also, large-framed jumpers have some advantage in that their wide shoulders have a lot of surface area to generate lift.
Caveats
I have three points of caution regarding this effective tracking position:
If you don’t know where everyone from your group is at breakoff, make sure you turn, then check in front of you before blasting off away from the formation. It won’t do anyone any good if you track into someone who was trying to get back into the formation just before breakoff.
You can cover a lot of ground with this body position. As such, if at breakoff you are oriented directly up or down line of flight towards other groups, especially if you have a high breakoff altitude, you may end up in other groups’ airspace. Consider tracking not quite as hard as you are able, or divert your tracking heading off line of flight if that doesn’t interfere with other jumpers in your group.
Maintain awareness of other skydivers in all directions as you track. Especially on big-way skydives, jumpers may be in all of those directions and small adjustments will help you gain even more separation from them. Be able to track while scanning in all directions.
You will never know how many incidents you avoided by tracking well–and that’s A-OK. See you later!
As skydivers who want to skydive again (and again, and again…), we tend to pay attention to the highest risk areas for our skydives to make them as safe as possible. We learn as students how to fly and land our parachutes safely, and we take canopy courses to get even better at it. We learn stable body positions for deployment, how to maneuver safely around other skydivers, how to determine the safest exit order for a plane full of skydivers, and how to find out how much time we should leave between groups to avoid freefall and deployment collisions. We also learn how to separate from other jumpers at breakoff to clear our airspace and safely deploy our parachutes.
Yet it seems the last item–breakoff and tracking–is becoming more and more neglected. For example, in a recent month at Spaceland Houston, we saw no less than five freefall near misses on breakoff from angle and tracking dives, one actual canopy strike by a jumper still in freefall, and numerous other close calls between jumpers in the same group as they deployed their parachutes (and those are only the ones I heard about). Some of these issues involved relatively inexperienced jumpers, while others involved highly experienced jumpers; thankfully, no one was hurt.
What’s happening? Is Mercury in retrograde? Are we teaching the wrong information? No and no. The simple fact is that as fun-loving humans, we tend to focus on all the cool stuff we want to do during our freefall much more than on the somehow less exciting time-to-save-your-life part at the end. But if we don’t start paying more attention to that save-your-life-part, there may not be another opportunity for the fun parts. Let’s work on creating safe breakoff scenarios so we don’t put ourselves in needlessly dangerous situations, and keep ourselves and our friends out of the incident reports.
Over the next few weeks, look for a series of articles on different safety aspects of breakoff and tracking, starting with this updated article on planning breakoff and tracking.
Before you hop in the plane for your next jump, here’s some food for thought on safety: Plan your breakoff and tracking just as carefully as you plan the freefall part of your jump. This part of the jump is often neglected because it comes after “the good stuff,” but it is at least as important to your survival as your other freefall objectives, if not more so. Remember you don’t have any friends below breakoff, so get away from those people! Your objective is to get as far away from your group horizontally as you can, so you all have clear columns of air in which to deploy your parachutes and deal with any malfunctions.
Let’s plan the dive and dive the plan. Whatever you’re going to do for most of your freefall, make sure you have these bottom-end basics in mind.
Plan enough exit separation from previous groups to give your group plenty of room to open in clear airspace. If you aren’t sure how much time to leave, check our Safety Stand information on today’s winds and thereby the recommended exit separation. If you are still not sure how much time to leave, ask an organizer or instructor.
Plan an appropriate breakoff altitude that will allow everyone in your group enough time to track away from each other into clear space for deployment. Allow at least 1500 feet between breakoff and deployment altitude of the highest-pulling jumper. At belly speeds, this gives everyone about nine seconds minimum to turn away from the formation, track to achieve separation, then slow down to initiate deployment. Groups with less experienced jumpers or larger groups may want to give even more time to track away.
Know which direction you will track from your fellow jumpers from any given point in the dive. If your group is very small and you have a large “piece of sky” for escaping others in your group, track away from the line of flight. (You knew which way that was before you exited, right?)
Dirt dive breakoff from each planned formation so you know where everyone will go regardless of whether you complete all of the planned formations (or start going through them again!). 180° from the center of the formation is the usual breakoff direction for everyone, but if you’re already facing sideways to the formation, for example, you’ll only have to turn 90° to get there. Think about this ahead of time and you won’t be trying to make decisions at the bottom of the skydive as time is running out.
Break off on time. Period. Don’t suck it down to close that last point or get that last geek in; this reduces the time you have to break off safely and it’s often the first link in the chain of events that leads to a collision.
Maintain awareness of other jumpers in your group as you track, so you can adjust your path as needed to maximize horizontal separation.
When you deploy, always scan for other skydivers so you can avoid any that are close enough to require evasive action. Don’t fly up or down the line of flight until you have verified that the groups exiting before and after you have already deployed and are not collision risks. Particularly with today’s faster canopies, you can cover a lot of ground even before you unstow your brakes, reducing your margin of safety if you’re flying towards other jumpers.
As always, if you have any questions, just ask one of our instructors or organizers. Happy skydiving, and stay tuned for part 2 on flat tracking!
Always make sure the green light is on before exiting the aircraft.
Quick! What do you do if you are on jump run, the green light has been turned on, and then the green light goes out (either the red light comes back on or the green light simply turns off)?
Assume the light is broken and proceed with your climbout and skydive.
Flip the spotting switch (if present) left and right quickly to let the pilot know the light is out, then climb out and exit after waiting the appropriate amount of time after the group ahead of you.
Abort your climbout, help any jumpers who have already climbed out to get back in, then look for an explanation/further instructions from the pilot.
If jumpers are already floating outside the aircraft, that group should continue their climbout and exit, but later groups should not climb out and they should await further instructions from the pilot.
You’re supposed to look at the light before exit?!
In an aircraft full of skydivers standing up and moving around as they prepare to exit, the door and exit lights are the quickest, simplest ways for the pilot to communicate with jumpers by the door. At Spaceland we have the red light to tell us to open the door and check for spot and traffic, and green light when the pilot says it’s OK to exit.
If that green light goes dark and/or the red light comes on, the following groups should not exit! The pilot is telling you that he or she believes it is no longer safe to exit. The problem could be clouds, a spot that’s getting too long, or even an air traffic problem such as another aircraft flying into our jump airspace. Yes, we are in fairly highly controlled airspace here, but that does not mean that all pilots talk to air traffic control regularly when flying or respond as quickly as desired if ATC tells them to change course to avoid us. This is even more true in less controlled airspace than ours.
I hope you answered #4 above! If the green light goes dark and/or the red light comes on, if jumpers are already floating outside the aircraft, that group should continue their climbout and exit, but later groups should not climb out and they should await further instructions from the pilot.
Once climbouts have stopped, close the door to reduce noise and communicate with the pilot to discover the reason for the aborted jump run and what will happen next. The pilot will either look back to communicate with the first group out directly or pass that communication on to an instructor or experienced jumper up front to relay to the first group out. Jumpers not essential to that line of communication should sit back against the walls and stay quiet until communication is complete.
The pilot has more information about weather and other aircraft than the jumpers in the back, so for everyone’s safety we need to be aware of this vital communication from him/her and respond accordingly.
Is it about time for your first hop and pop (low-altitude emergency exit simulation) in our Skydiver Training Program? If you’re like most skydiving students, chances are you are more nervous about this jump than most of your full-altitude skydives! The lower exit altitude combined with the 5-second maximum deployment time, and possibly your first time opening the aircraft door, seems like a very tall order when you try it for the first time.
This exit is no different from any other solo diving exit you’ve done, except that you’ll need to be stable and deploying within 5 seconds to pass this level of the program.
Here are 8 tips on how to rock that hop and pop!
Check the winds aloft and discuss the spot with your instructor before boarding. It’s hard to check the spot on jump run if you don’t know where it is.
Be prepared to open the door. Chances are good that your instructor/designated jumpmaster will have you sit by the door and open it especially if it’s your first time (BEER!). At 1500 feet, you’ll remove your seatbelt, check your handles, check that seatbelts are off of the jumpers near you, then get a thumbs up regarding seatbelts from an instructor or experienced jumper near the front of the plane. Only then will you open the door, which is easiest when done from a kneeling position at the center of the door. After reading all of these tips, watch this video on how to open/close the aircraft door.
Keep an eye on the ground while you’re climbing and find the airport early. This will give you practice at recognizing where you are relative to the airport, and give you an idea of how long it will be before you’ll get door and exit lights from the pilot. Your view of the area is best from right in front of the door, so take this opportunity to pick out the usual landmarks and use them to find the dropzone. Ask your instructor/jumpmaster for help if you can’t find it.
Get a good gear check before exit. ‘Nuff said.
Check your handles before exit. ‘Nuff said.
When the door light goes on, put your goggles on if you haven’t already and look outside the plane to check the spot. Don’t just find the airport; figure out if you are in about the right spot relative to it for the day’s winds aloft.
Also lean your head out of the plane to look around and check for other airplanes below you. Checking for traffic is important because while most pilots in our airspace are in contact with Air Traffic Control and they are being routed away from our drop zone, occasionally a pilot will miss the warnings or have a radio problem that keeps them from knowing about us. Aircraft below us can be a major safety hazard, especially if they are below, behind, and traveling in the same direction. Those are the aircraft that are right where you are going when you jump out. If you see an aircraft below you, check with your instructor to see if it really is an issue. You may need to call for a go-around to let that aircraft get out of the way.
Now that you’ve checked the spot, the traffic, and your gear/handles, you’re ready to dive out on green. This exit is no different from any other solo diving exit you’ve done, except that you’ll need to be stable and deploying within 5 seconds to pass this level of the program. On the green light, stand facing out the door with your left foot forward and exit when ready. Leave the airplane by pushing off straight out the door (not upward), left foot last, and with your right side (hip, shoulder, and elbow) higher than your left. This will put the wind on your chest and belly for stable belly flight out the door. Chances are you’ll turn a little with your head down the hill as you exit, and that’s just fine. Deploy your parachute calmly after 5 seconds or less, and you will pass your hop and pop level. If you become unstable/tumbling on exit, sort it out as quickly as you can and remember to pull by 3500 feet whether you are stable or not. The parachute will open into the relative wind, so it may not be directly above you since you aren’t at terminal velocity yet, and the wind is coming horizontally from the prop when you first leave the plane.
After rocking your hop and pop, you know you’re ready to jump safely in the unlikely event of a low aircraft emergency. As always, ask your instructor any questions before your jump. Blue skies!
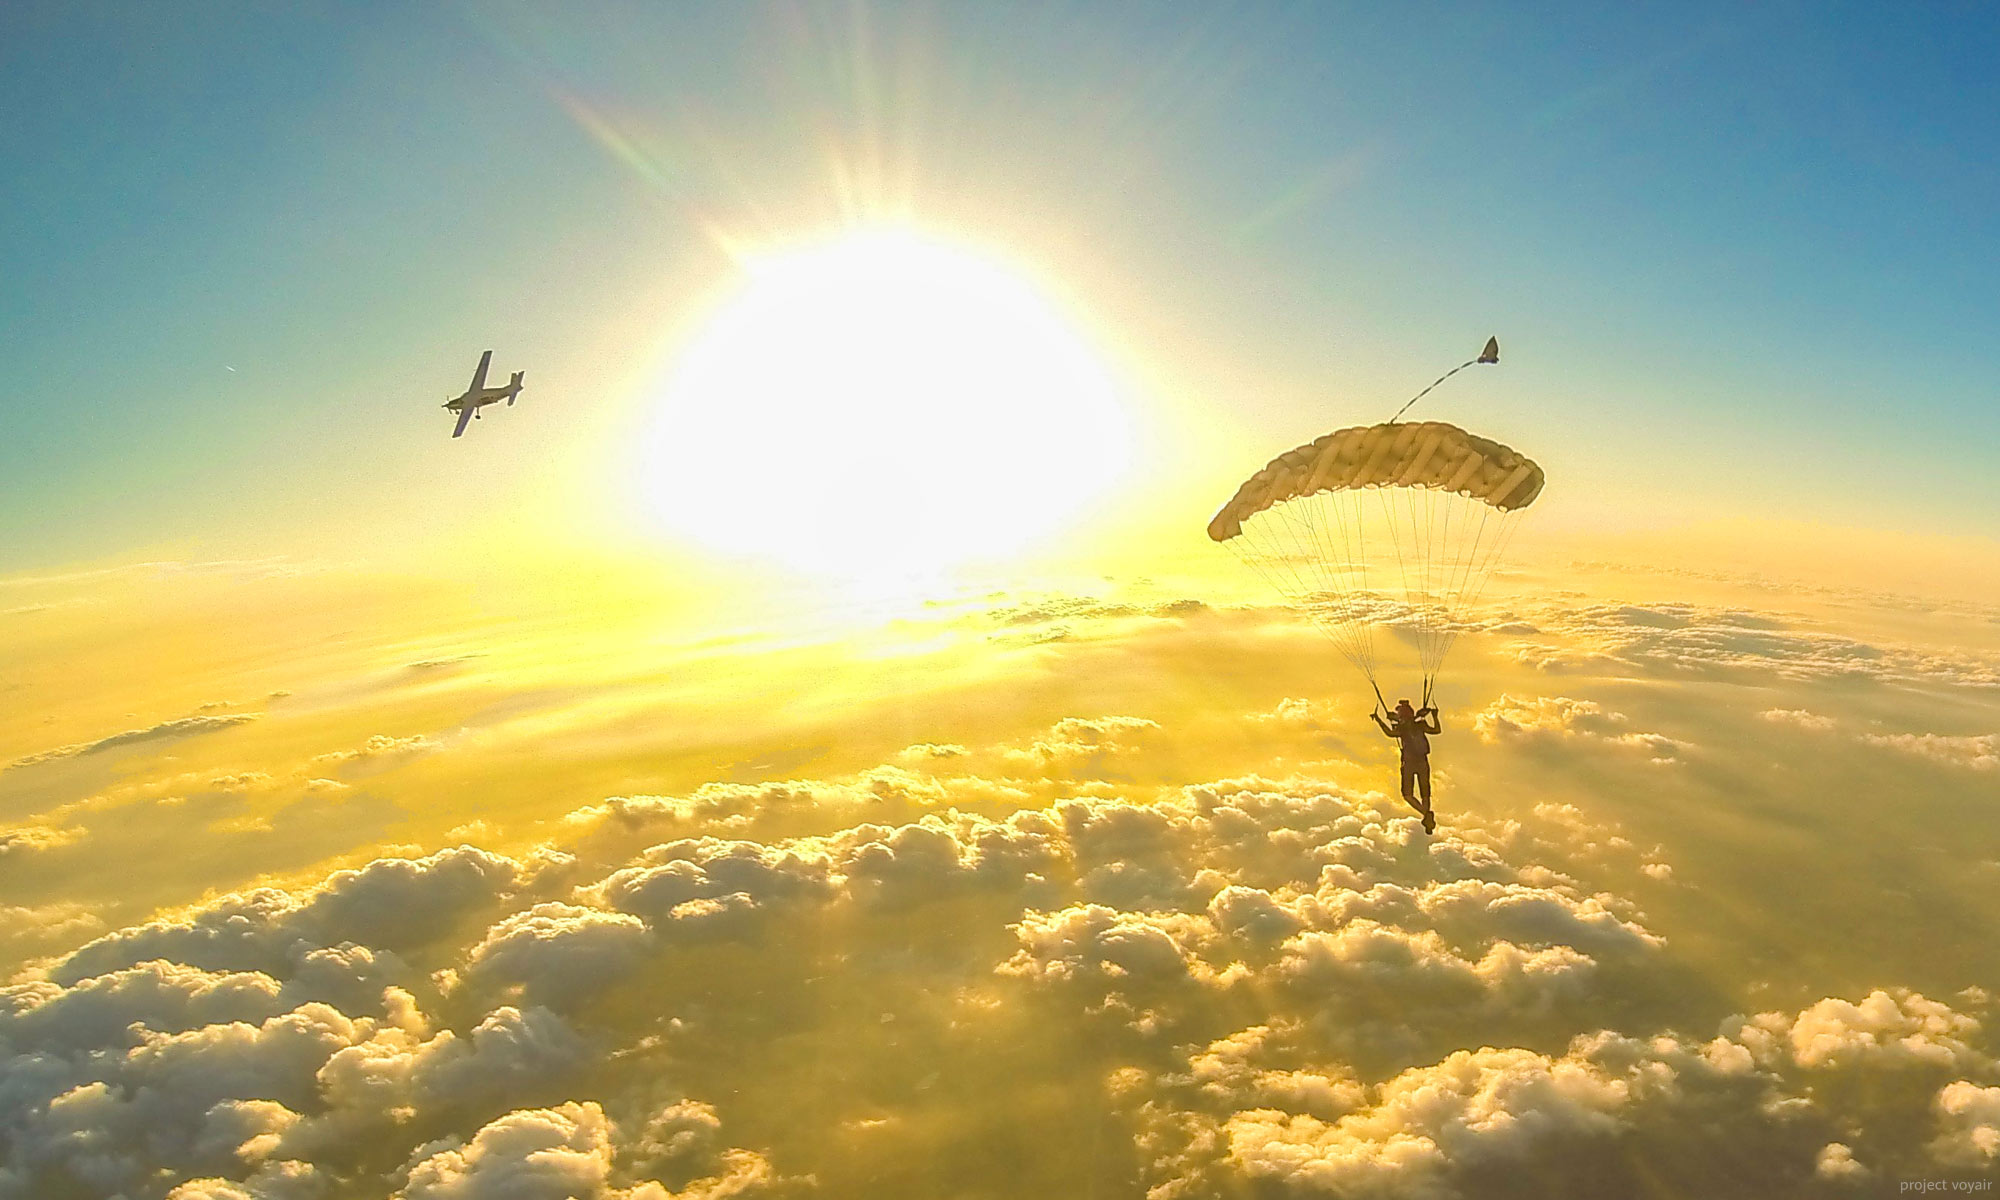
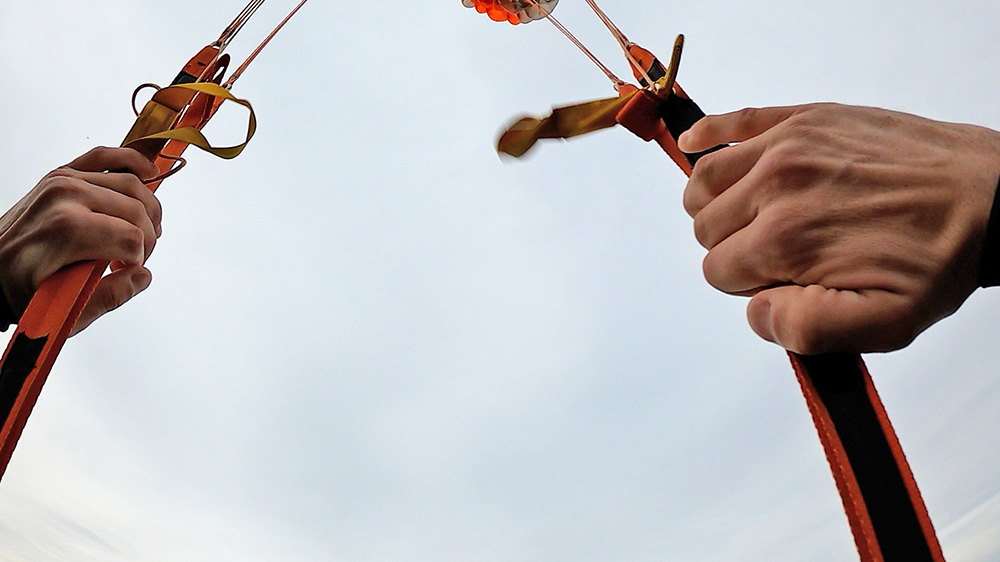
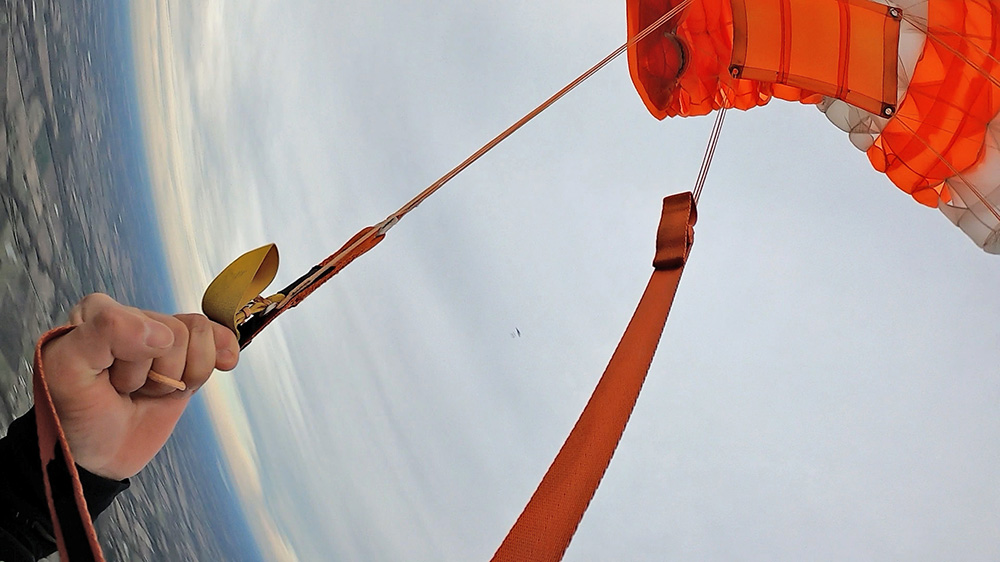
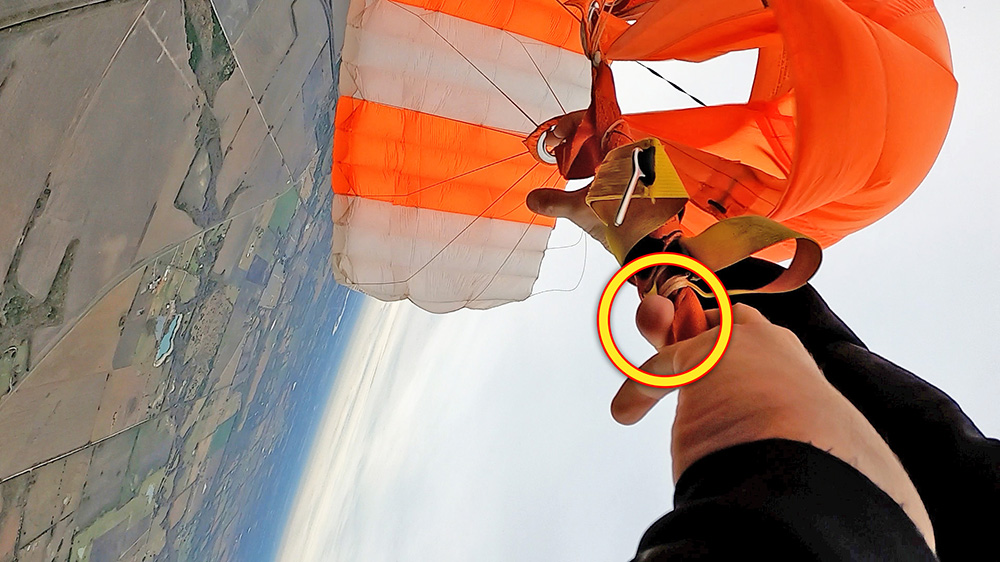
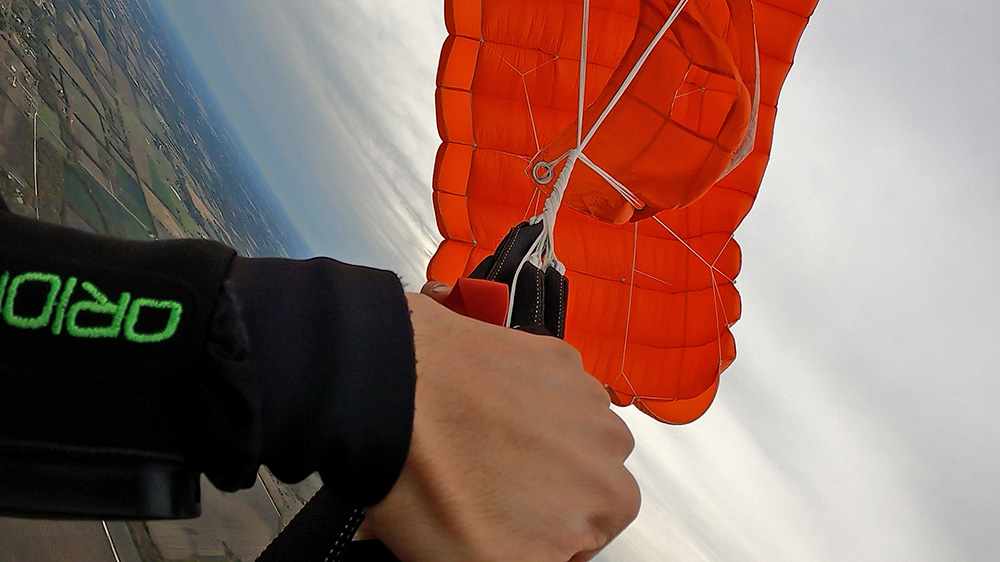
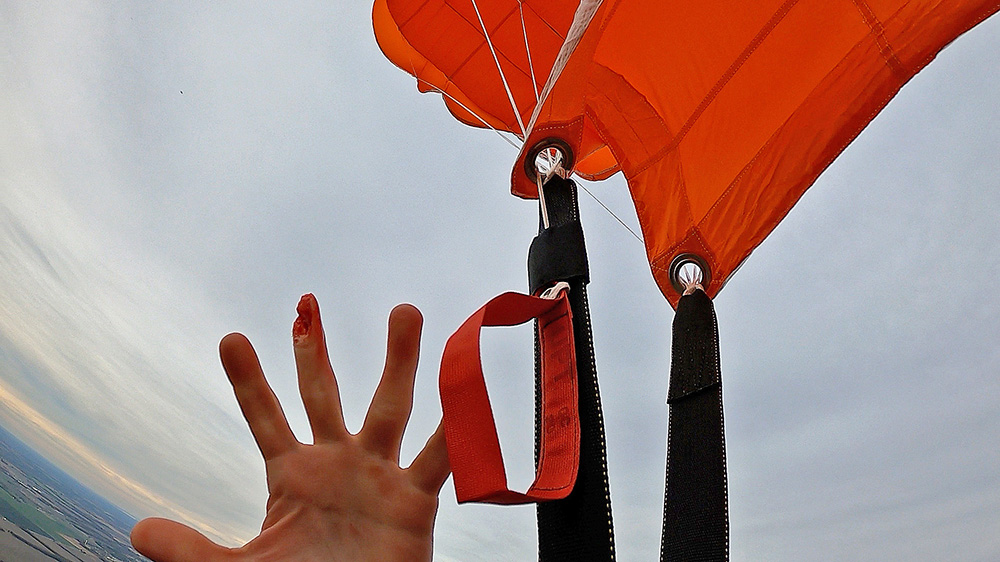
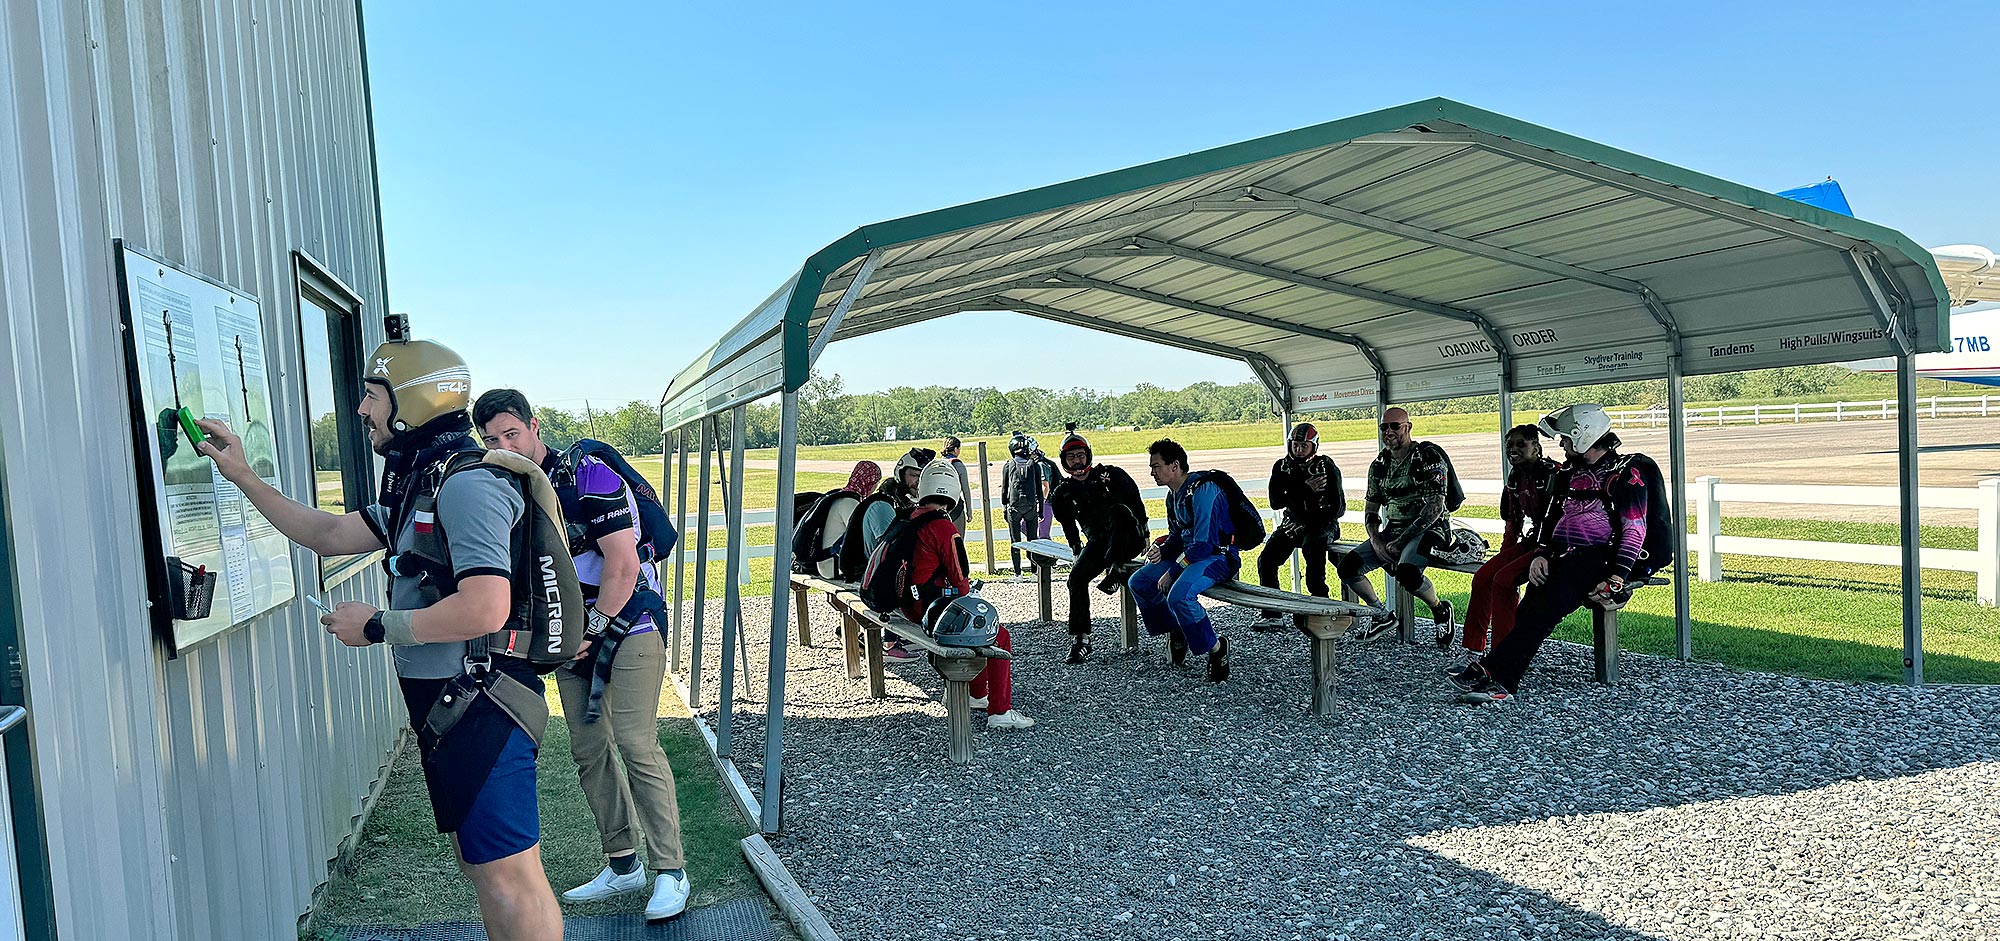

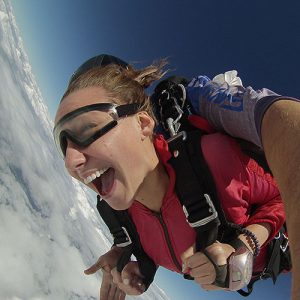 $129 + tax
 $179 + tax
 $229 + tax
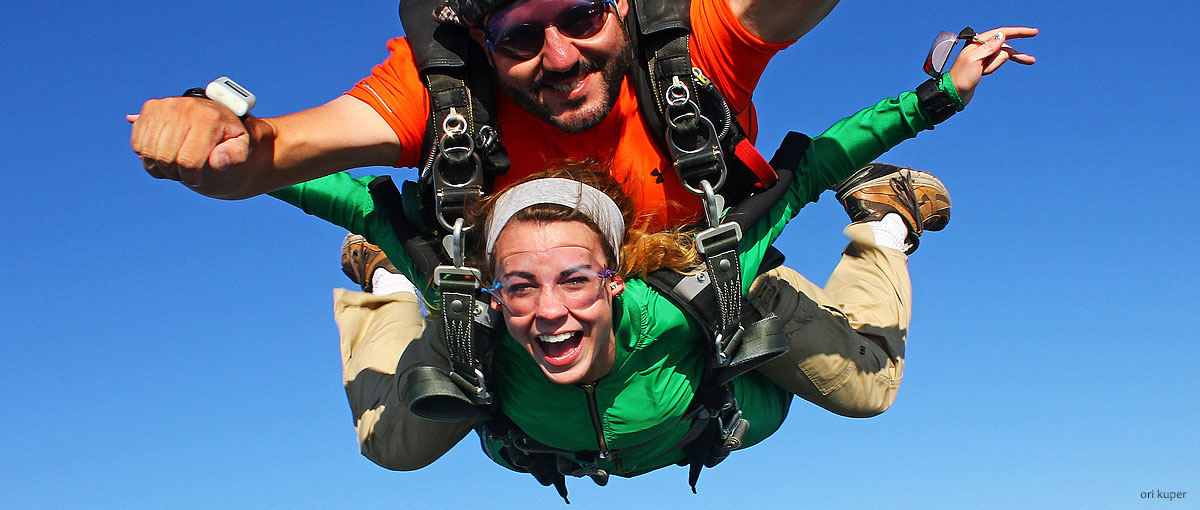
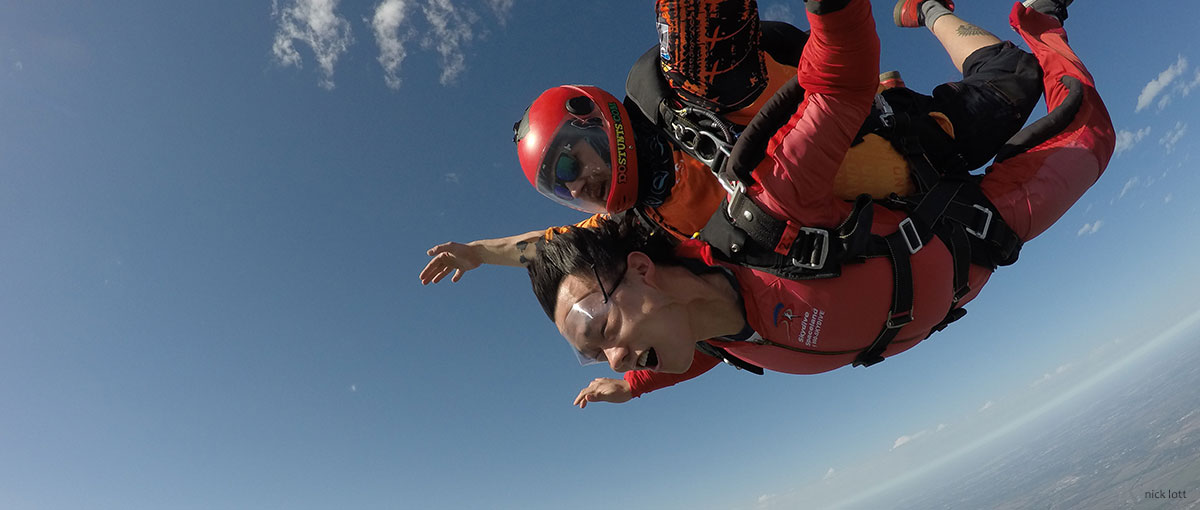
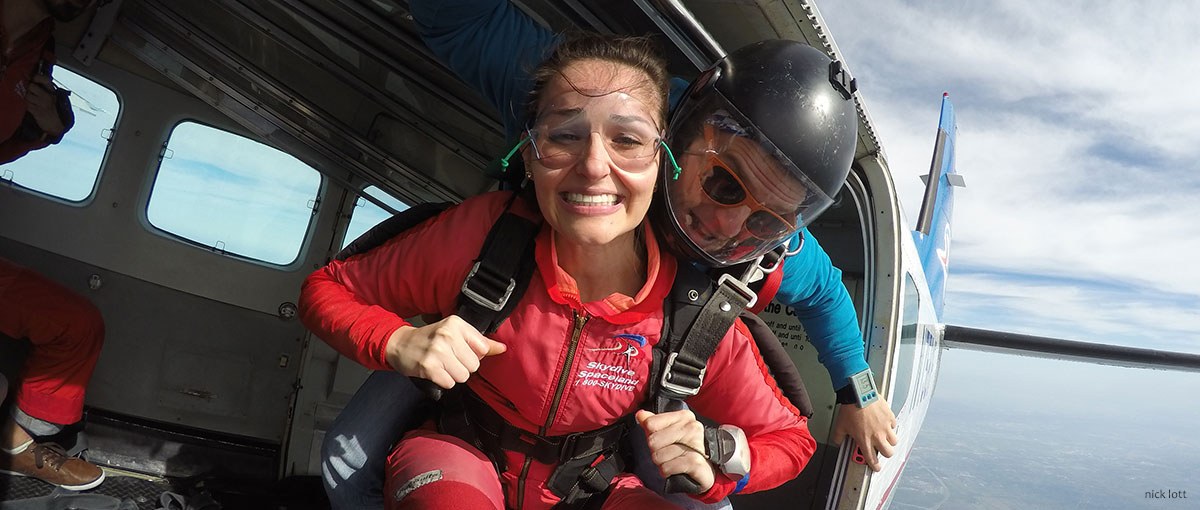

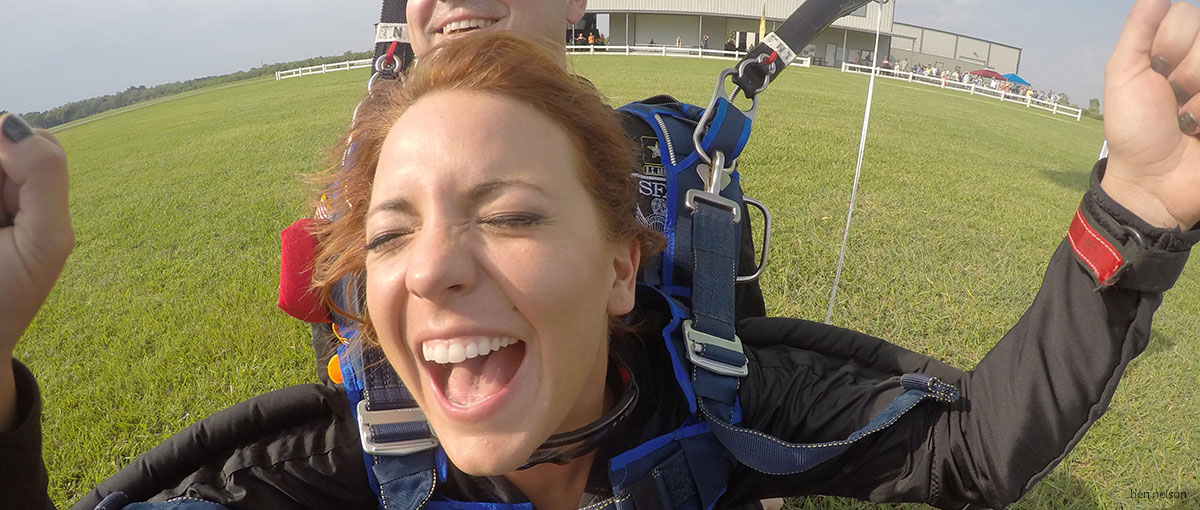
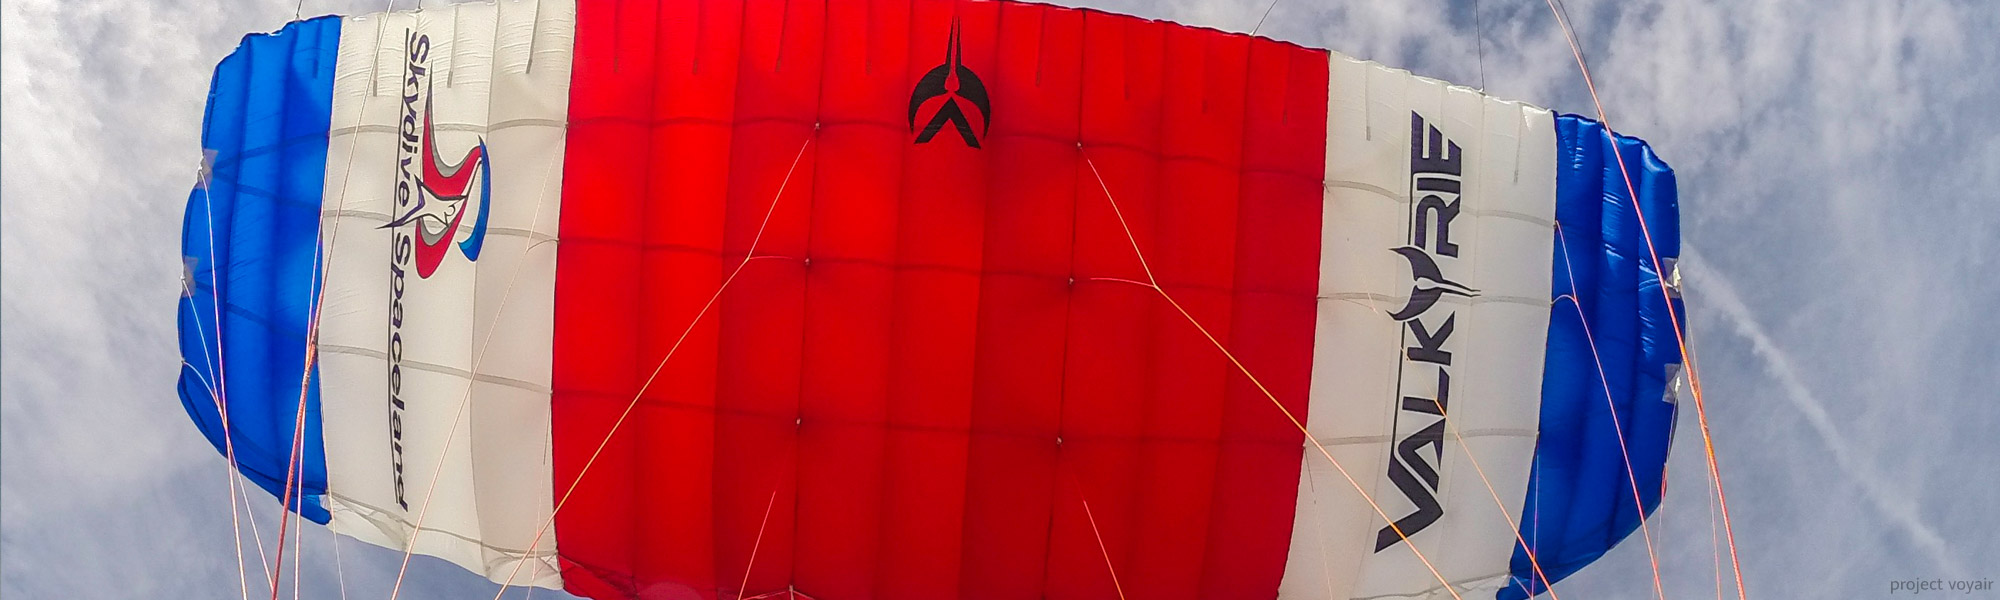
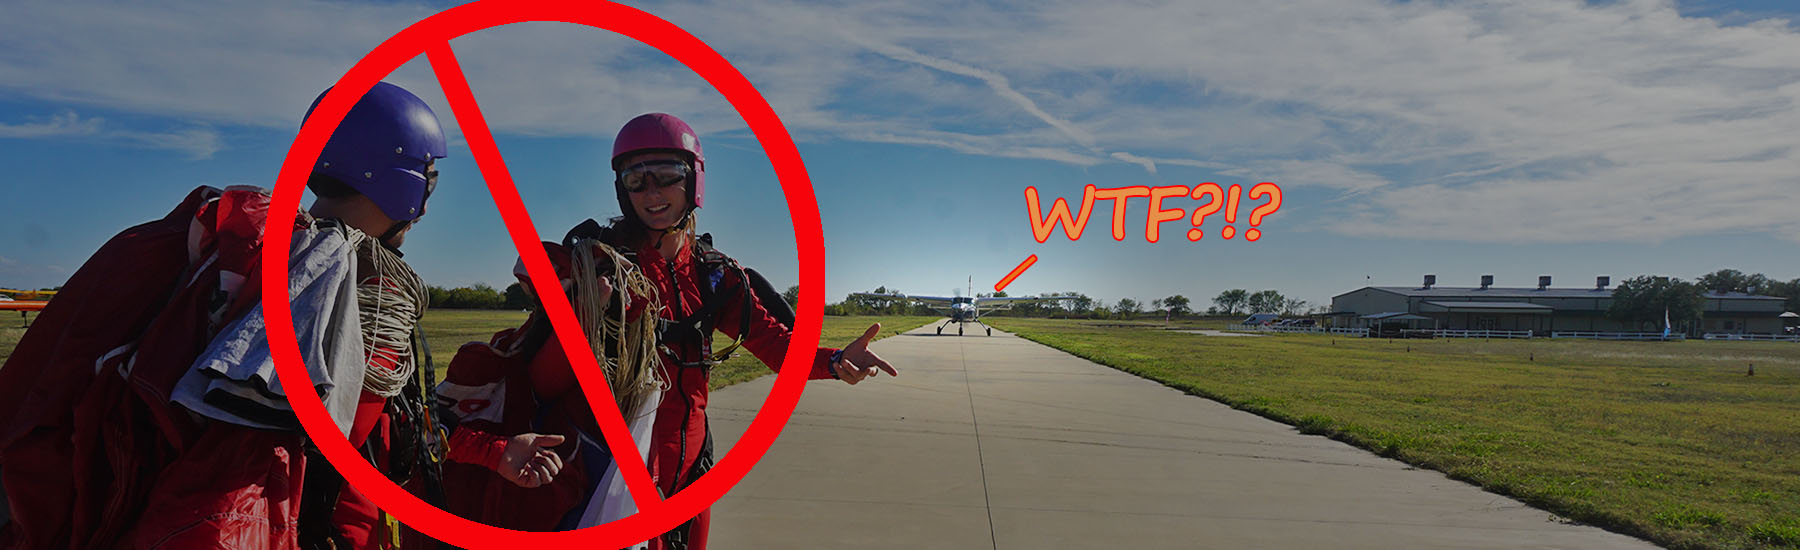
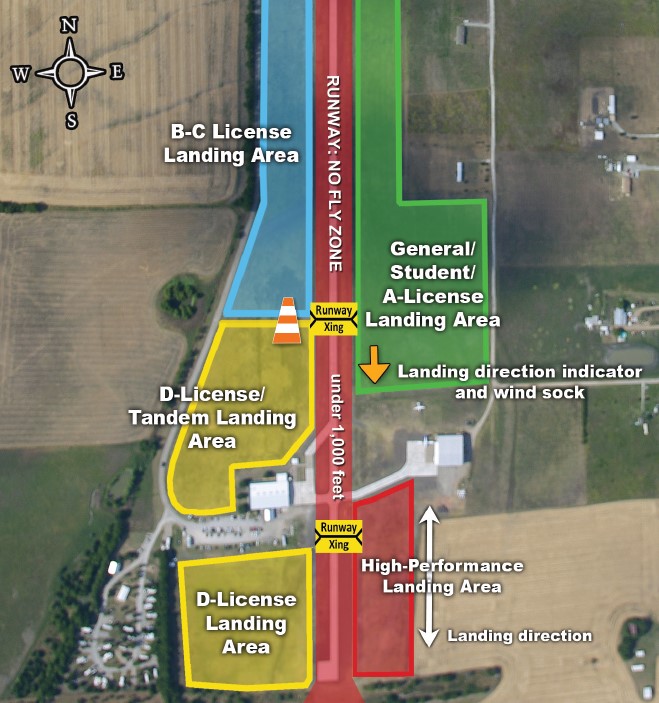


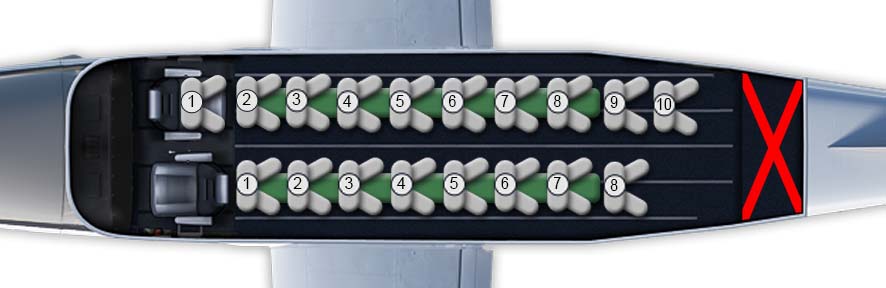
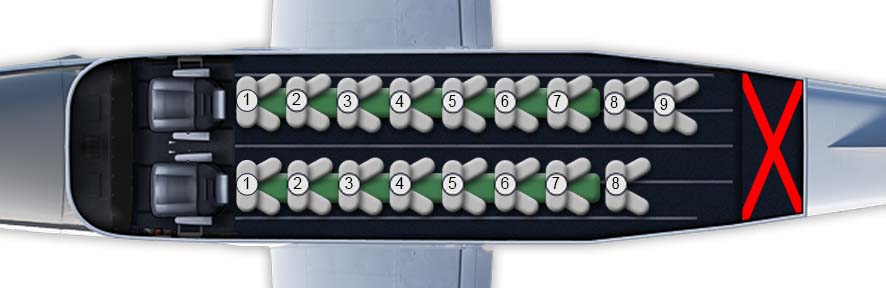
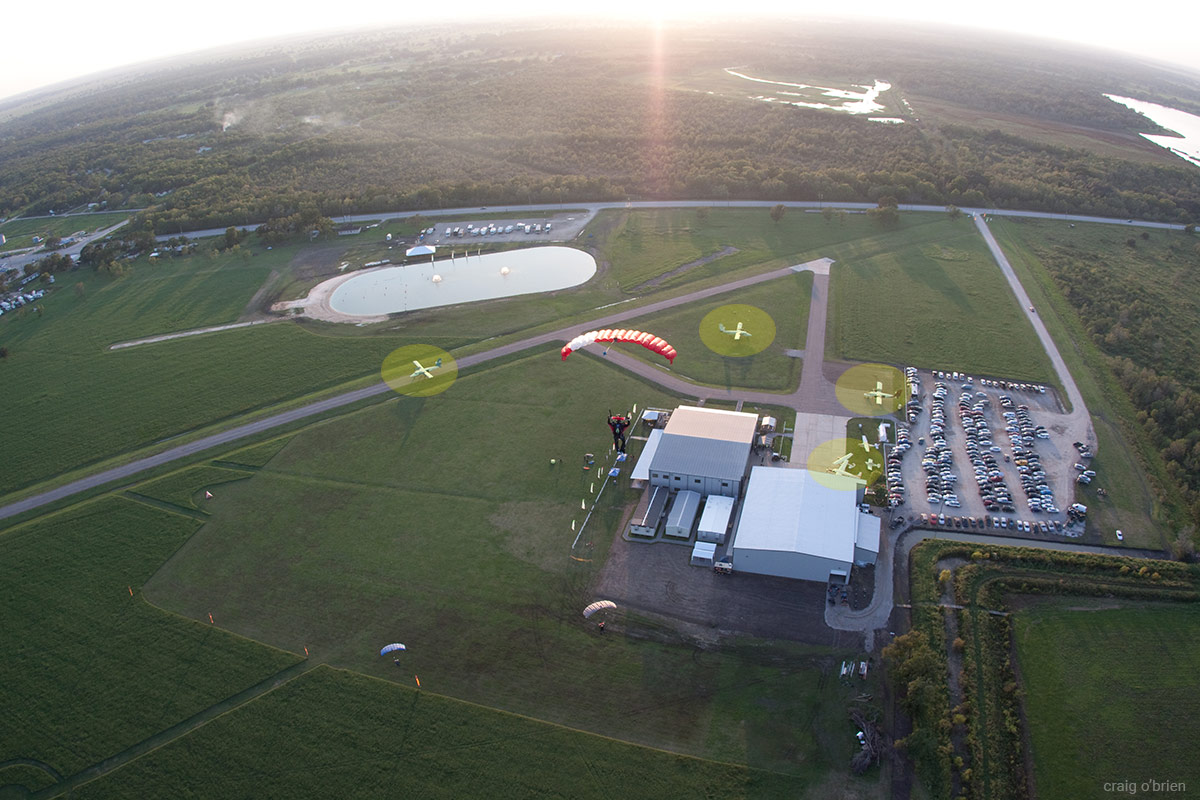
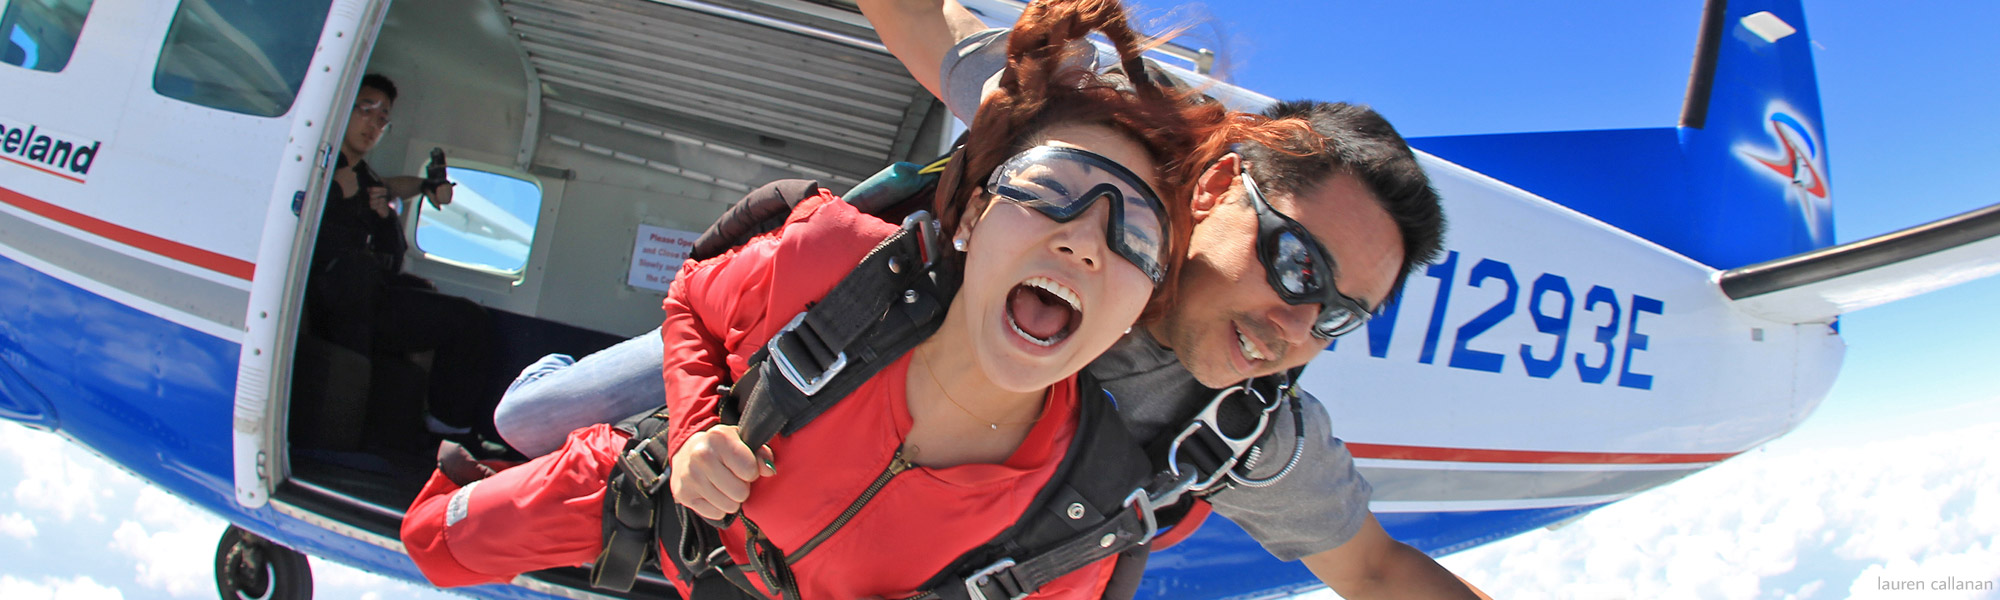
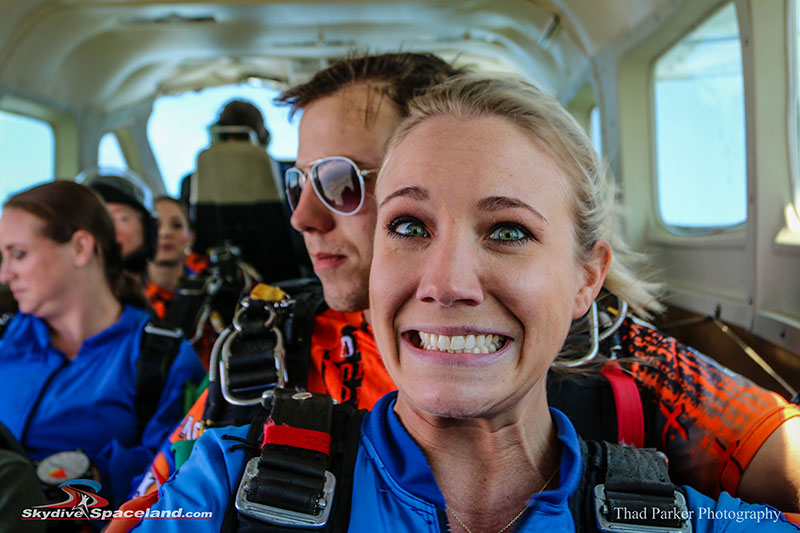
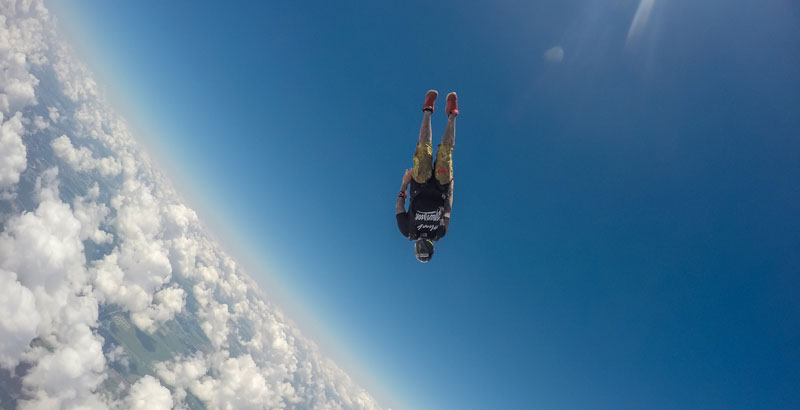
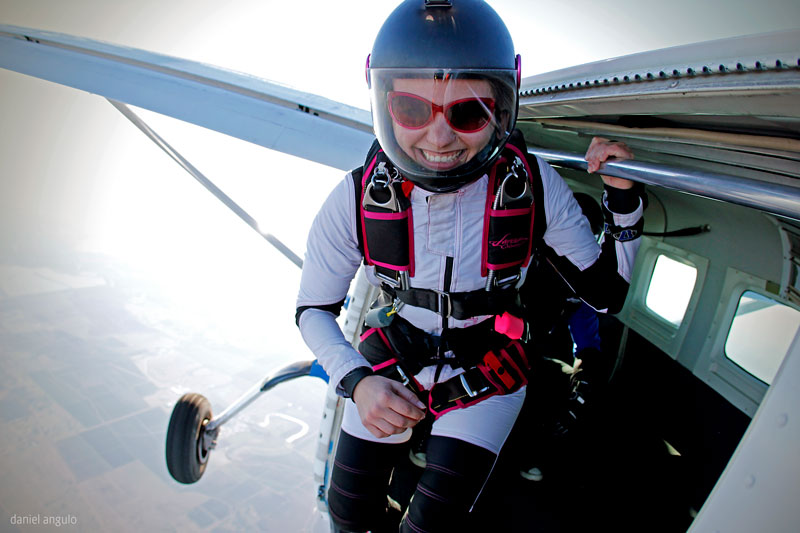
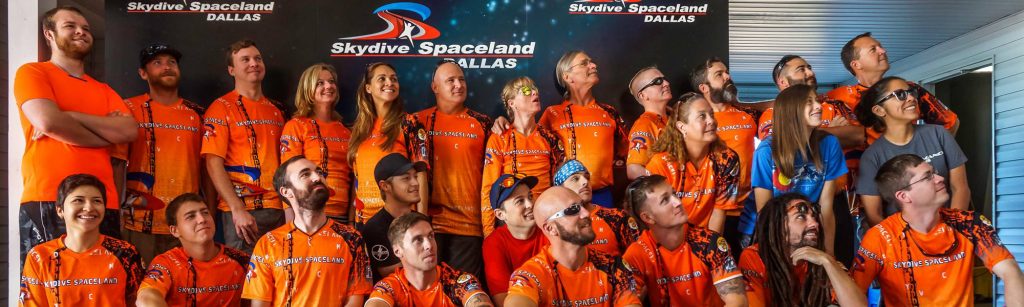
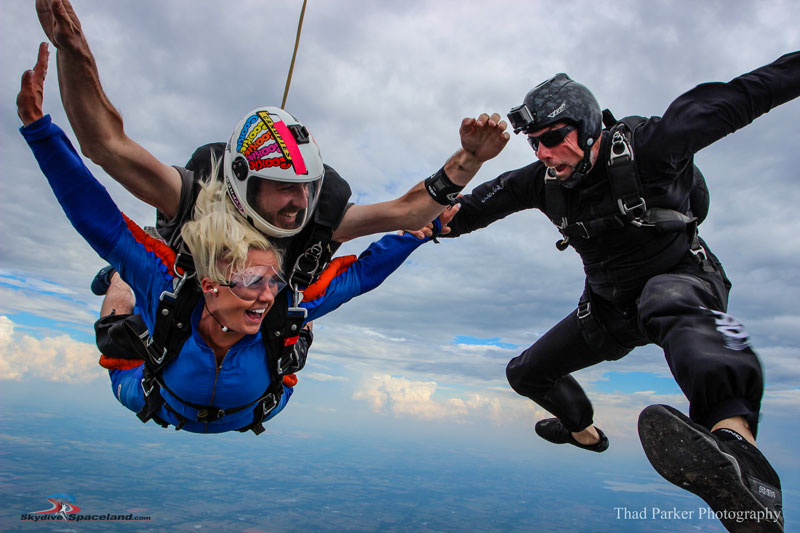
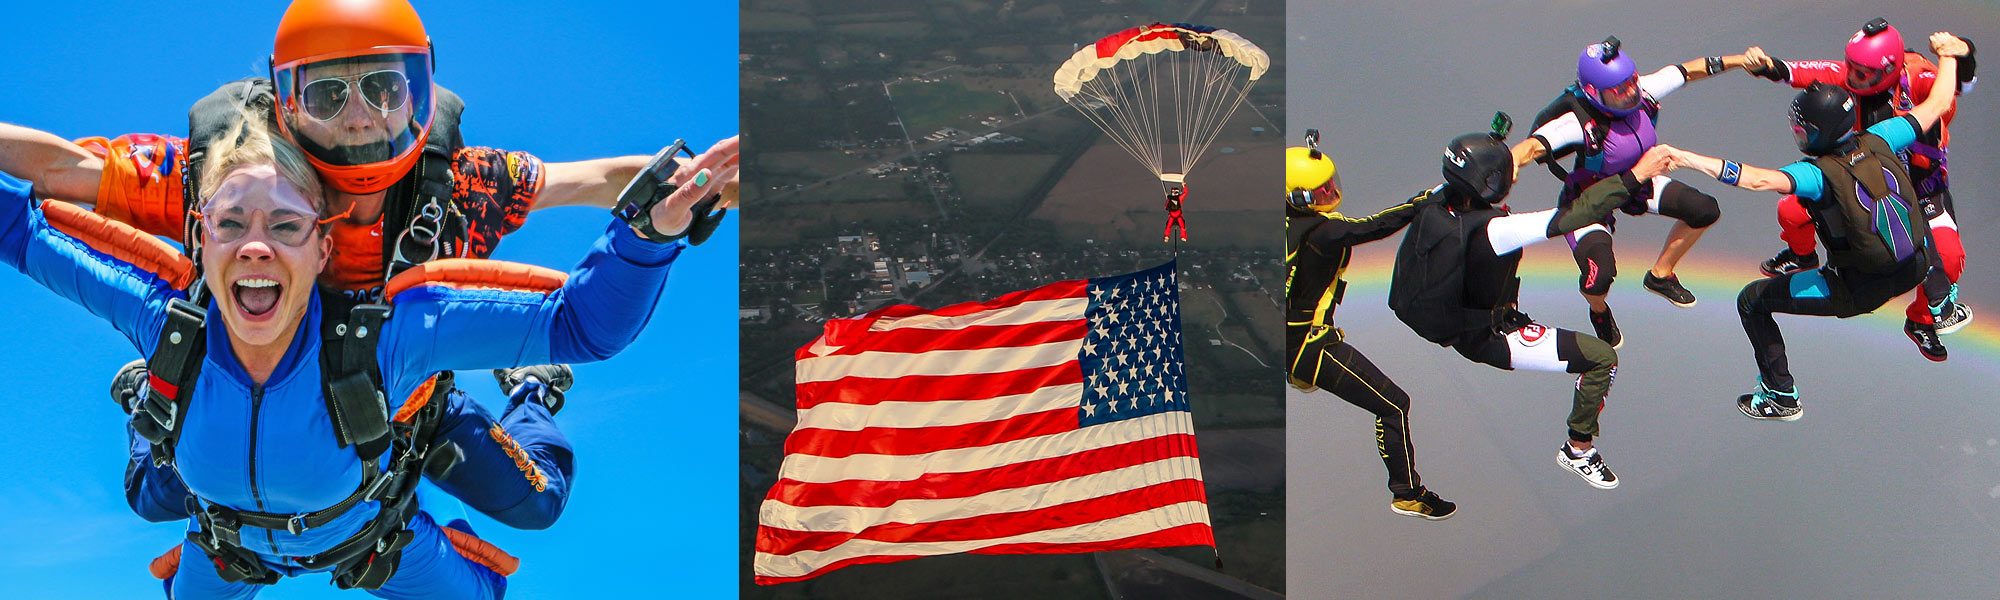

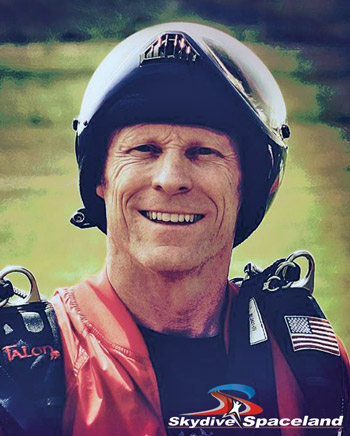 Skydive Spaceland is thrilled to announce the full-time addition of longtime competitive skydiver Scott Latinis to the Skydive Spaceland team as Organizing and Events Director.
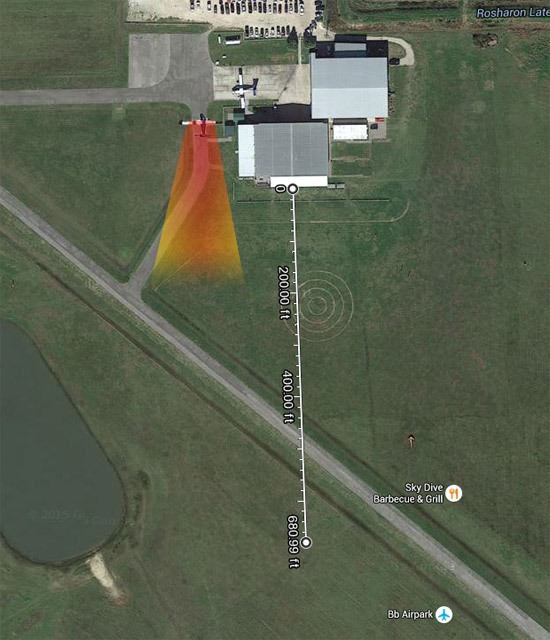
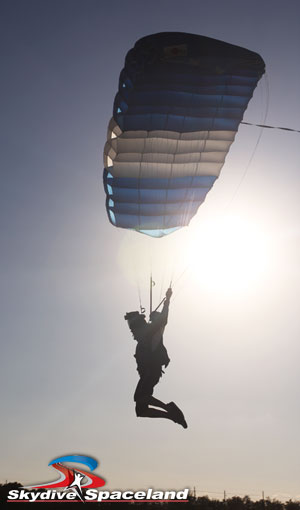 Once we identify risks for a jump, we can create contingency plans to mitigate them (just like your emergency procedures). A simple way to think of this is prior to takeoff, ask who is doing what on the jump and look at the size container they have or better yet, ask what they’re flying to get a rough idea of what to expect under canopy. While under canopy, constantly scan all around you and identify all the other canopies in the sky with you by color, size, speed, and position relative to you (high, low, left, right). You will know some by sight, while others you will just be able to observe in flight. You are now actively and continuously assessing your airspace (smart!).
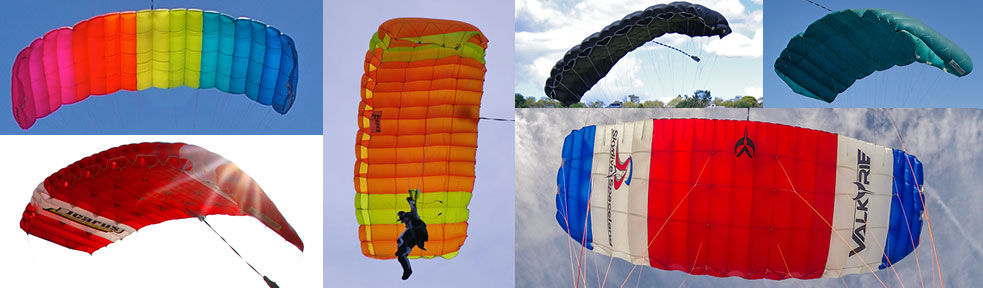
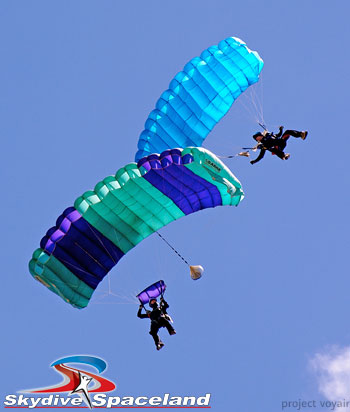
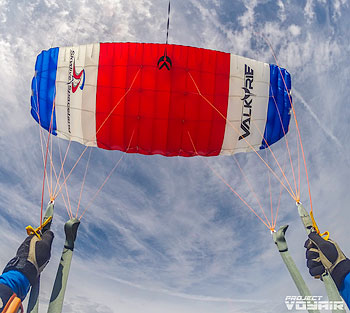
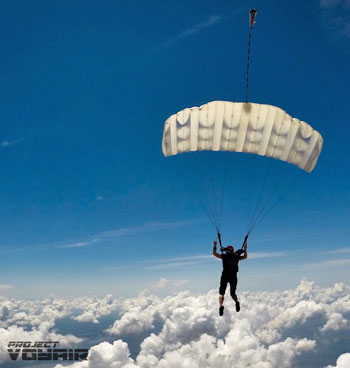
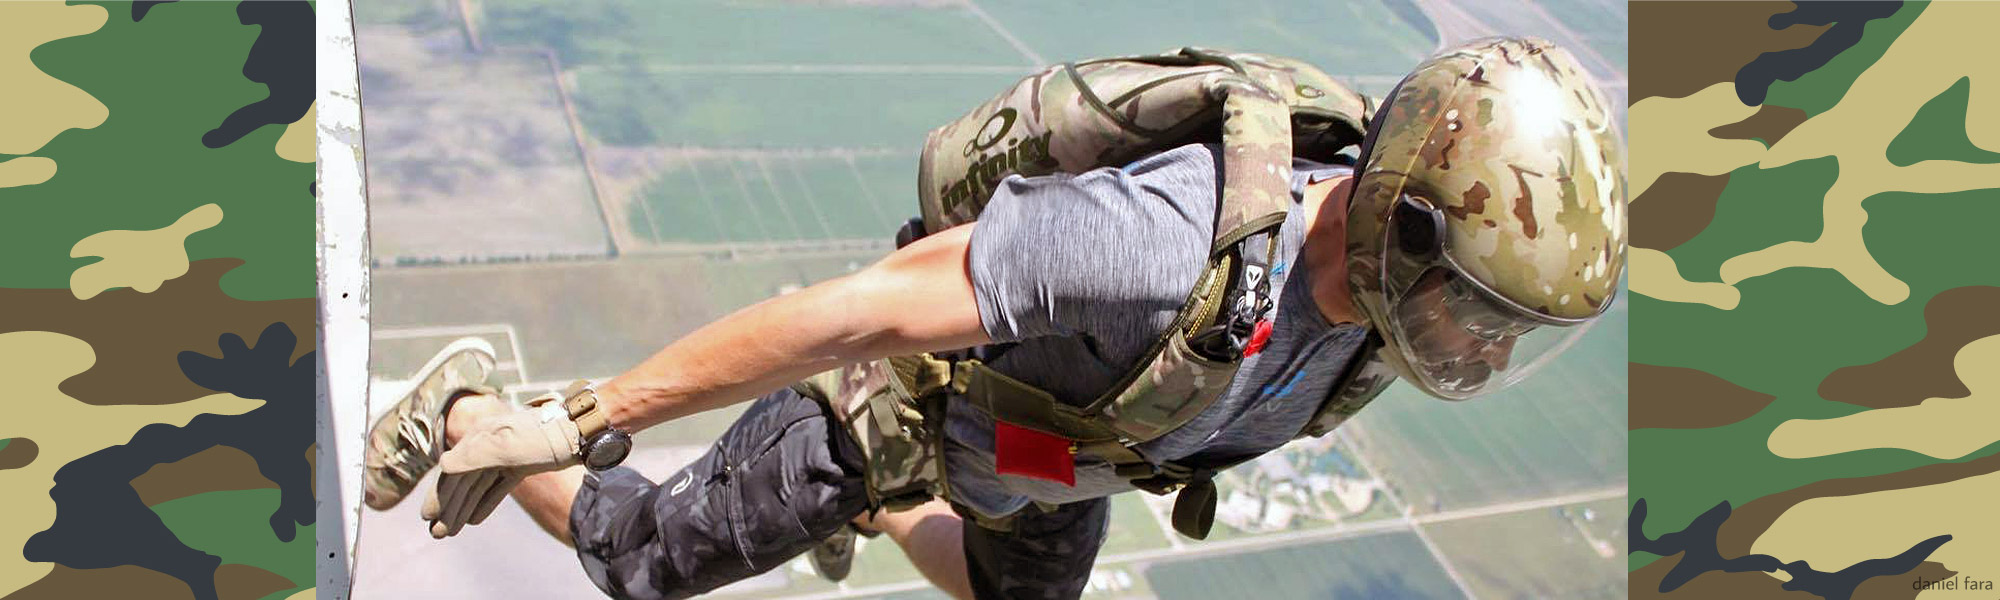
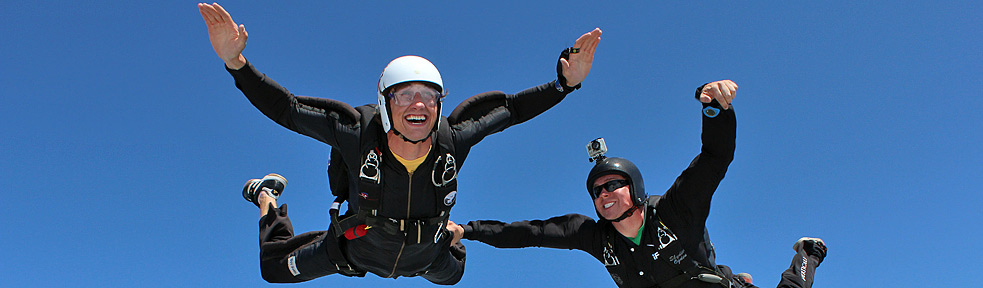
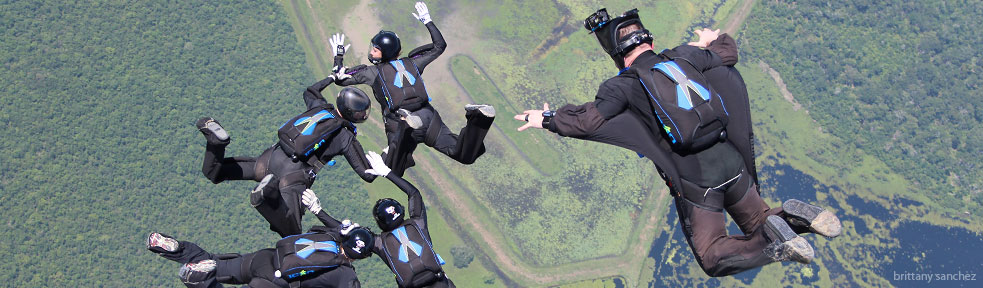
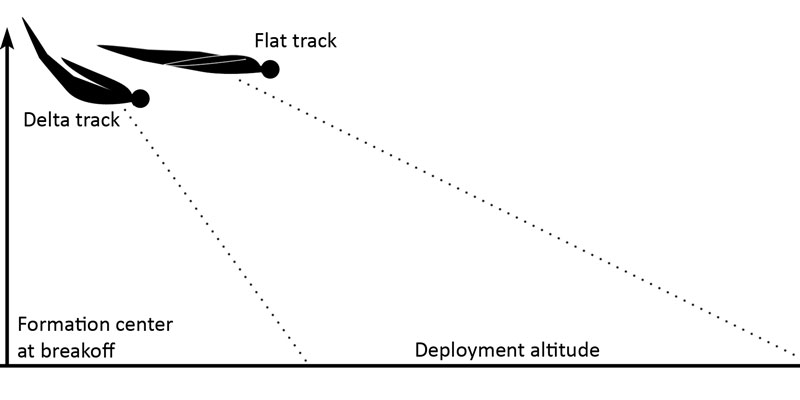

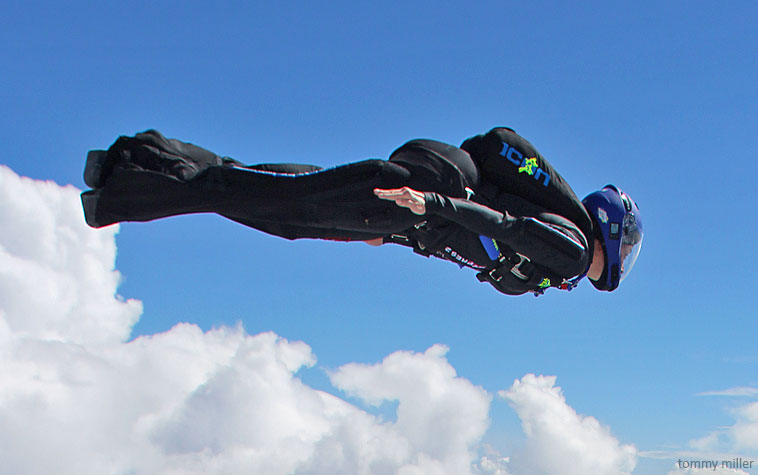
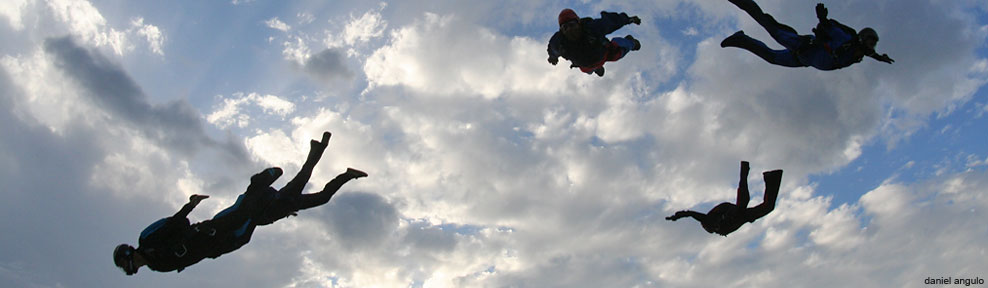
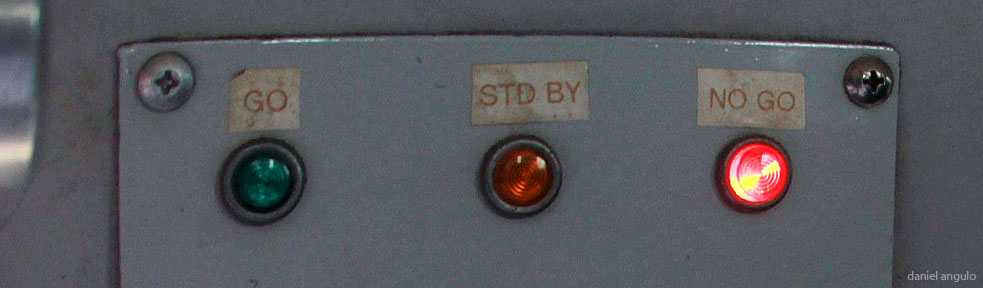
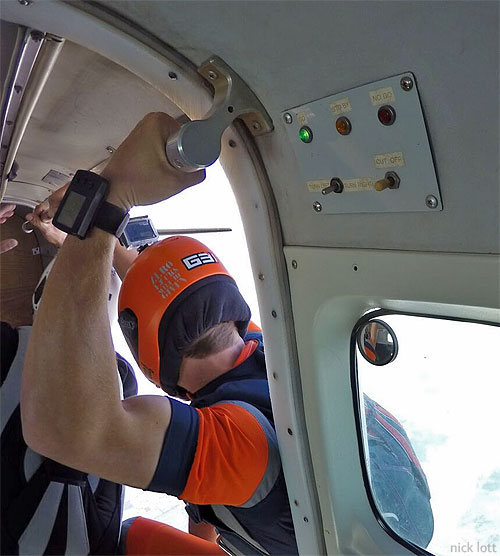
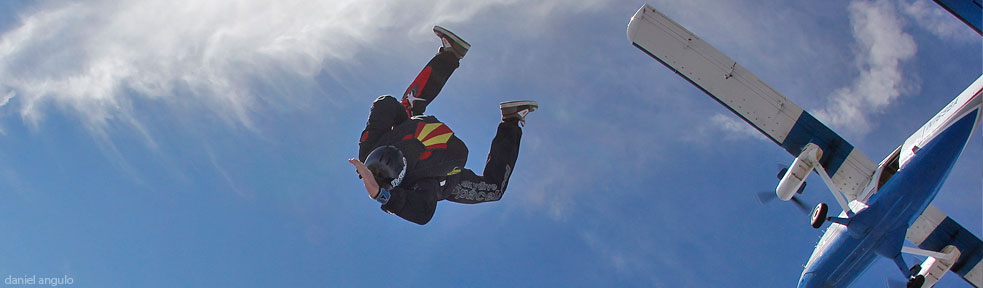
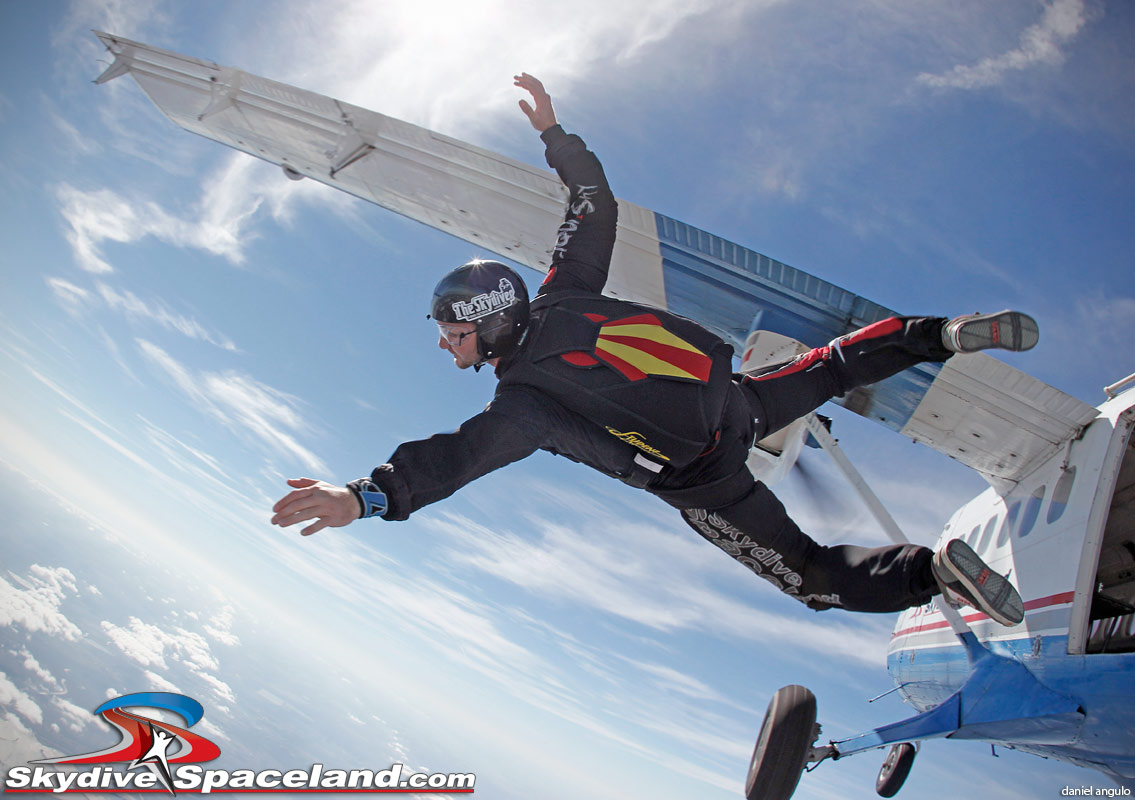